 |
So
I let
that one go, but having convinced myself I could have an
M in the
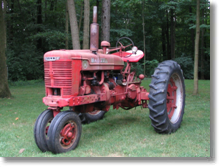
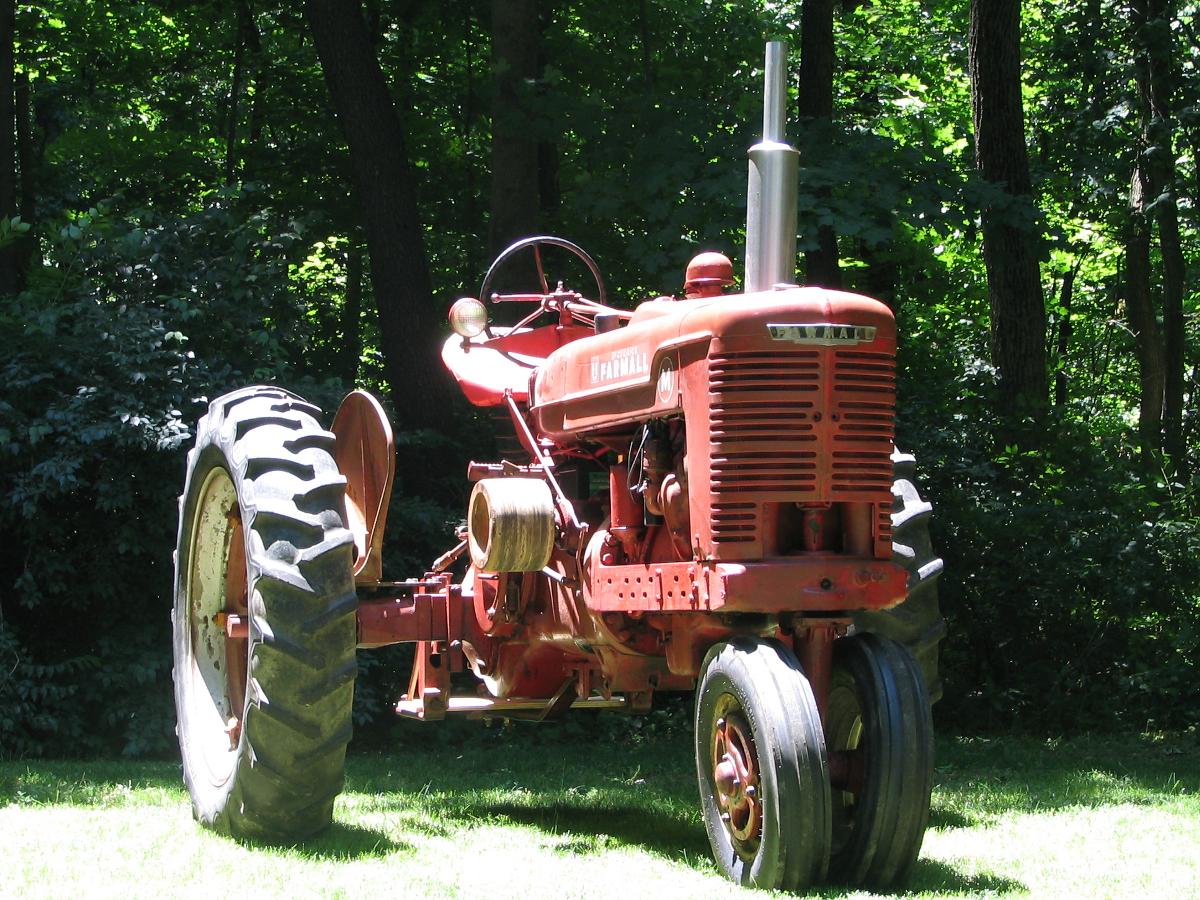
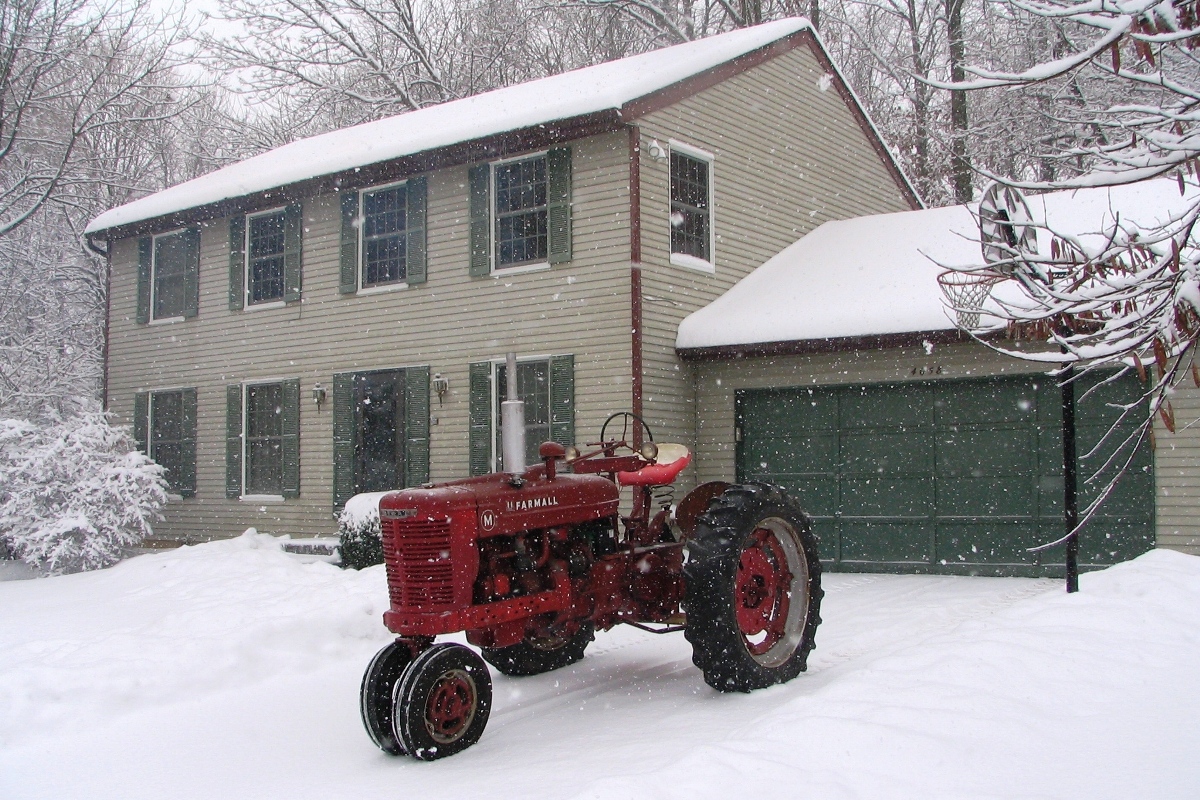
garage I resolved to find one closer to home. A
short
while later I was
looking at a picture on ytmag.com of this 1950 M about 25 miles
away from
me, and somewhere I'm
sure a soprano started warming up to sing. It took a week or
two
to arrange to get over to see it, but I remembered to bring my
checkbook with me. This one doesn't have the pristine
originality
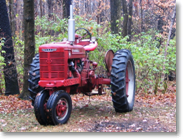
of the one I'd seen on eBay but it's a smooth-running
easy-starting old girl, and
it was close, and that was enough.
Once in a while I
drive it down to the corner gas station to
put
air in the front tires, or just take it for a spin and enjoy the sound
of the engine and the waves of the neighbors. Some year I
still hope to
get back out in the country where I can put the M to work.
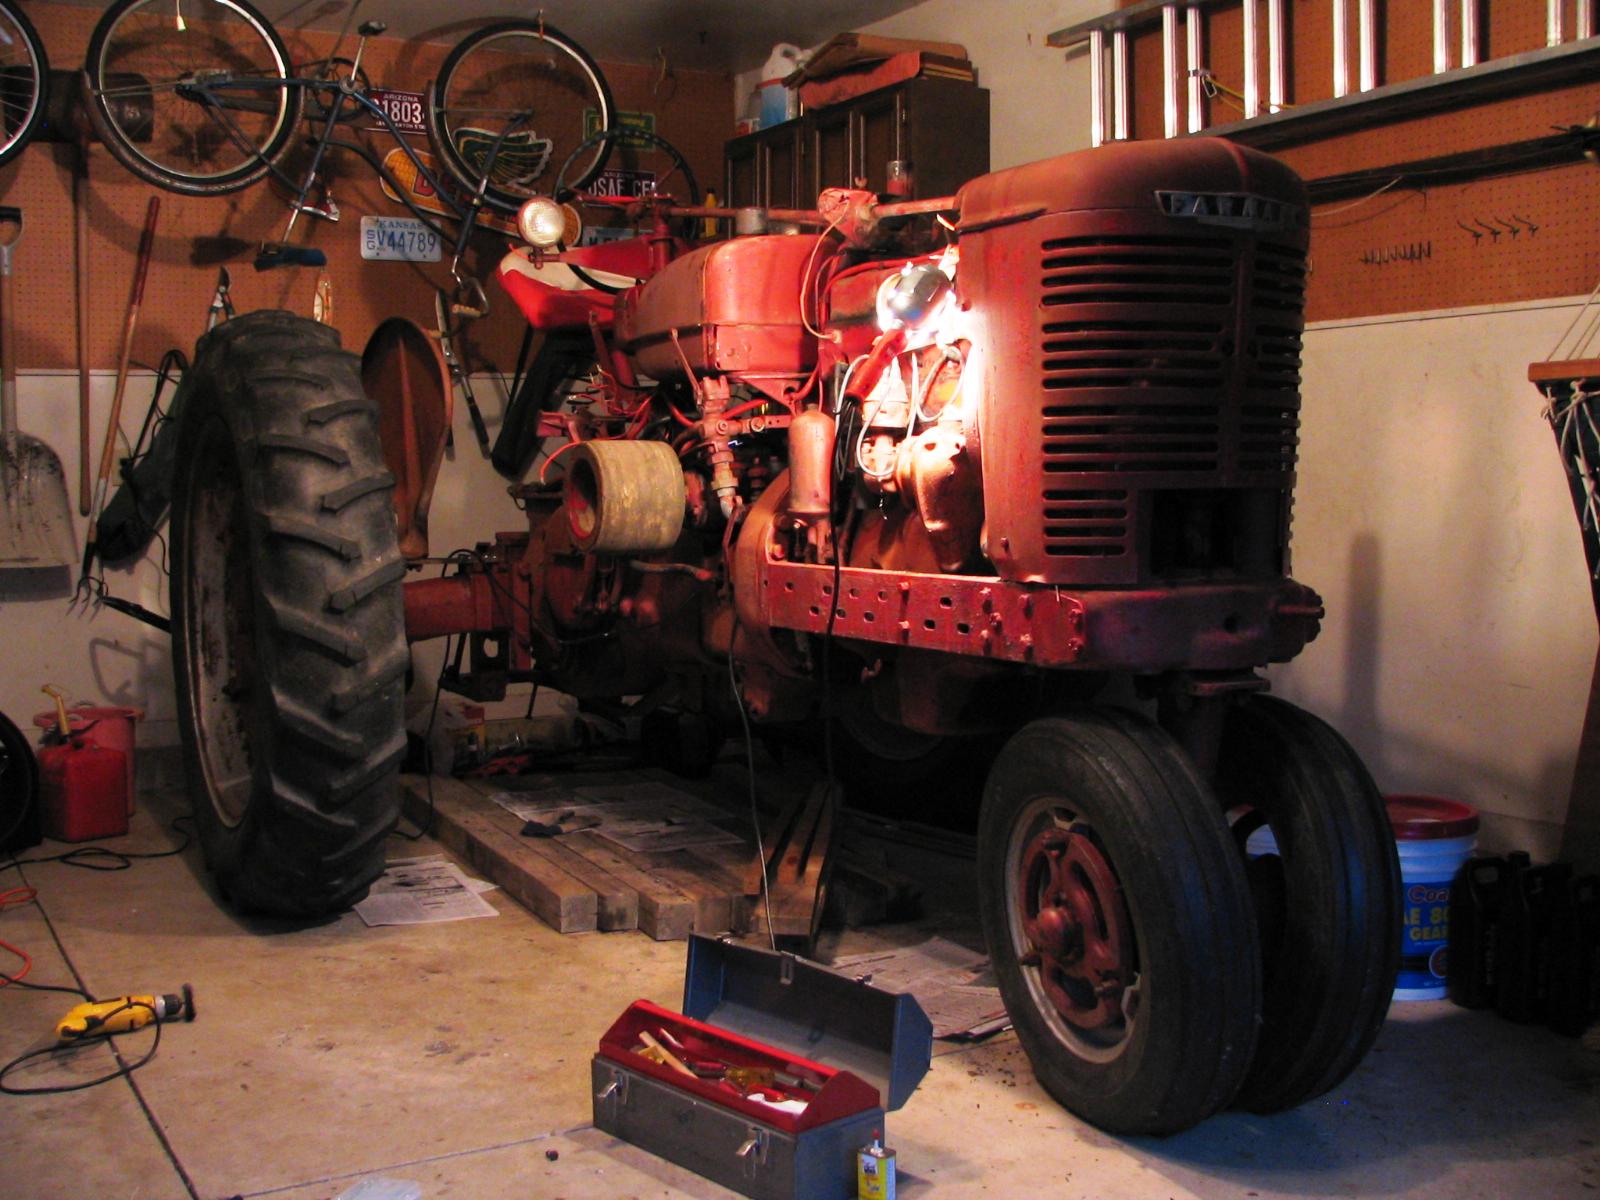
In the meantime, seeing this handsome machine in my garage
warms my heart every day. And it's hard to beat
the
satisfaction of fixing up an honorable veteran like this. I'm
not out
for show-quality restoration but I want the
tractor to look decent and
be solid mechanically, and I've already enjoyed many
hours slowly
tinkering and learning. |
| |
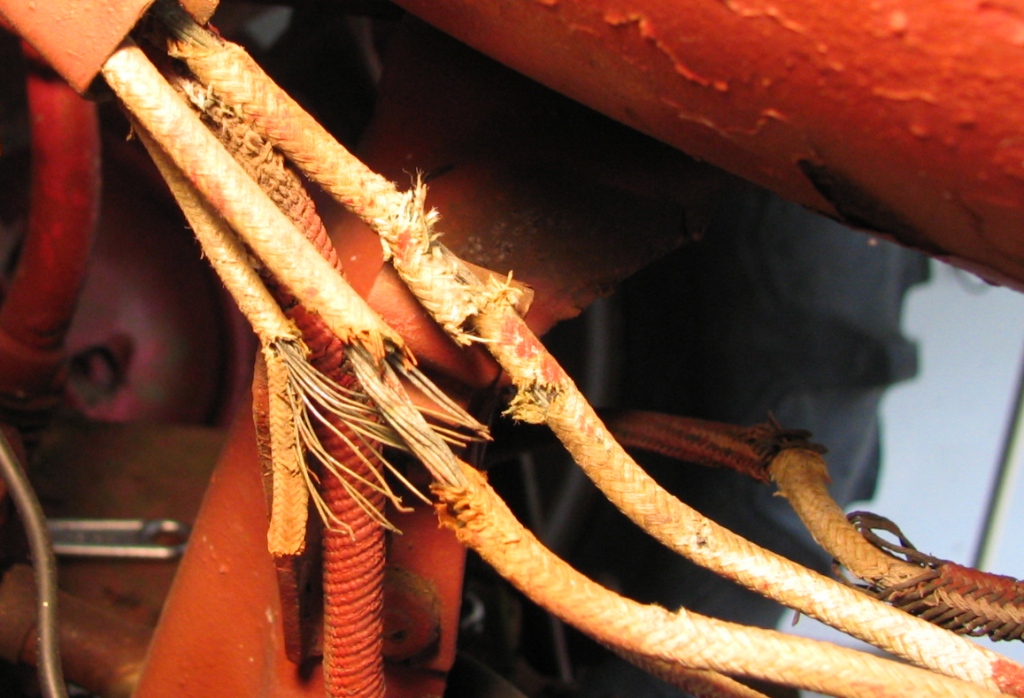
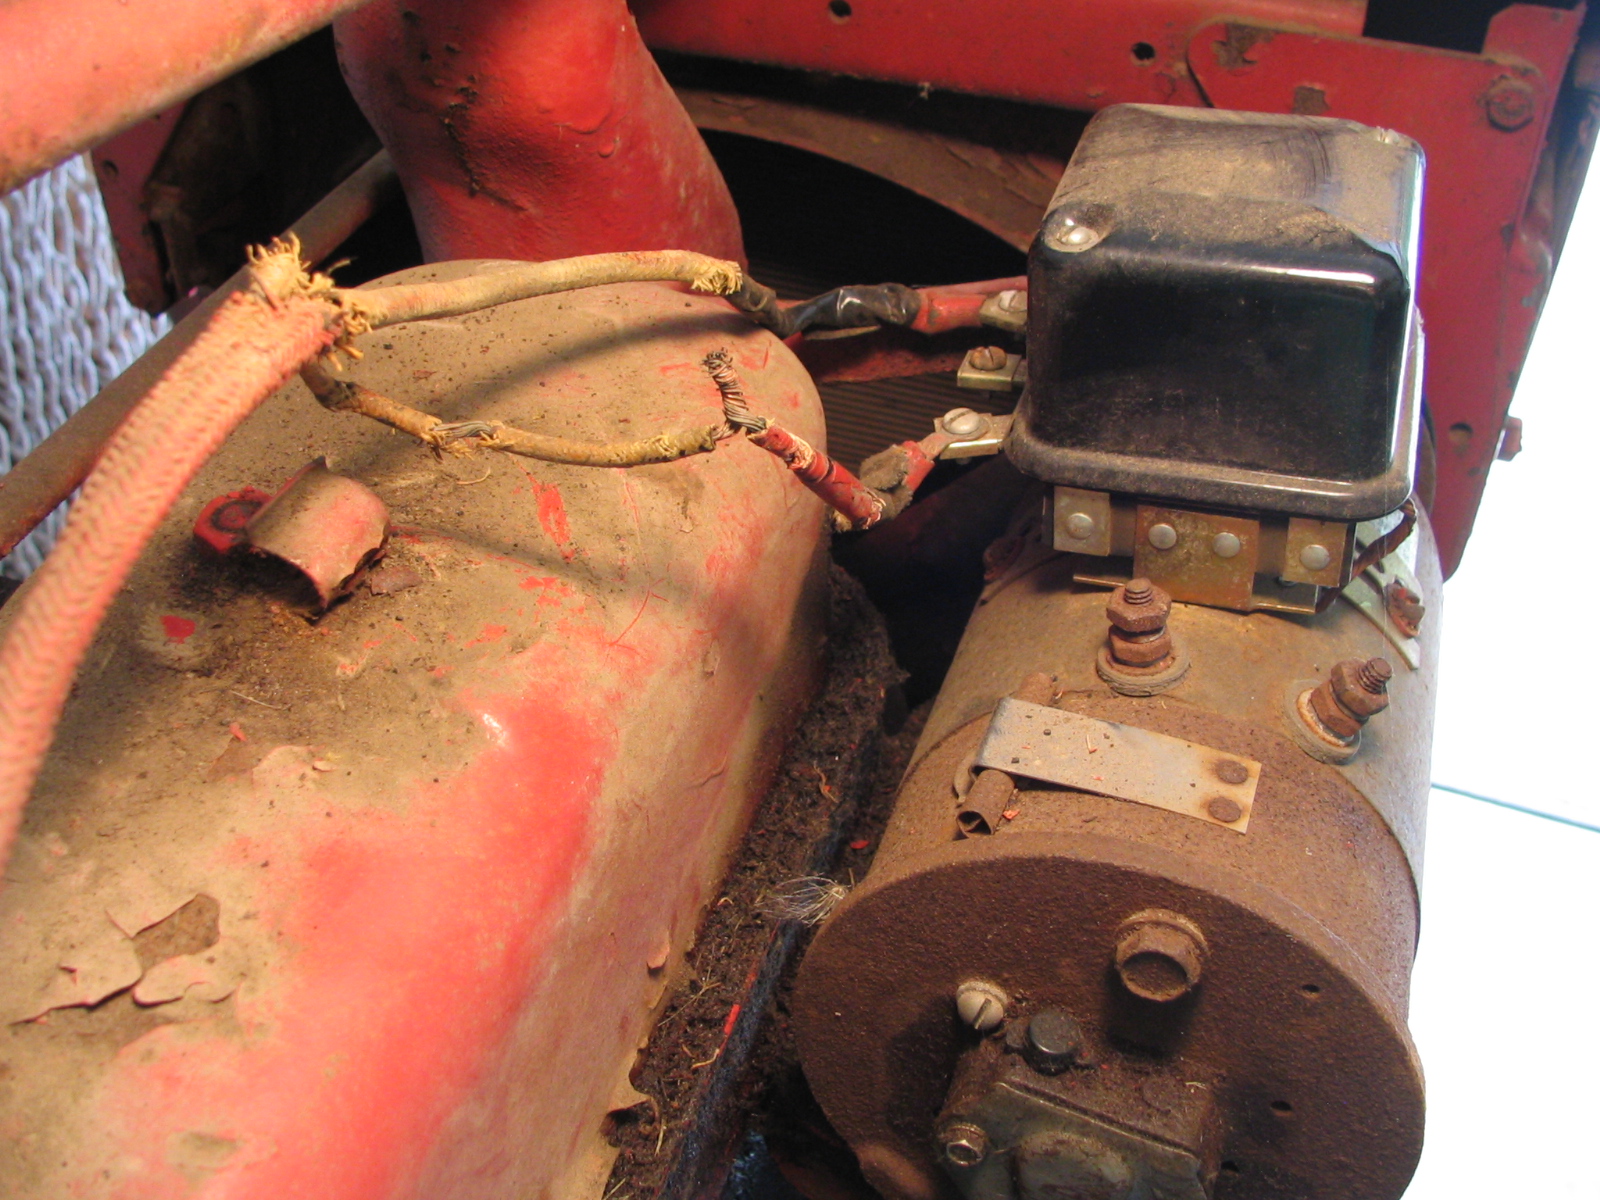
 The electrical system
was one of the first tasks: All the ignition and lighting
circuit wiring was
pretty much shot and the charging system didn't work.
Replacing the wiring
sounded simple enough when I got started, but I eventually figured out
that just putting new wires where the old ones had been wasn't going to
cut it. I couldn't match the existing wiring up to the
diagrams in the parts book, and there was no existing wiring at all
connected to the
generator. The electrical system
was one of the first tasks: All the ignition and lighting
circuit wiring was
pretty much shot and the charging system didn't work.
Replacing the wiring
sounded simple enough when I got started, but I eventually figured out
that just putting new wires where the old ones had been wasn't going to
cut it. I couldn't match the existing wiring up to the
diagrams in the parts book, and there was no existing wiring at all
connected to the
generator.
The generator had a voltage regulator mounted on top of it, but
the tractor had evidently started life with a cutout relay instead.
A cutout relay lets current flow from the generator to
the battery but prevents it from going the other way, so you can charge
the battery up but it won't just drain back down through the generator.
The tractor operator controls the charging rate with the
light switch, which has four positions: High, Low, Dim, and
Bright.
If the lights are on (Dim or Bright), the generator charges
the battery at the high
rate. If the lights are off, the generator charges at either
the high or low rate depending on the switch position. Too
little
charging and the battery will run down; too much and the battery can be
damaged. An automatic voltage regulator has the same
basic job as the cutout relay, letting current
flow from the battery to the generator but not the other way around,
but it also solves the under- or over-charging problem. It
lets current flow from the generator to the battery whenever the battery
voltage is lower than it ought to be, but then stops as soon
as the battery is charged back up.
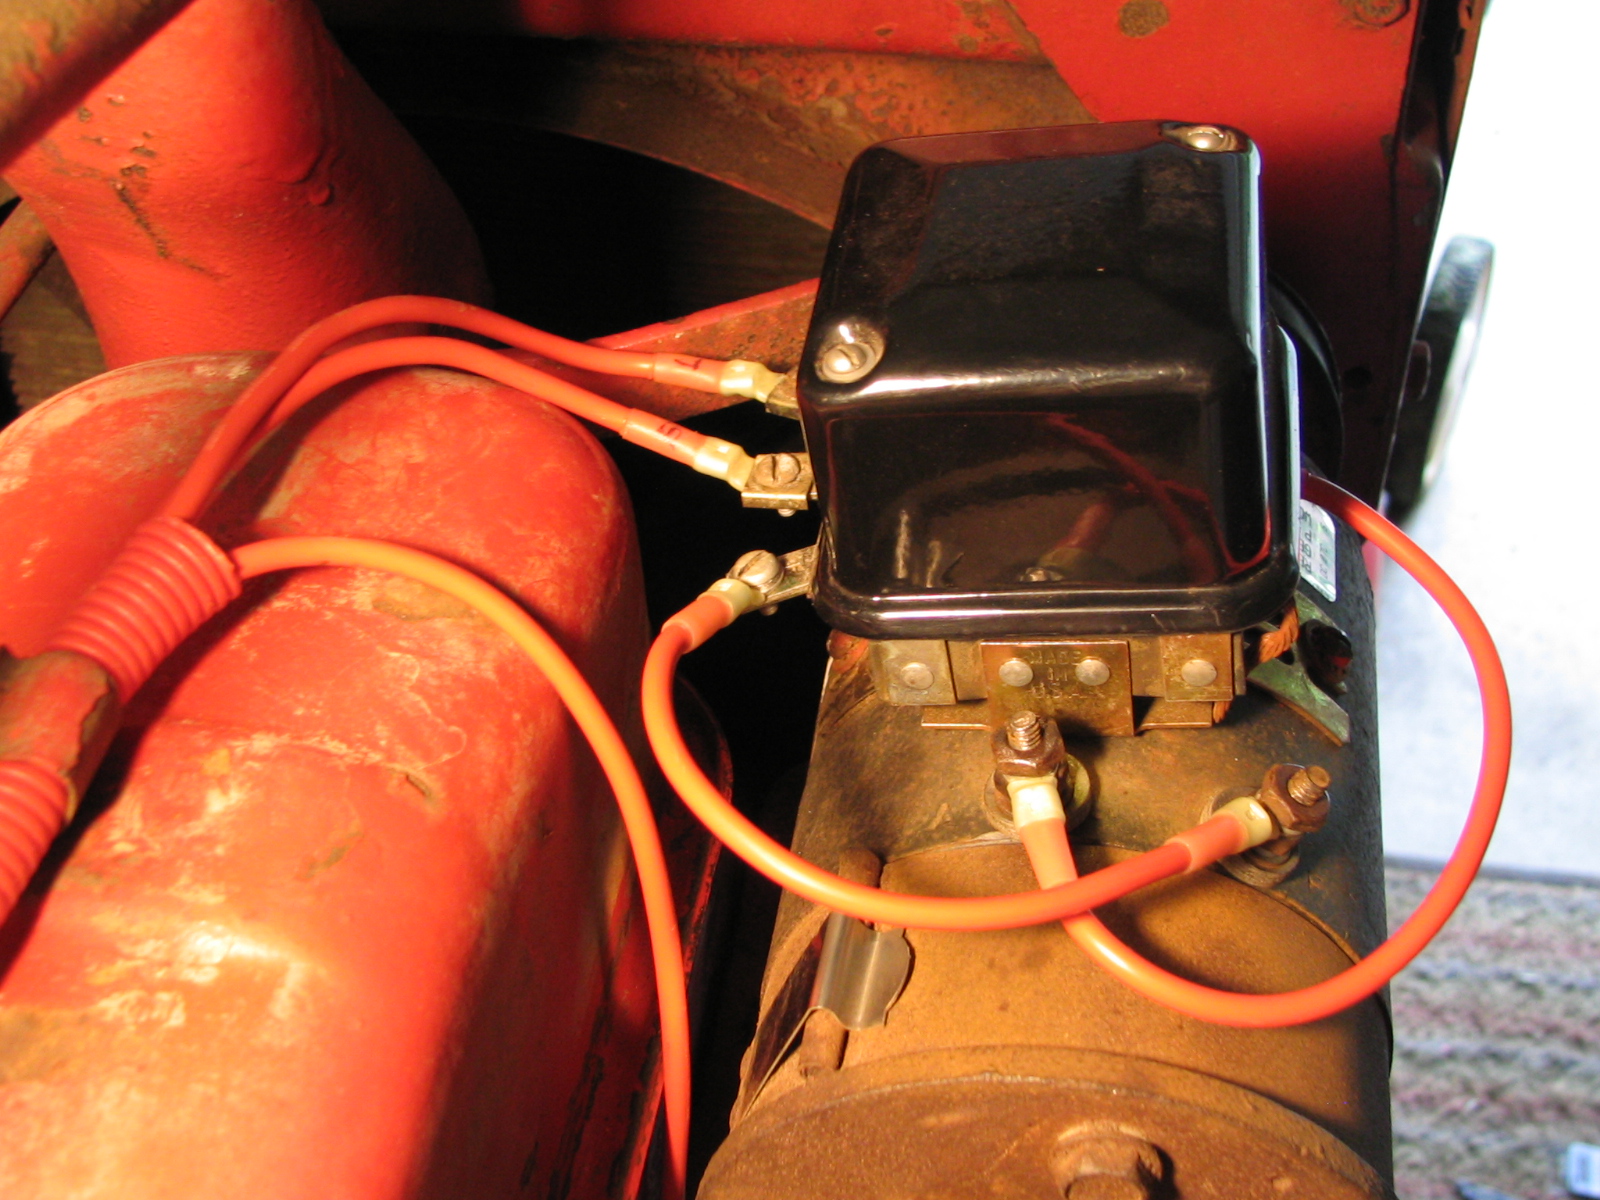
With a regulator there's no need for the operator to manually control
the charging rate, so the wiring
between the switch and the regulator is a little different than it
would be for a cutout relay. And there's
no need for the High and Low positions on the light switch.
(On tractors that came equipped from the factory with a
voltage regulator, the switch was truly just a light switch, and had
only three positions: Off, Dim, and Bright). My
tractor still had the four-position switch.
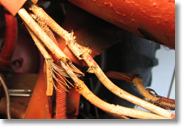
Not really understanding all this at the time, I ran new wires to the
regulator and hooked them up the way you should for a tractor with a
regulator, and then hooked up the other ends of the wires to the switch
the way you should for a tractor with a cutout relay. That
had the unfortunate effect of creating a direct short to ground, which
made some wires get really hot and made me re-think just how smart a
mechanic I was. With the generous help
of several folks on the ATIS
e-mail lists, and with
Robert
Melville's Farmall wiring diagrams,
I disconnected the High/Low part of the light switch and wired the rest
of it as if it were a three-position switch, and all was well.
|
|
|
|
|
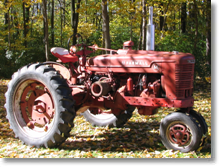 |
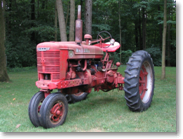
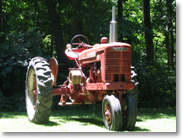
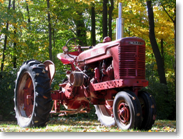
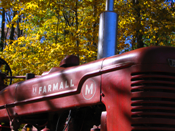
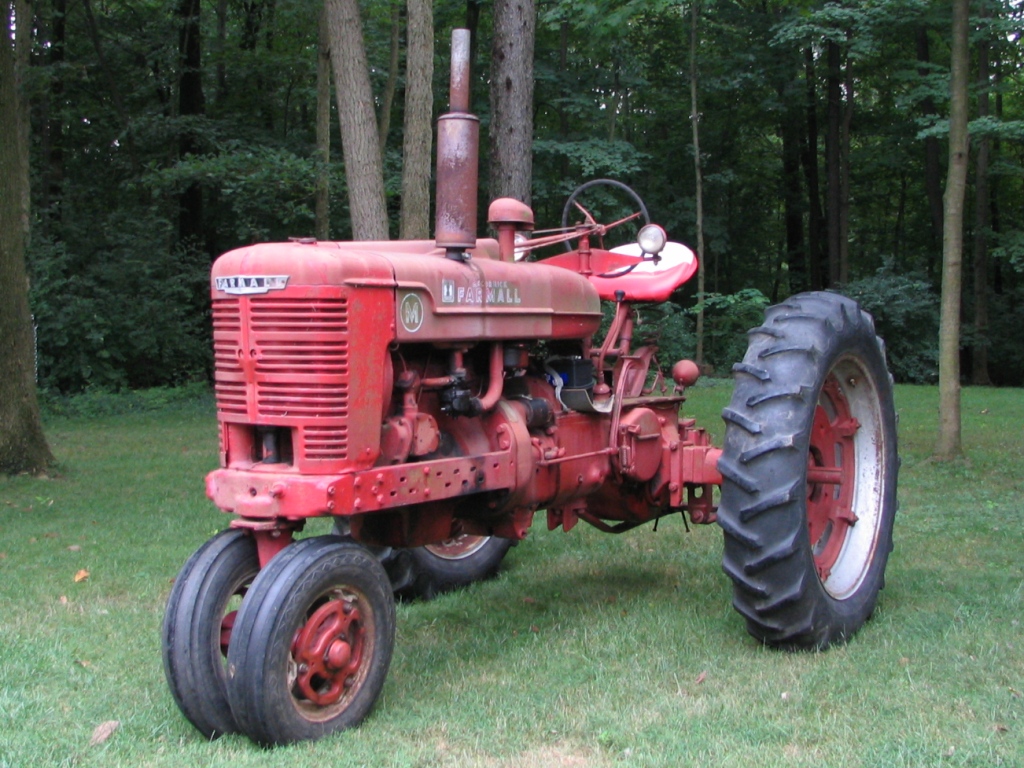
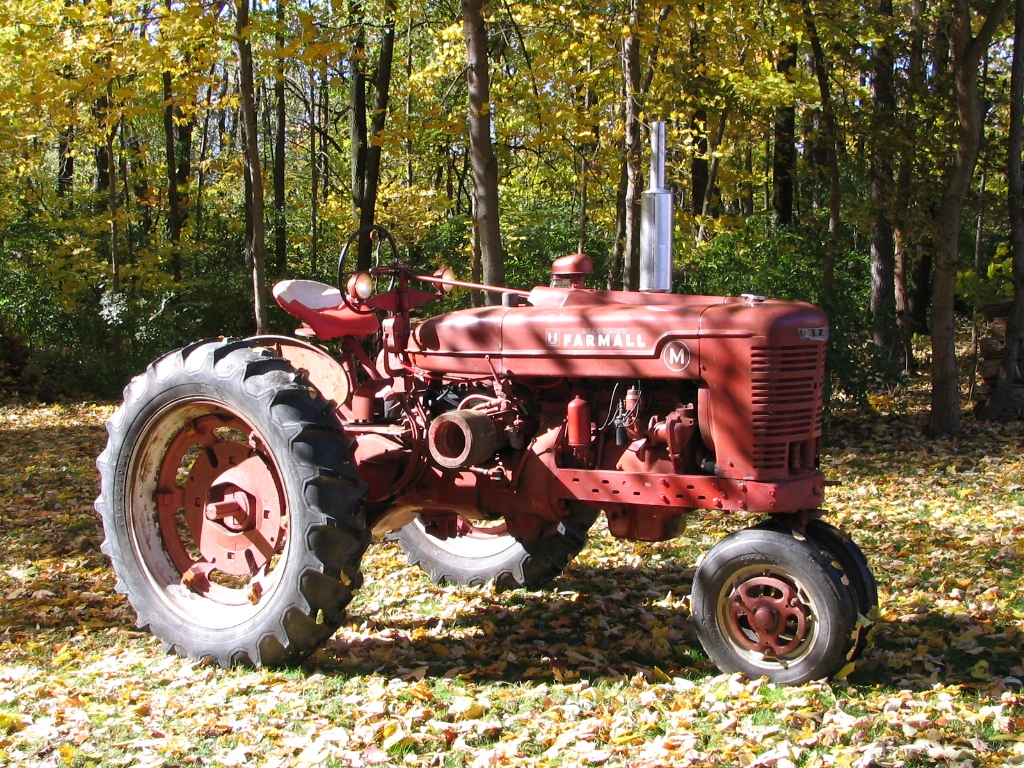
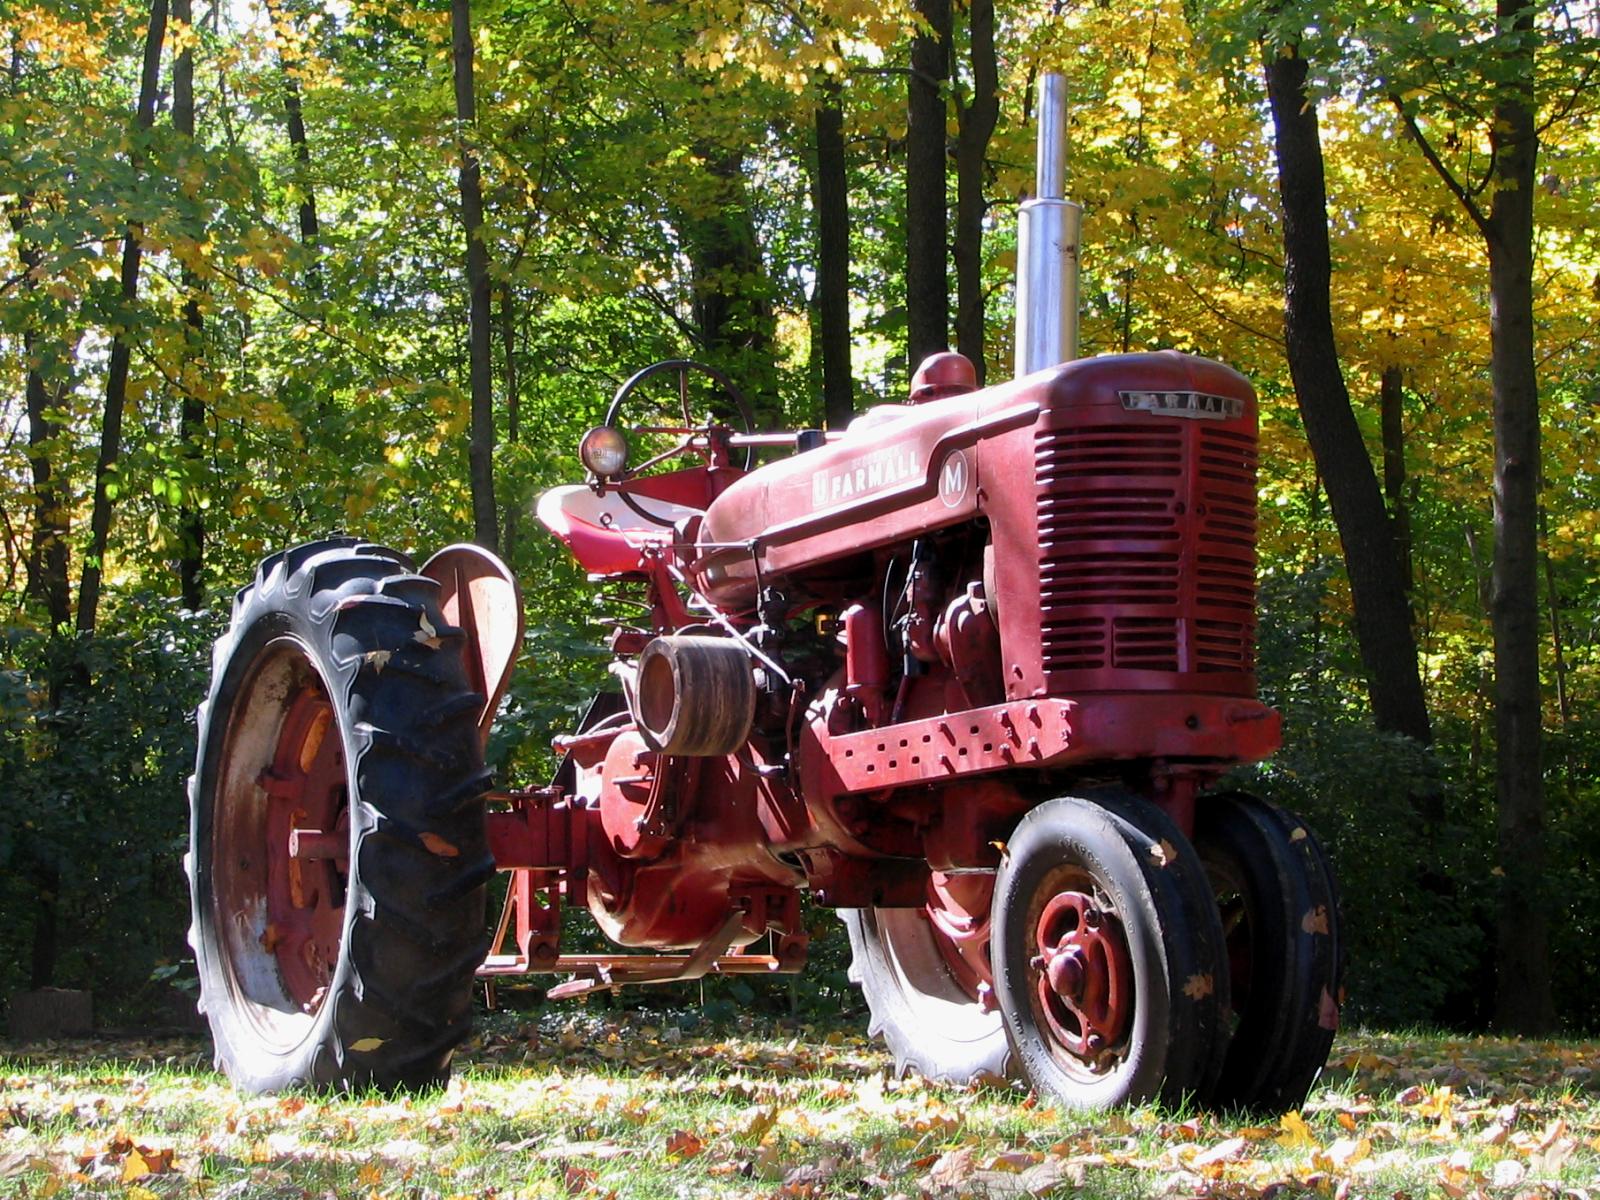
Posing in the back
yard on a nice October afternoon, after a trip up to
Anderson
Tractor Supply
in Bluffton, Ohio to buy a set of fenders and the belt pulley.
I'd gone to Anderson's about ten years earlier to look
for fenders for the
Super M
I used to have, and had good memories of wandering around their salvage
yard. I'd found that first set on what was left of a
Farmall 400. The ones I found for this tractor were
on a
560, although they're just normal H and M fenders. Anderson's
had
another set with much nicer paint, but I didn't want the fenders to be
the nicest-looking part on the tractor--weathered but straight suits me
just fine. |
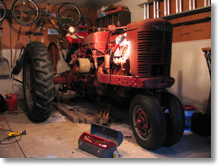
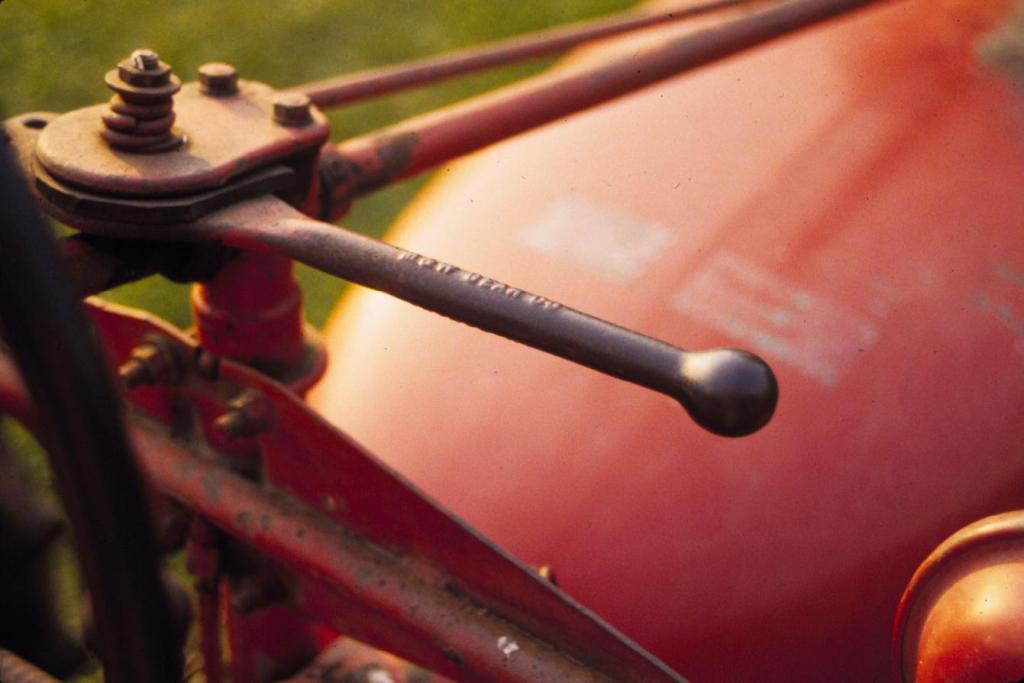
Saturday
afternoon, time to work on the tractor for a while. I put on
an
M&W aftermarket throttle lever because that's what had
been on
my old Super M,
and I like to stay with things that work. The
steering wheel made my hands all black and sooty every time I touched
it, so I painted it with clear spray-on lacquer. Looks fine
and
worked like a charm. |
 |
|
|
| |
|
|
| |
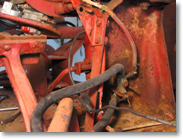 |
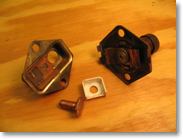
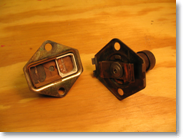
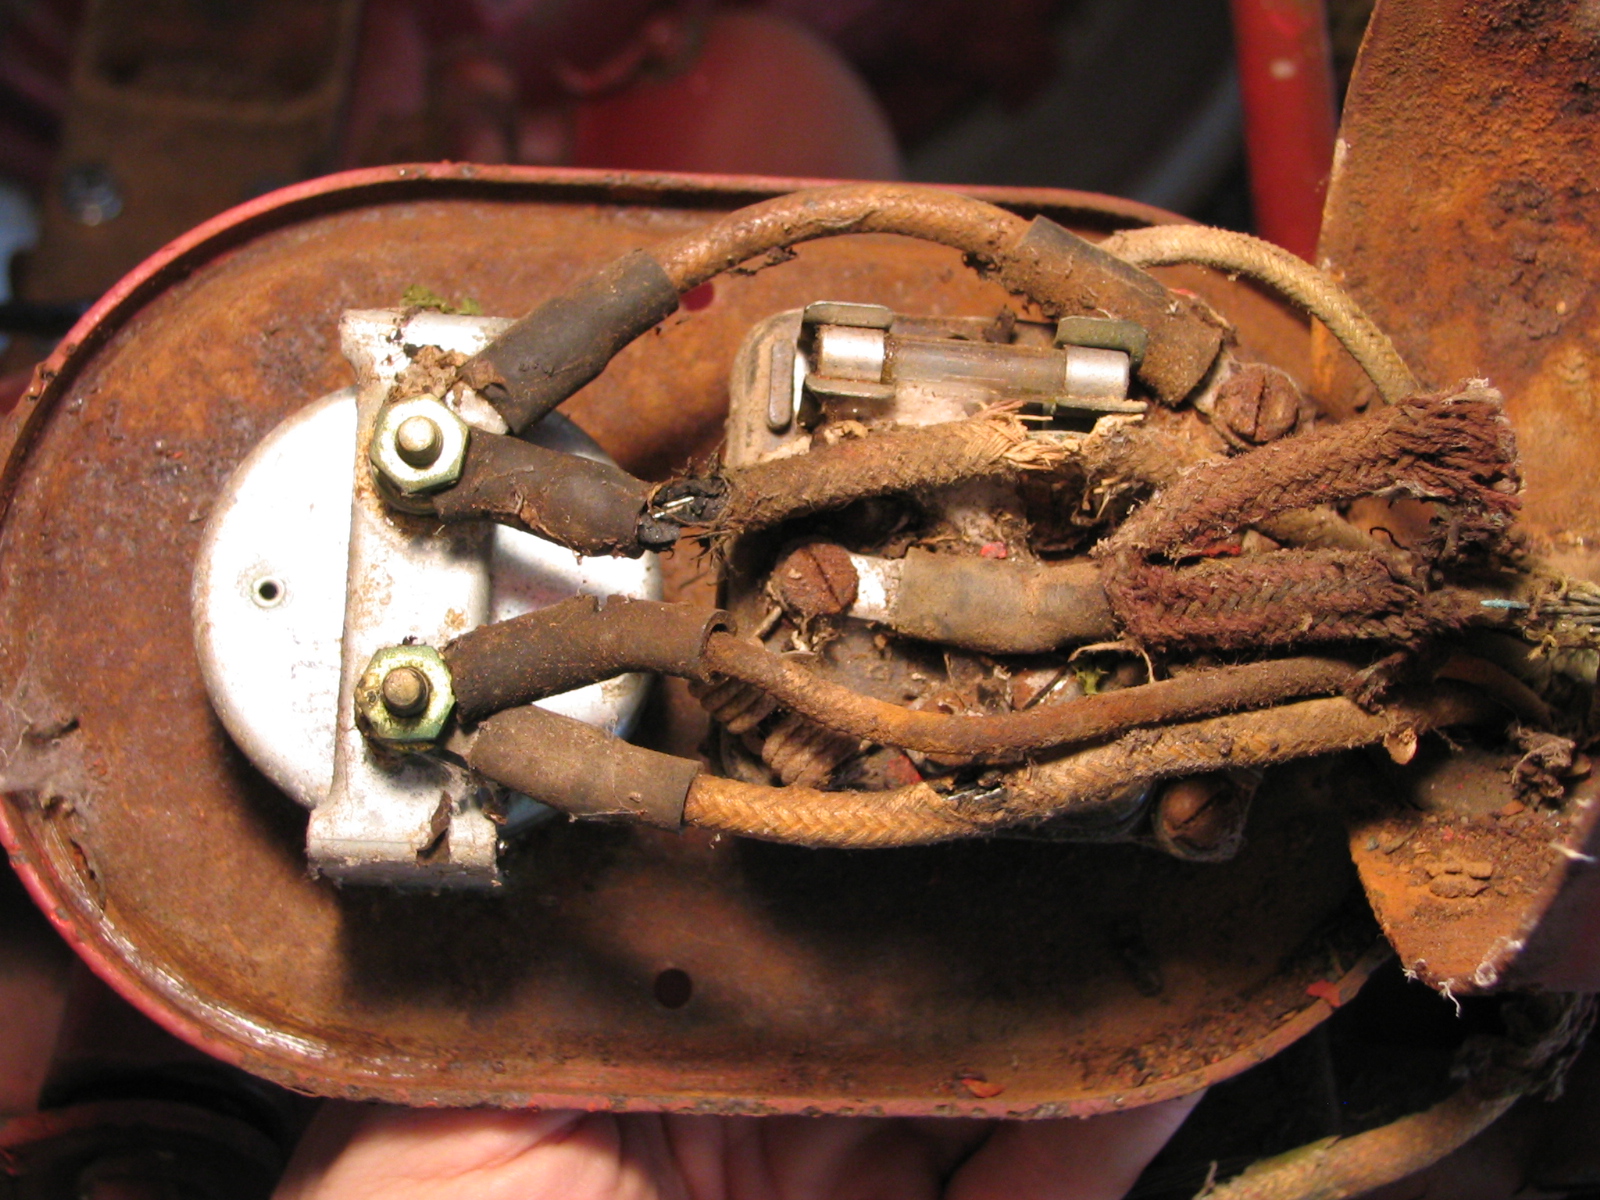
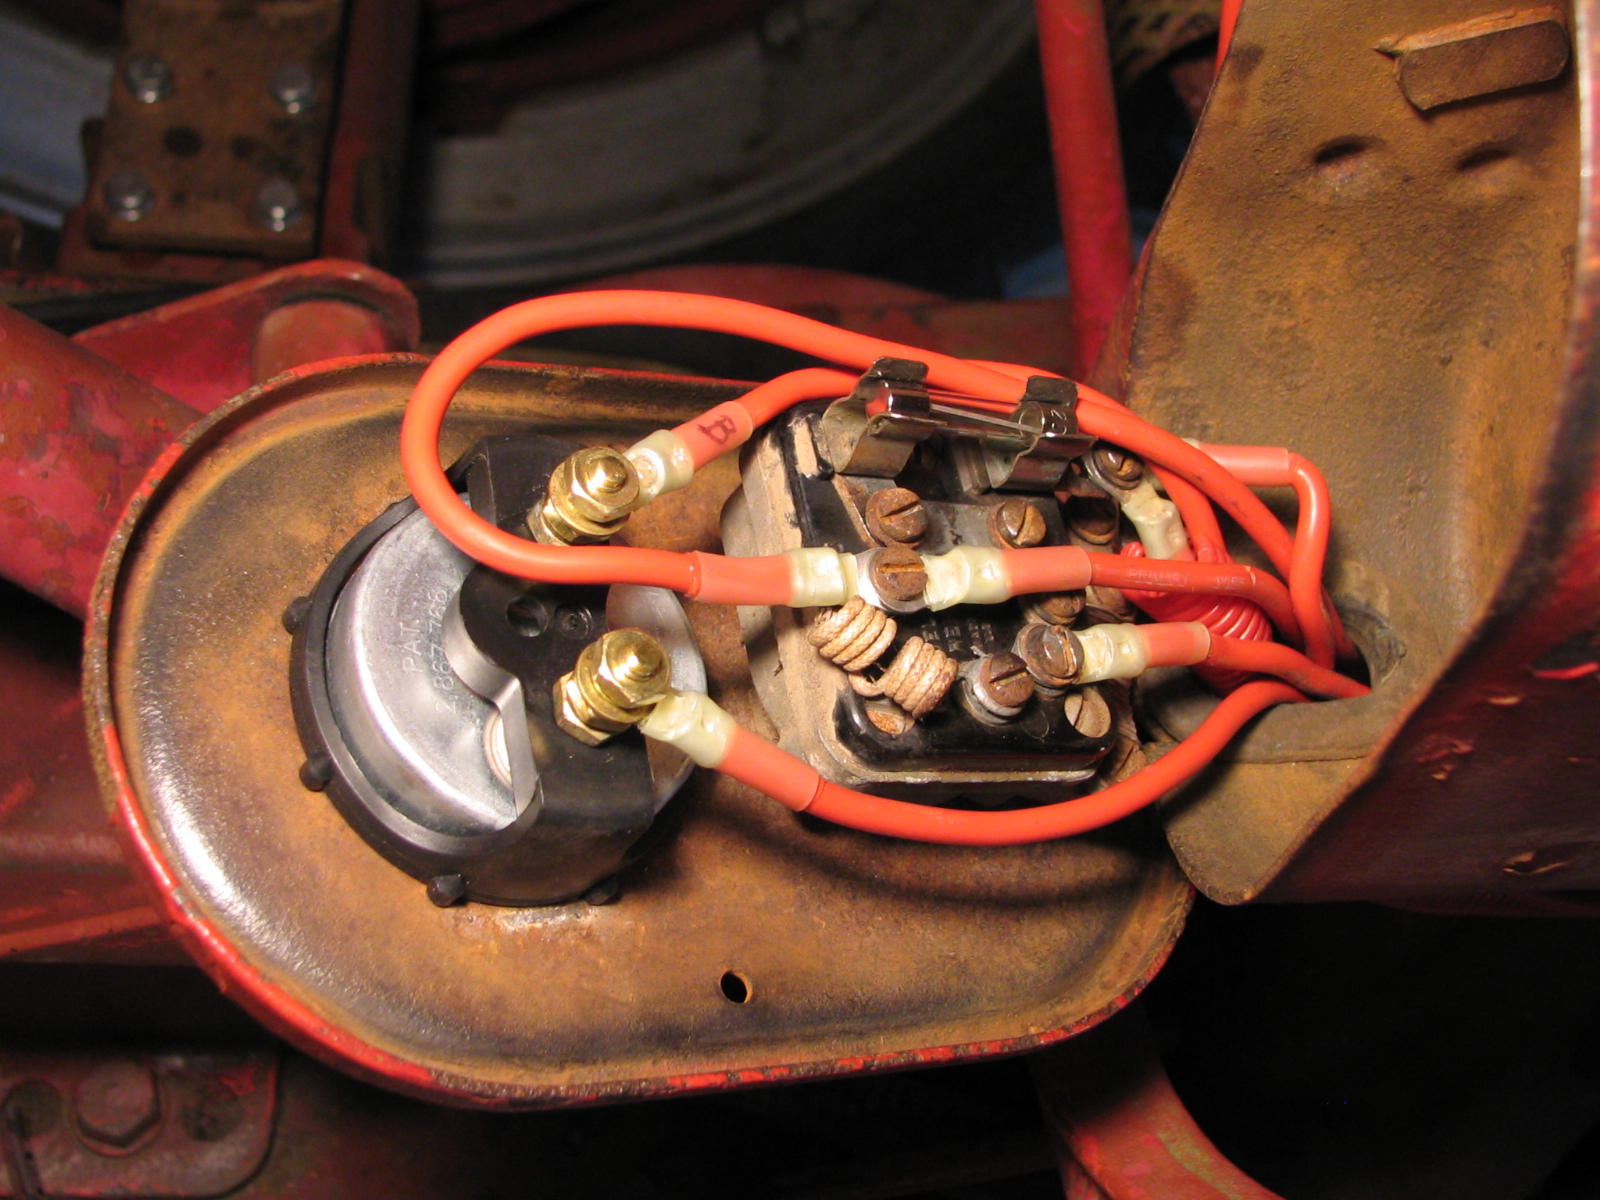
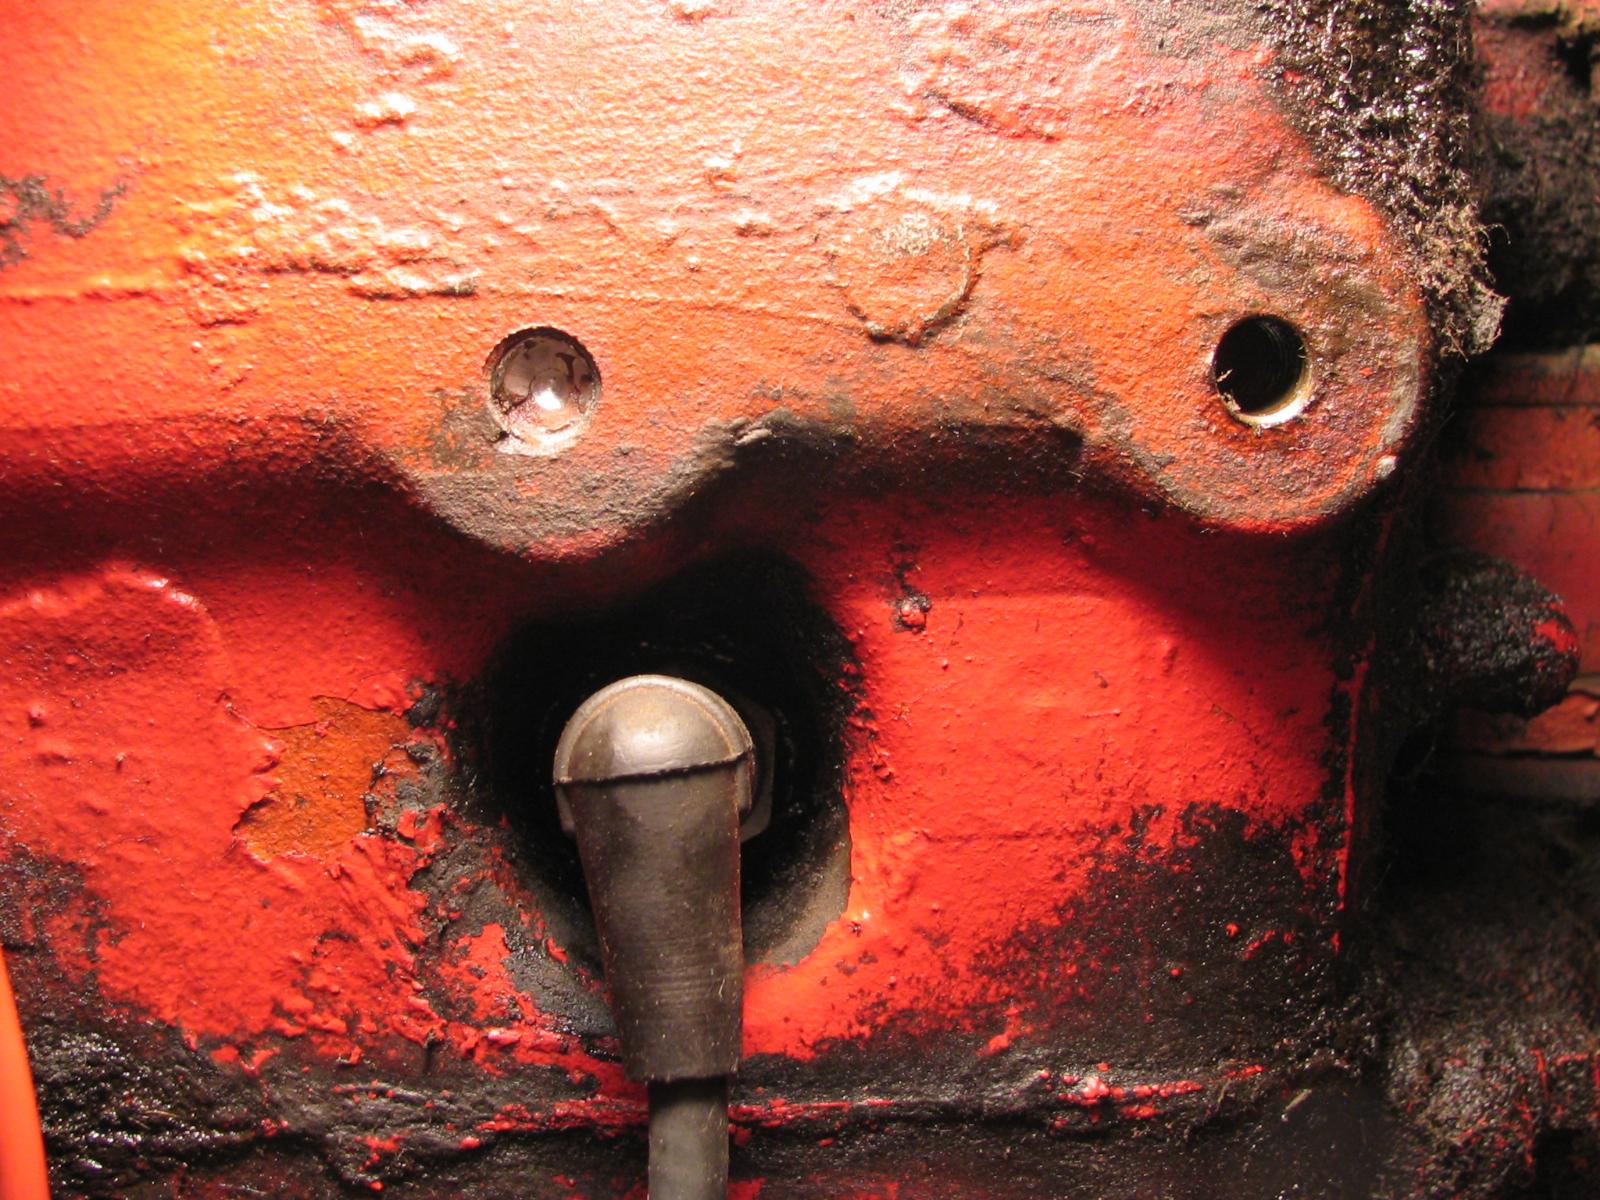
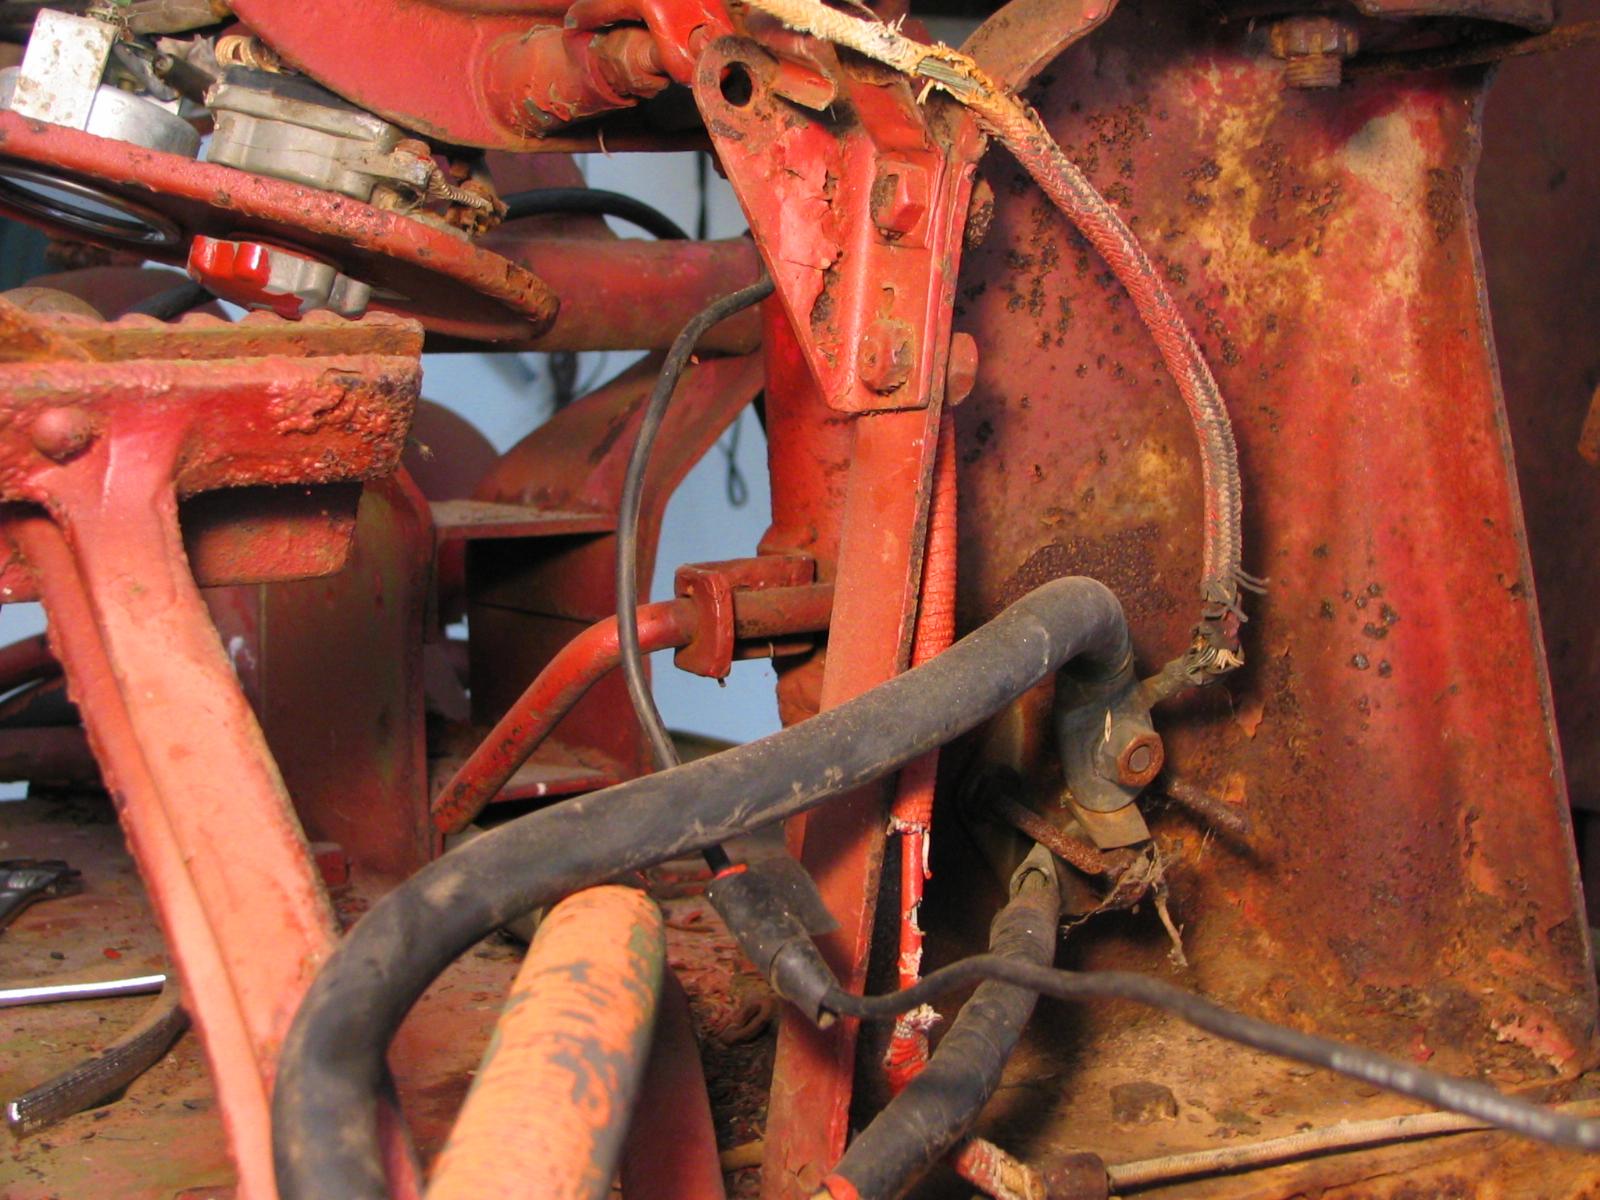
One day while trying to start the tractor I noticed a puff of smoke
from down by the starter switch. When I tried again one of
the
mounting bolts on the side of the switch glowed red-hot.
Those are rarely good signs. So I pulled the battery
out and
took all the cables off and removed the switch, and carefully opened it
up. The cardstock insulation around one of the terminal posts
had
worn through, letting the post touch the metal switch housing and
thereby creating a direct short to ground when I pressed the contact
button. I had some polystyrene sheet left over from some
model-making, and it looked
about the same thickness as the worn-out cardstock, so with an X-Acto
knife and a hand drill and some plastic cement I made a new
insulator. Put the switch back together, put it back on the
tractor, and it starts like a champ again. Have to love these
forgiving old machines. |
 |
 |
|
|
|
|
|
I knew when I bought
the tractor that the power
take-off didn't work: The shaft rotated freely but I couldn't
engage
it--the PTO lever would barely move. I removed the control
rod and the
PTO guard and cleaned up the outside of the PTO housing so I could
see it better, but (not knowing what to look for) I didn't see anything
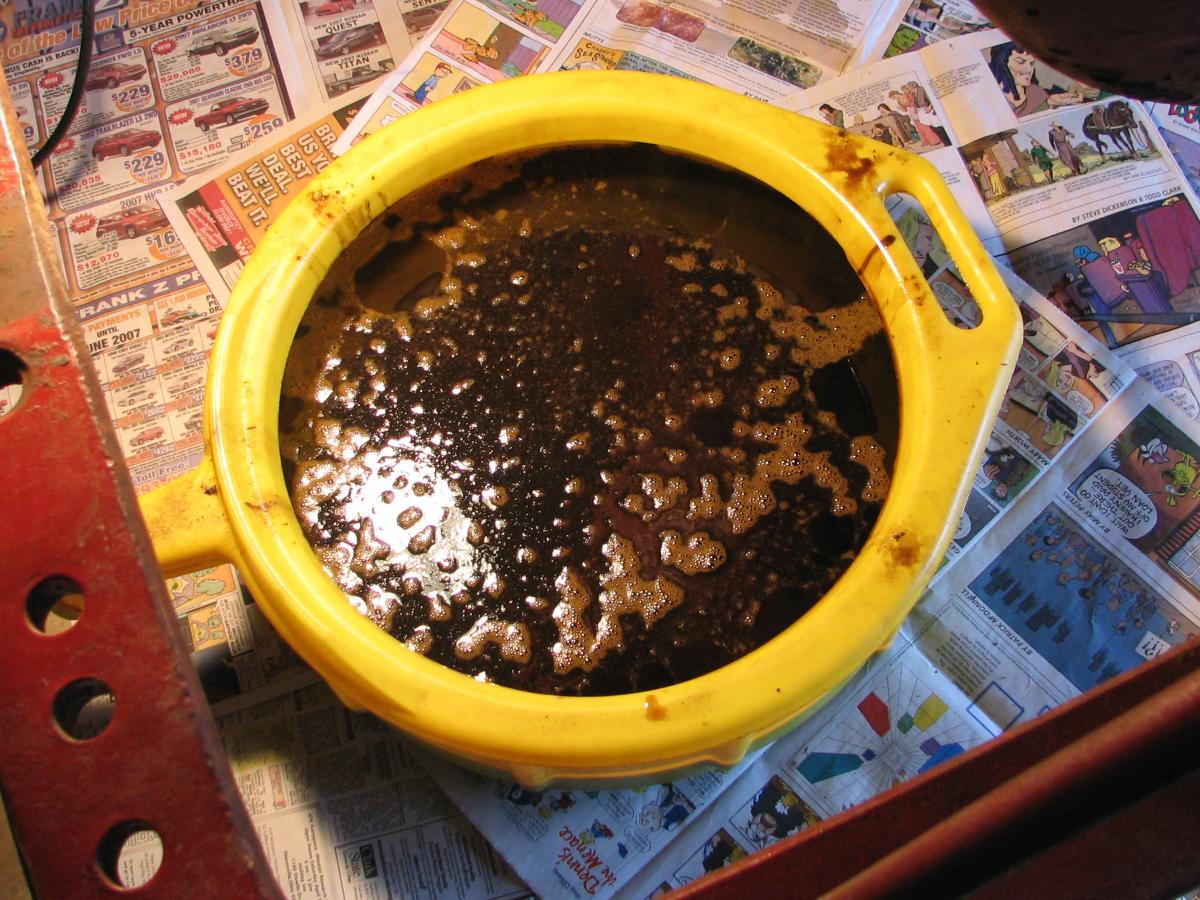
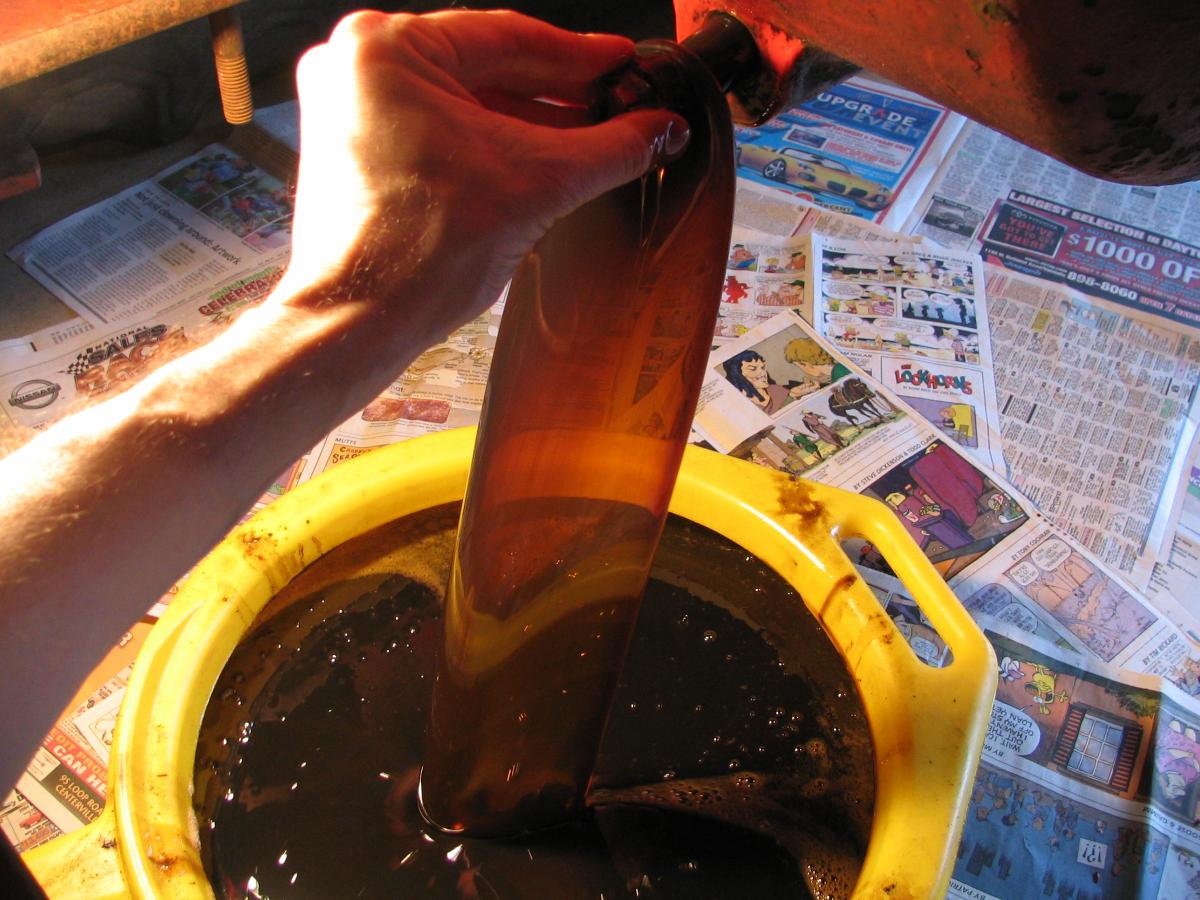
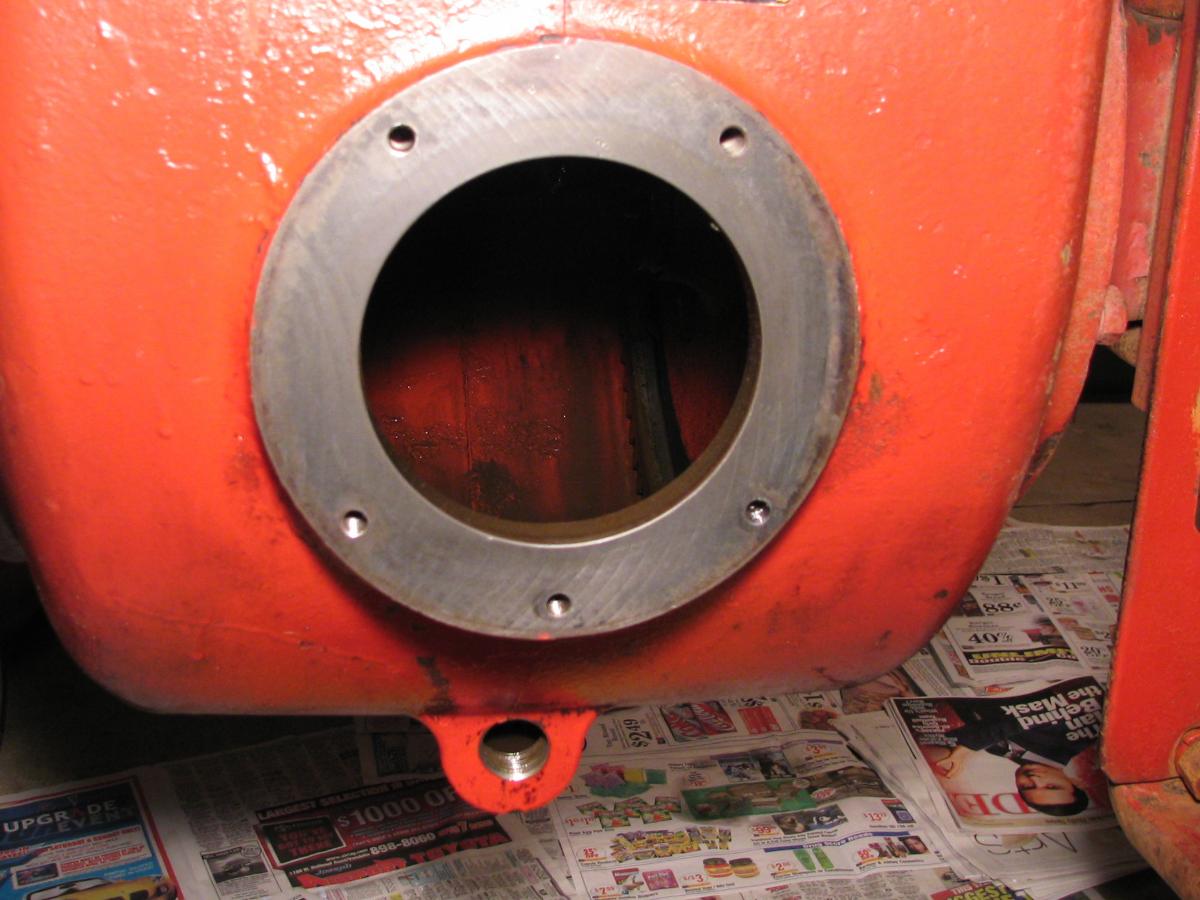
wrong. Removing the PTO meant draining the transmission oil
first, which of course was a project in itself: The
operator's
manual says to put 13 gallons of oil in the transmission, but I drained
about 18. First few gallons were kind of brown and frothy, so
some water seems to have gotten in at some point. The rest
didn't
look as bad as I'd expected, although there was a bunch of goopy sludge
left in there
that I had to clean out through the rear opening while I had the PTO
housing off. Aside from that bit of sludge at the bottom,
everything in the transmission case looks great.
 |
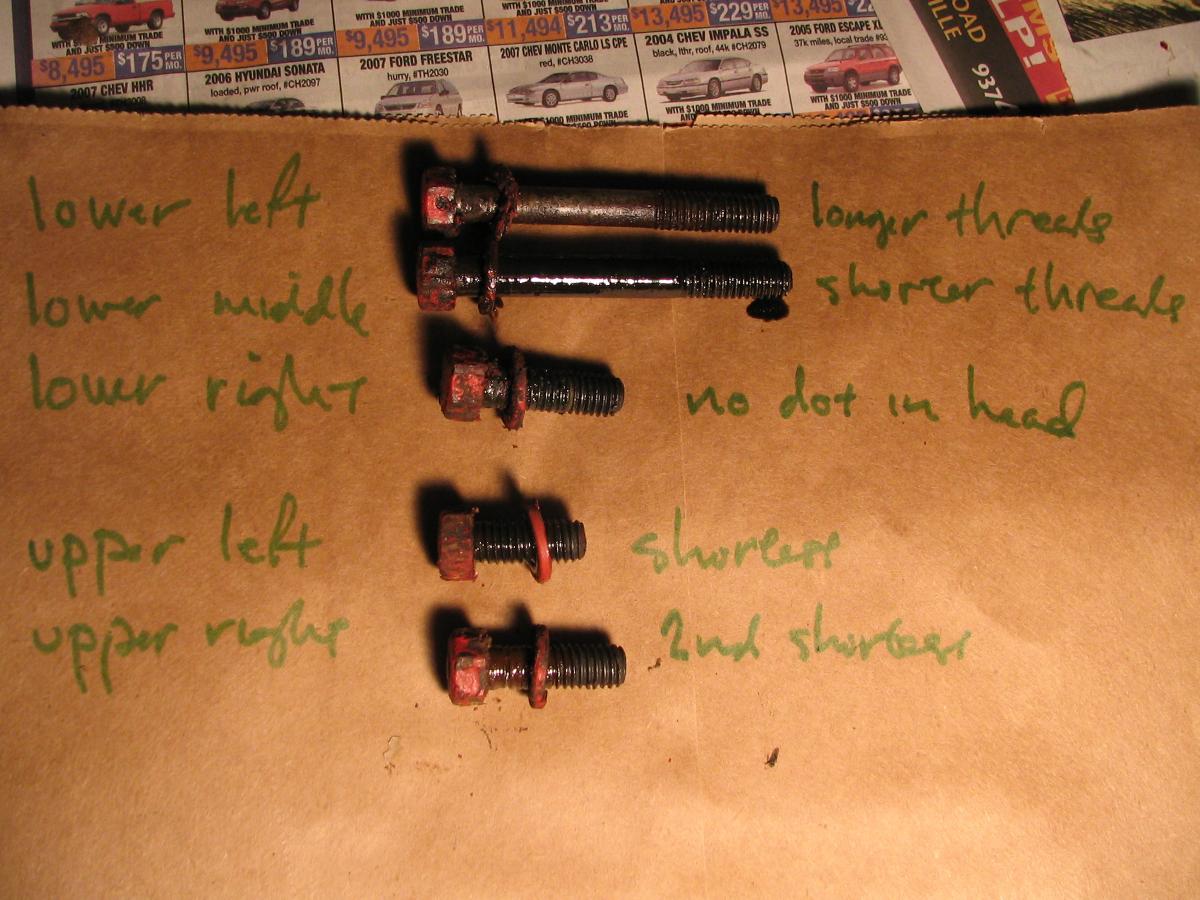
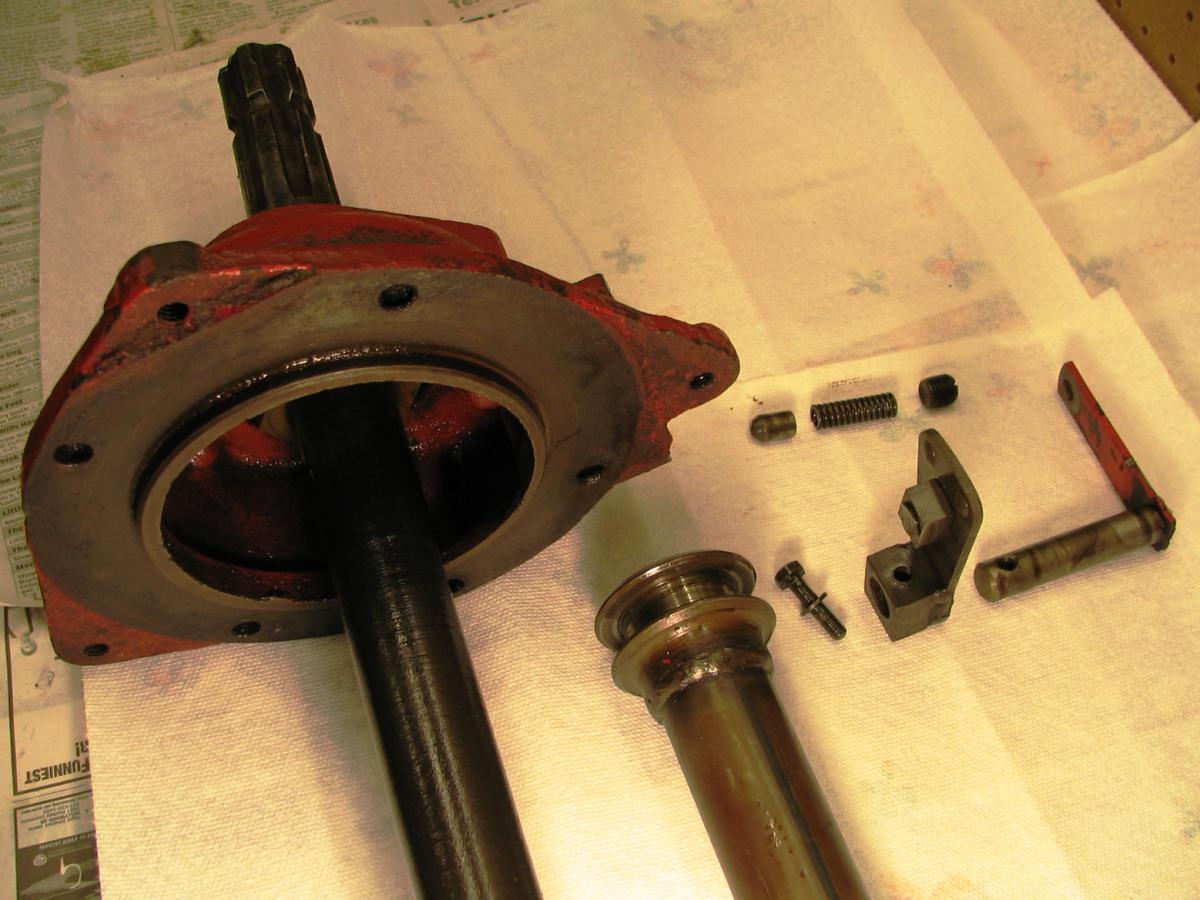
Removing the PTO was
easy,
just a matter of removing the bolts and pulling the whole
assembly out.
All five
of the bolts
turned out to be different, so I made some notes
to help me remember how to put it back together later.
|
 |
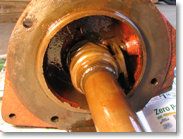 |
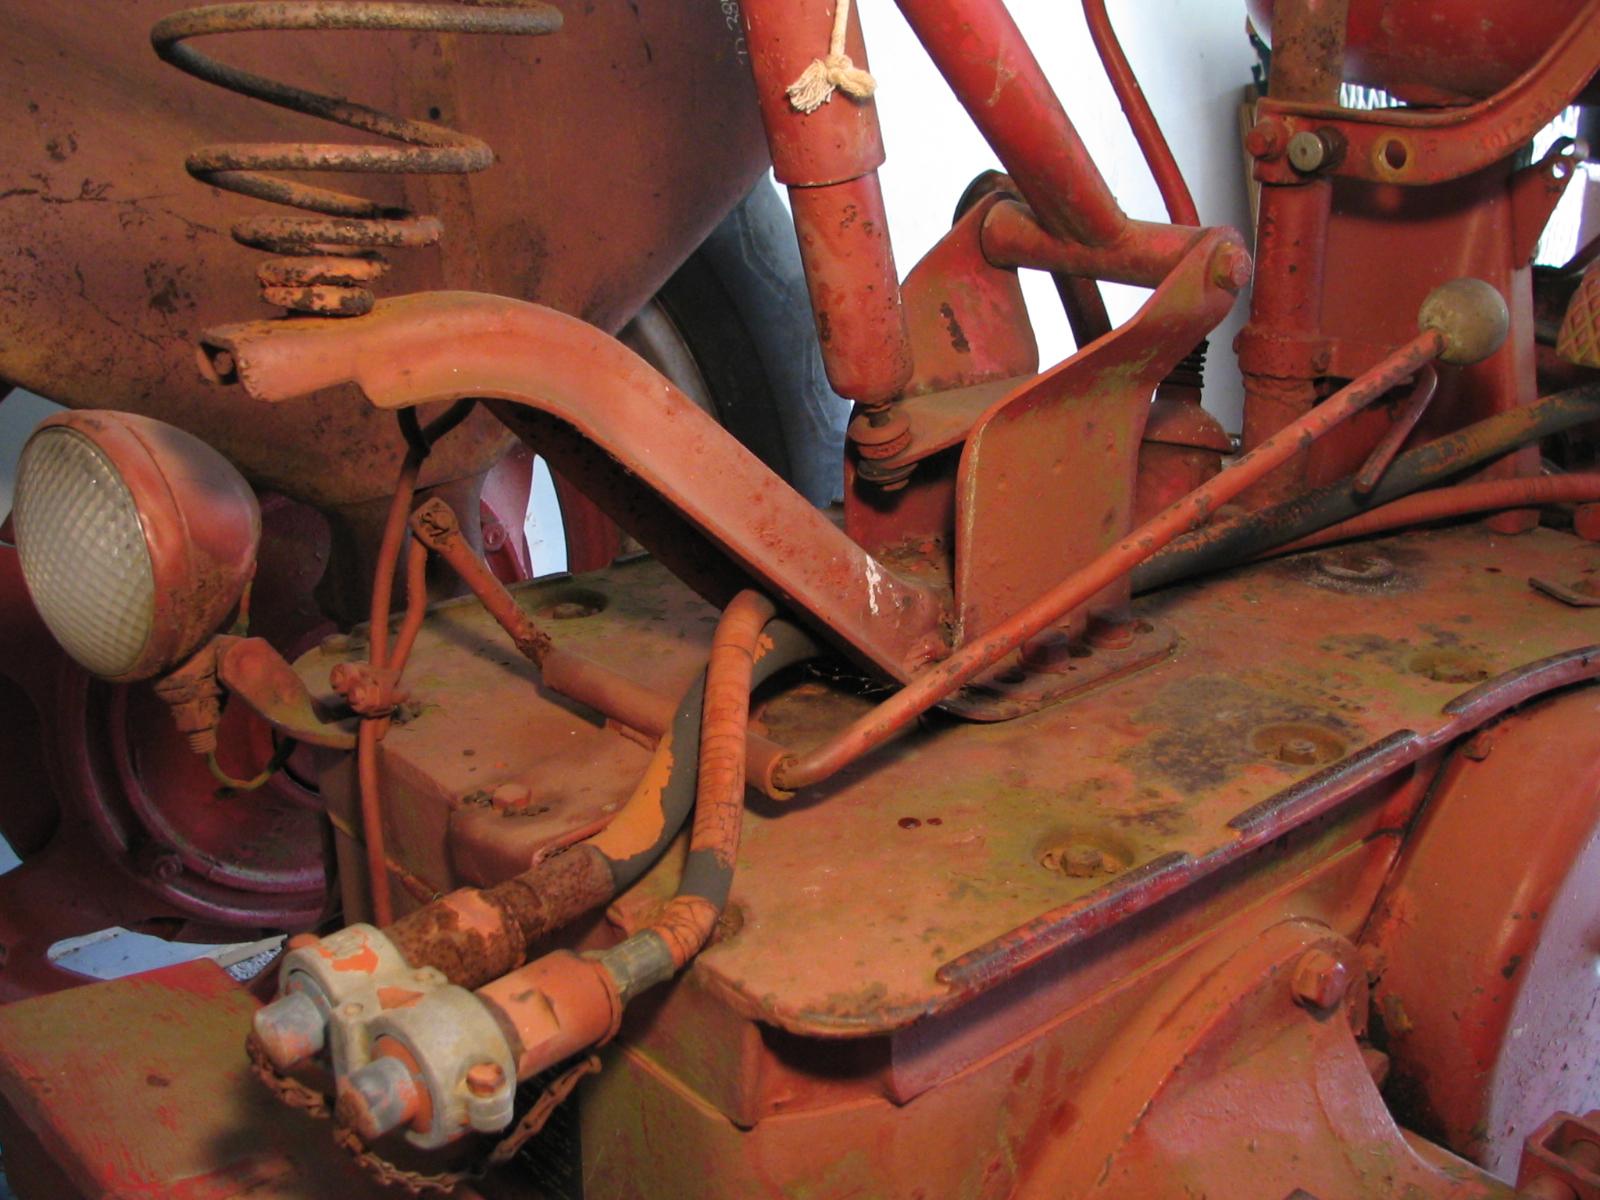
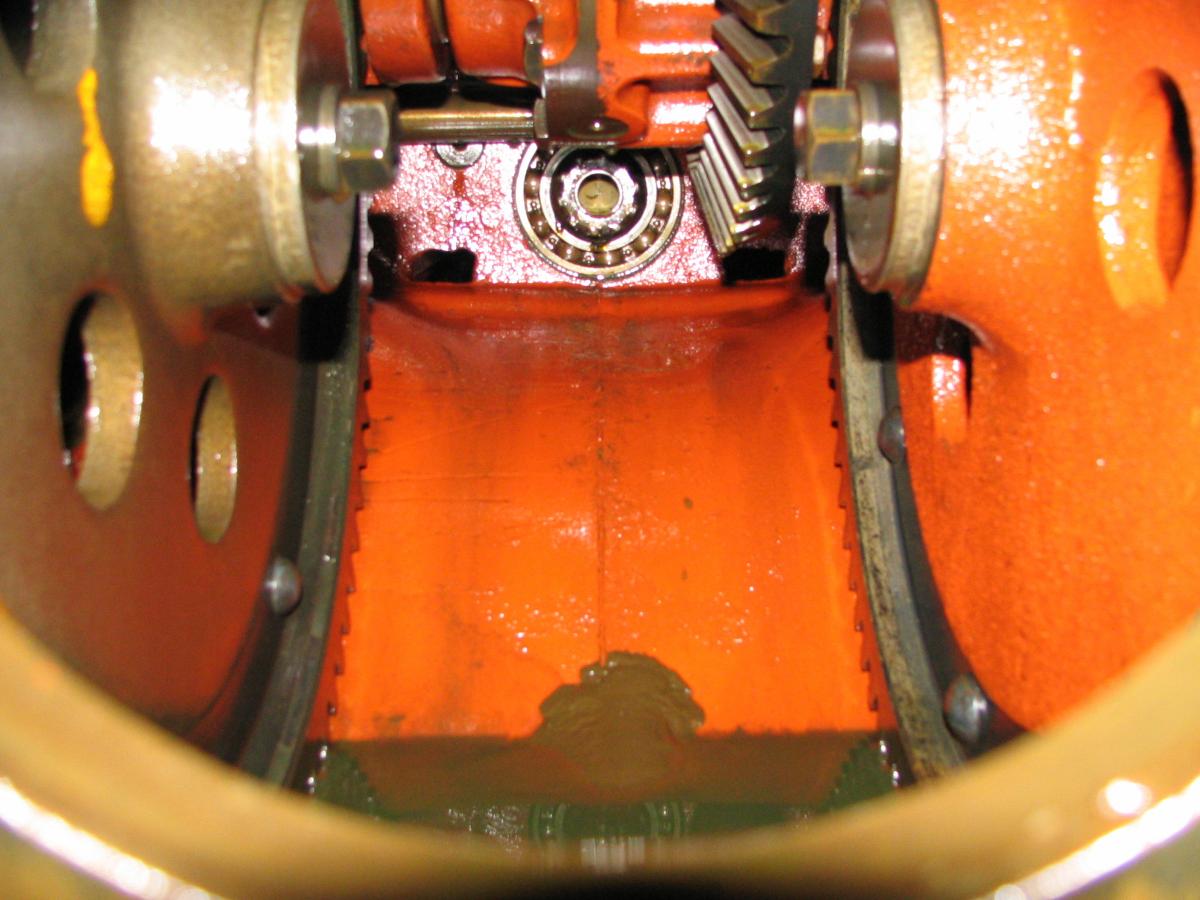
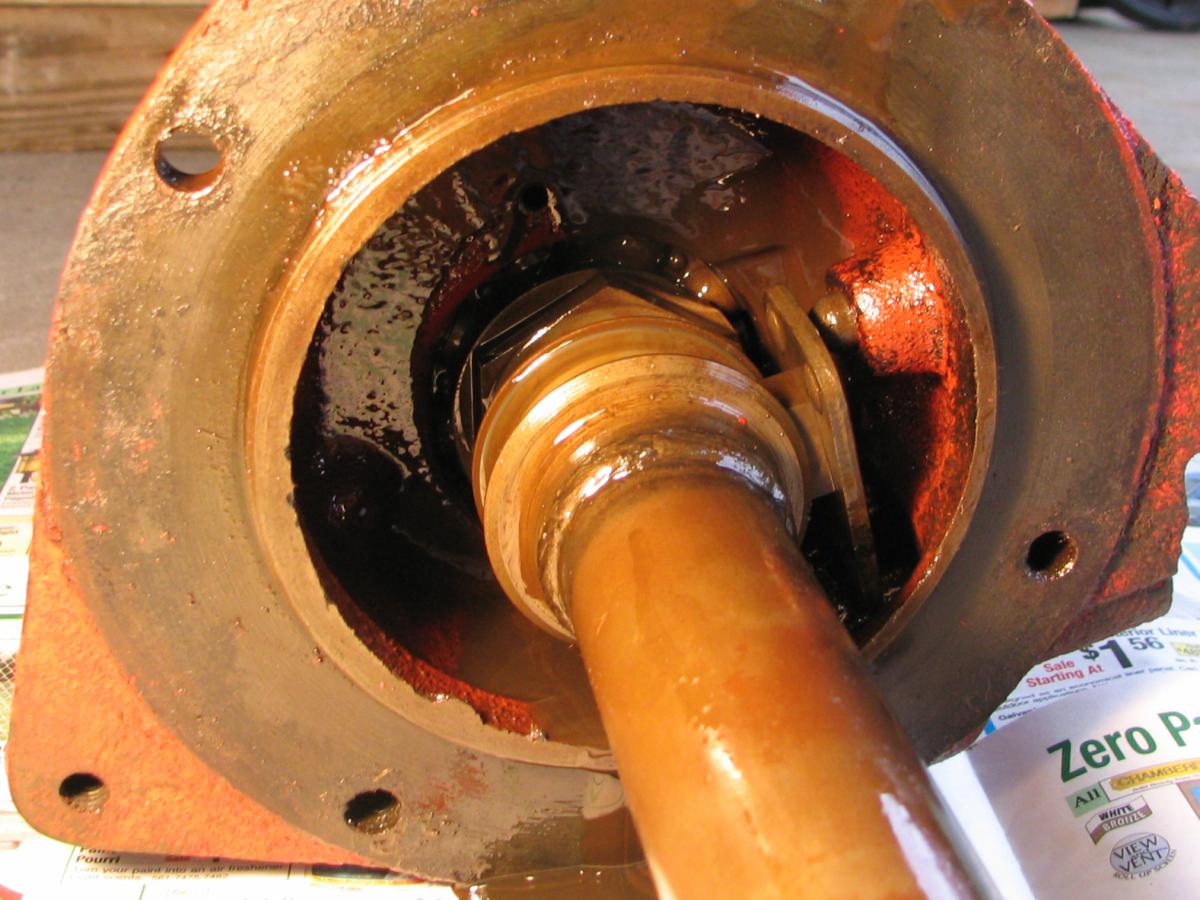
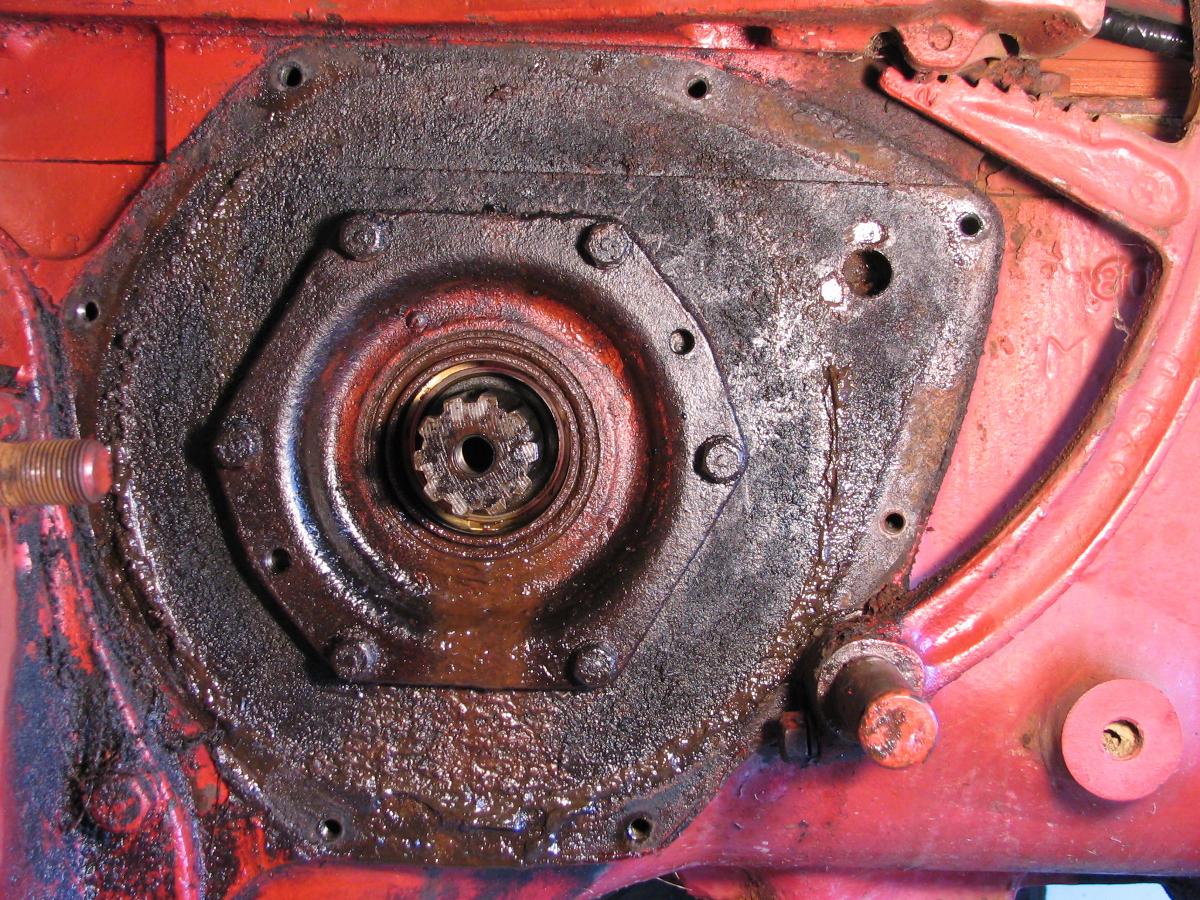
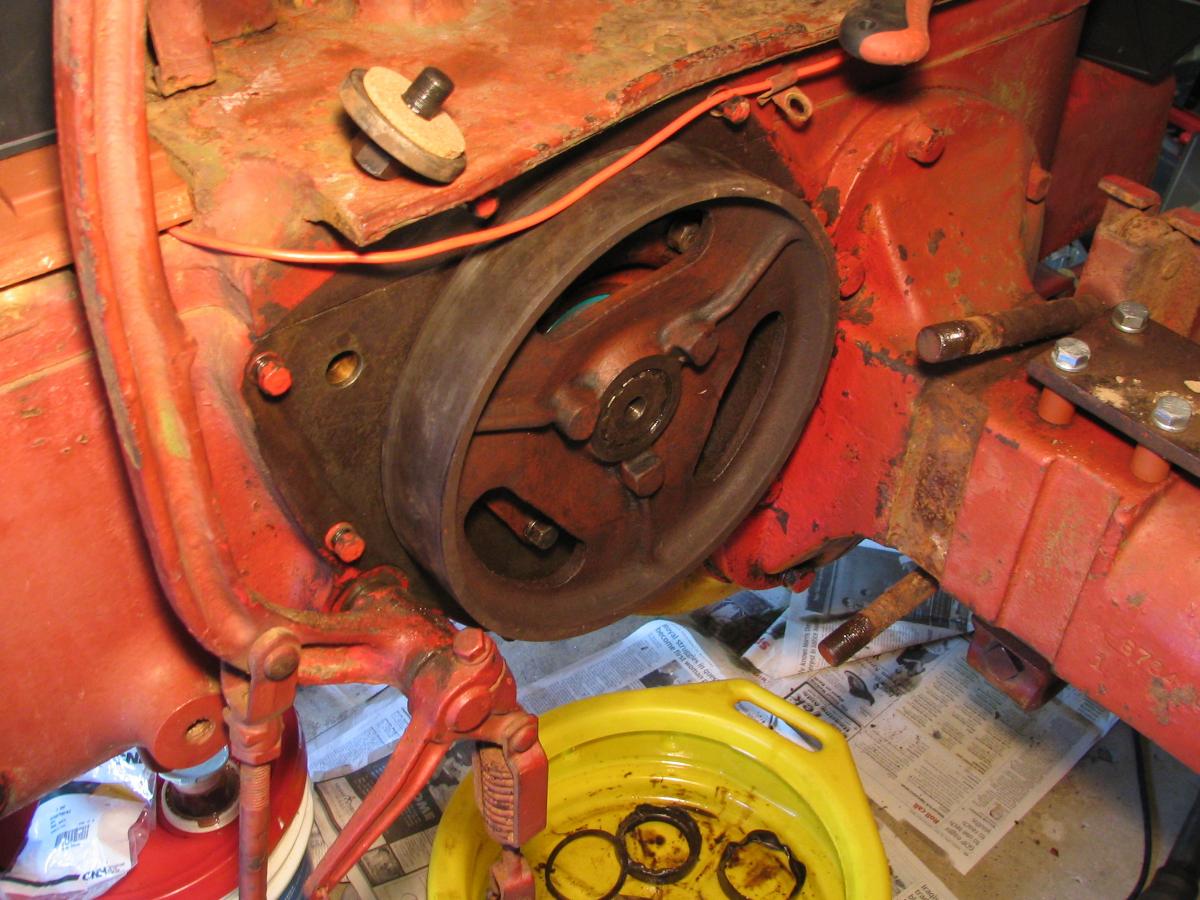
Looking
into the PTO housing, I could see that the shifter linkage did in fact
move,
but not far enough: Pulling up on the external shifter lever
rotated
the internal shifter arm, but not all the way to the "engaged"
position, so the sliding PTO tube didn't go far enough forward to
engage the transmission countershaft. The external
shifter
lever only
had a range of motion of about 15 degrees, and about five of those
degrees were free play (didn't move the shifter arm at all).
I
decided those five degrees of slop meant there had to be a lot of wear
on the shaft between the external shifter lever and the internal
shifter arm, wasting a lot of its range of motion. |
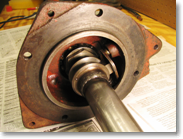 |
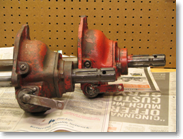
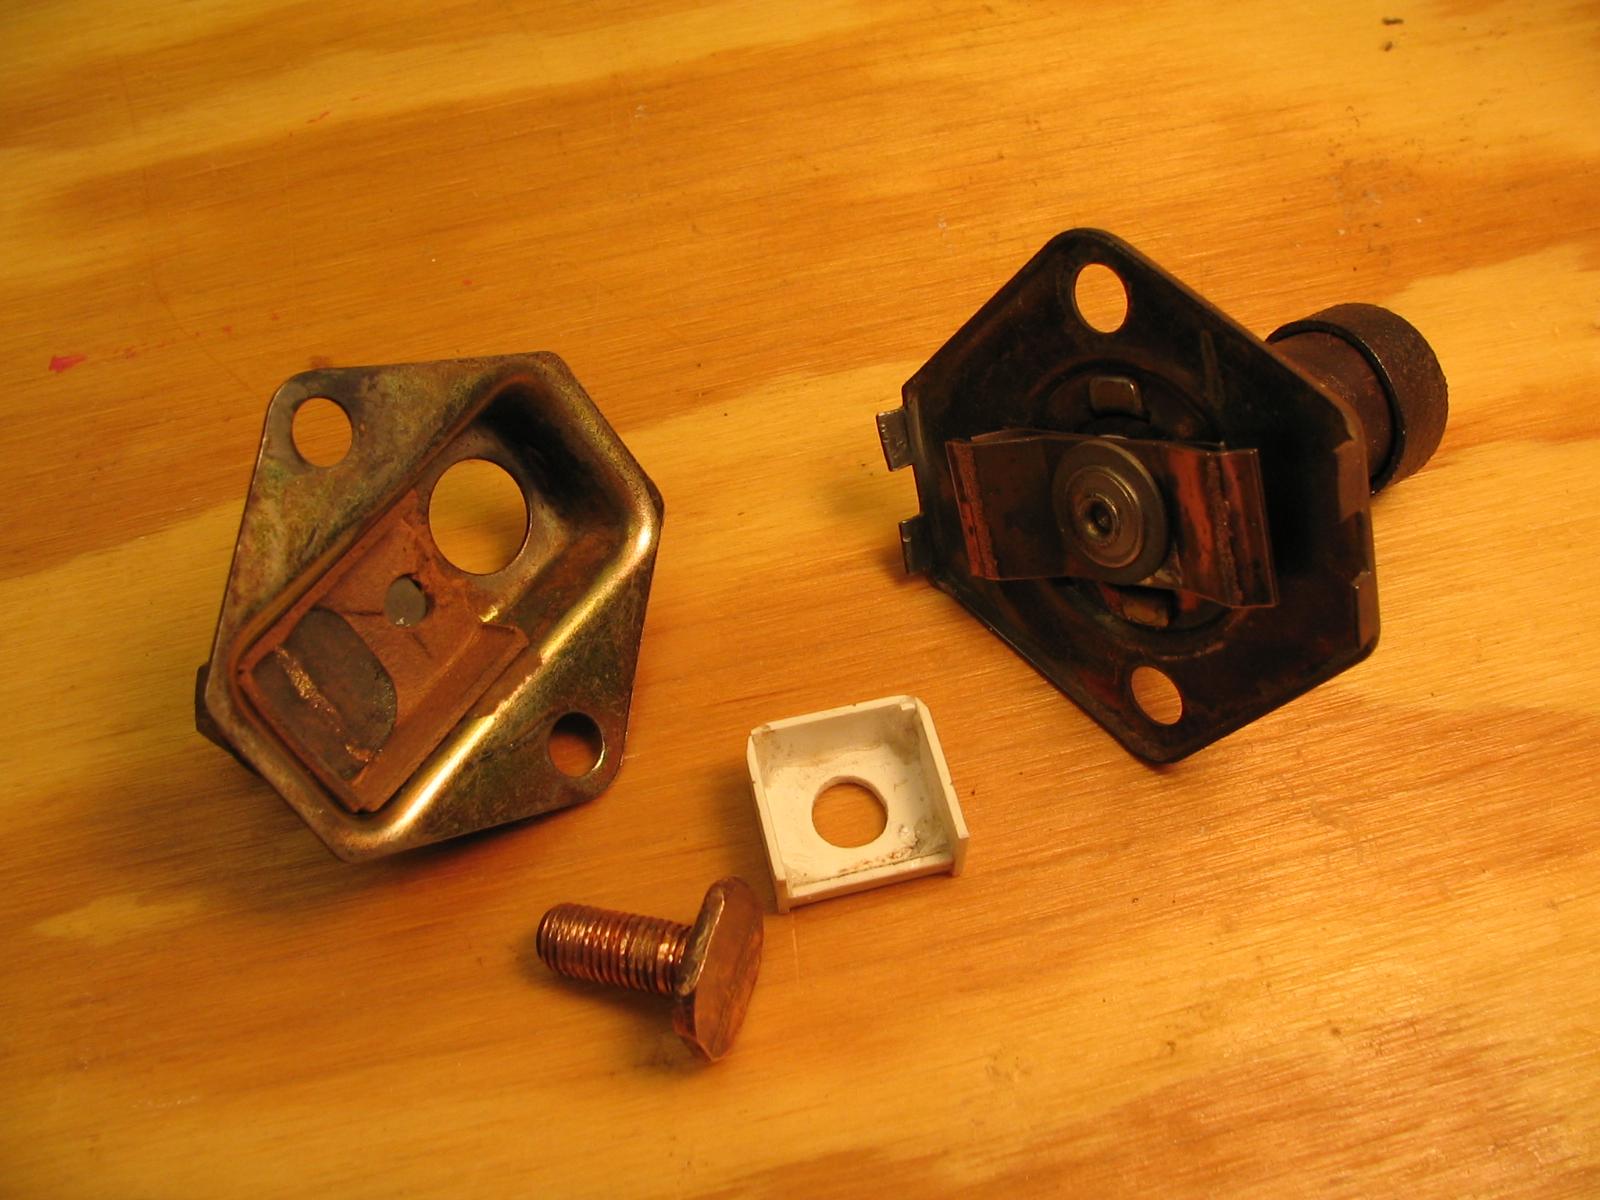
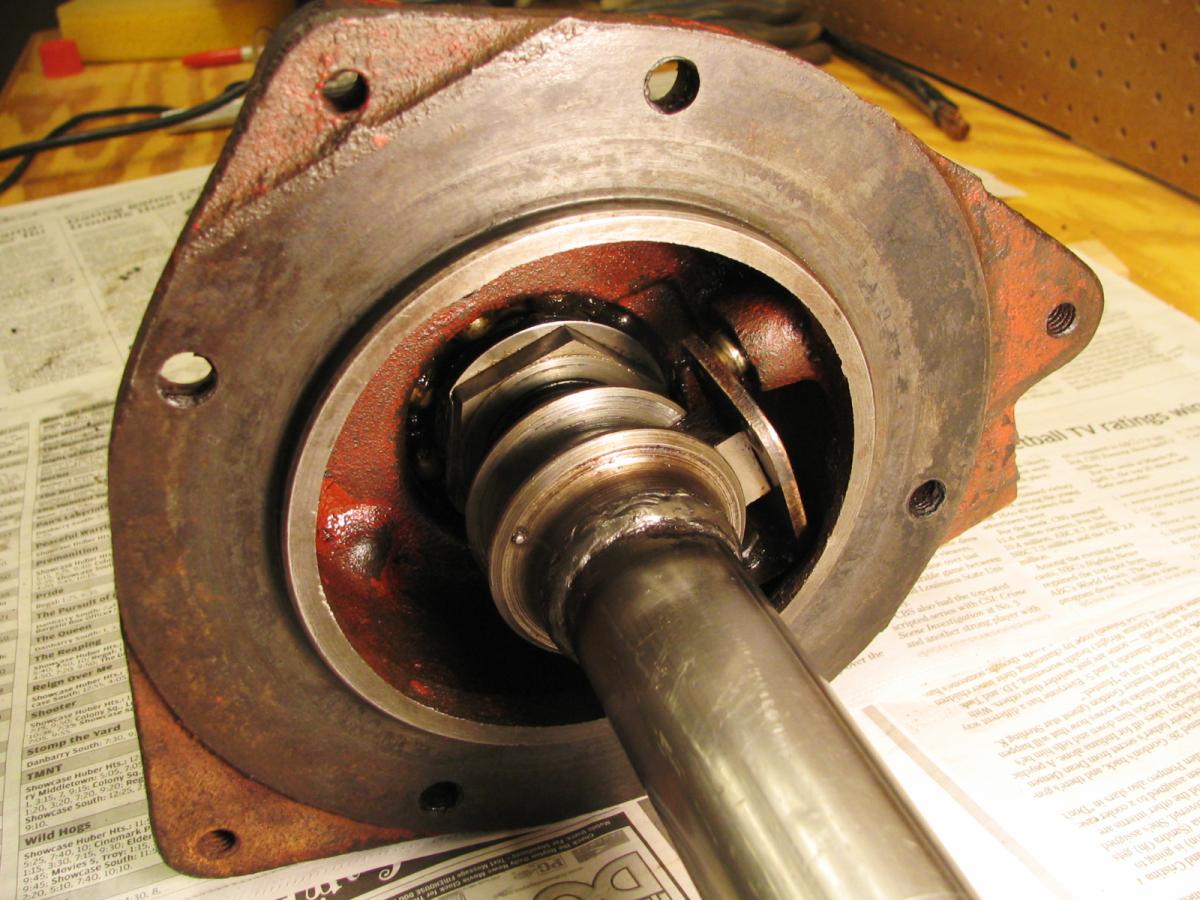
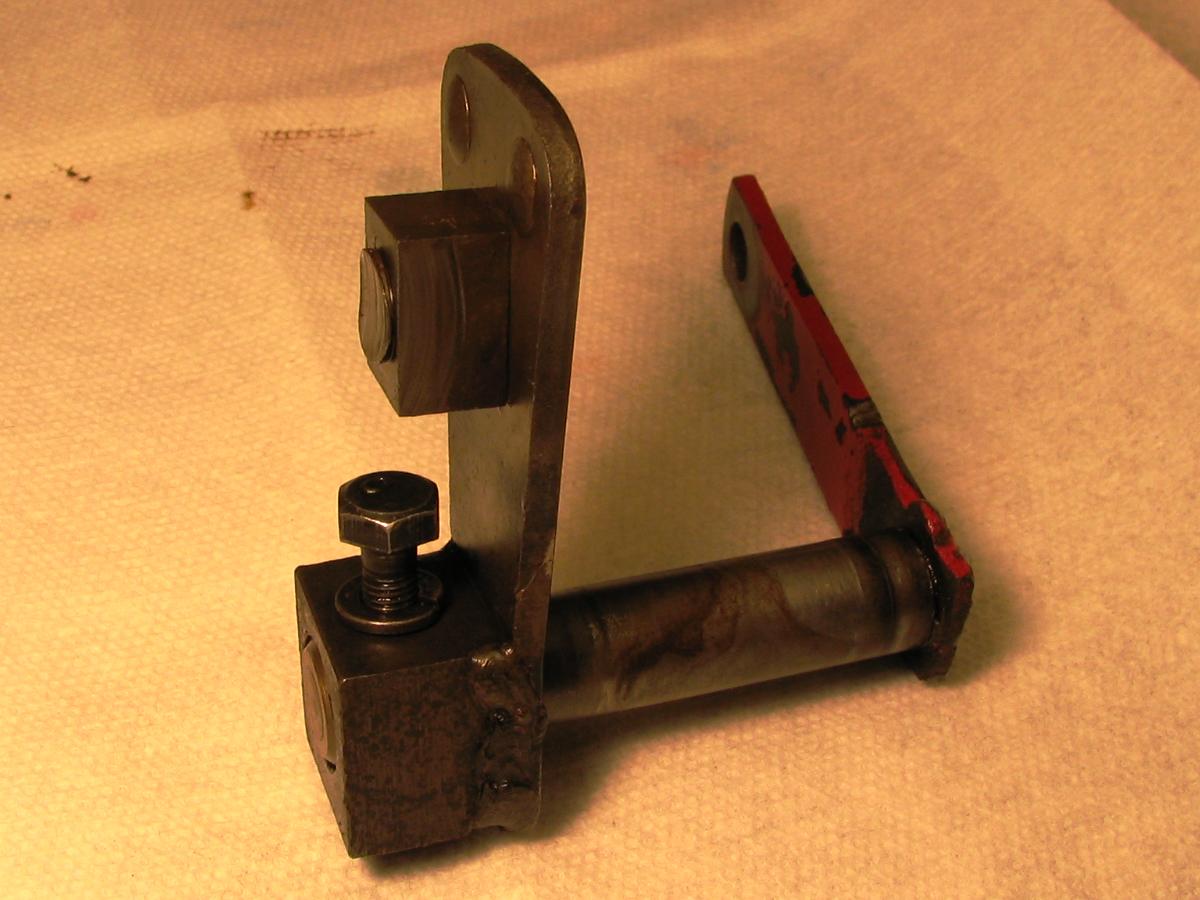
I wasn't sure I had
the skill to fix worn-out steel components, so I made another
trip to Anderson's
and picked up a replacement PTO assembly. This photo shows
the
difference: With the external shifter lever all the way up,
the
internal shifter arm is all the way forward in the "engaged" position,
so the little spring-loaded bullet-shaped poppet coming in from the
right side has snapped into the rear detent on the shifter arm.
In the photo above, of the original PTO assembly, the shifter
arm
isn't far enough forward for the rear detent to have reached the poppet. |
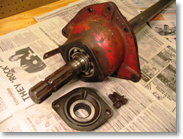 |
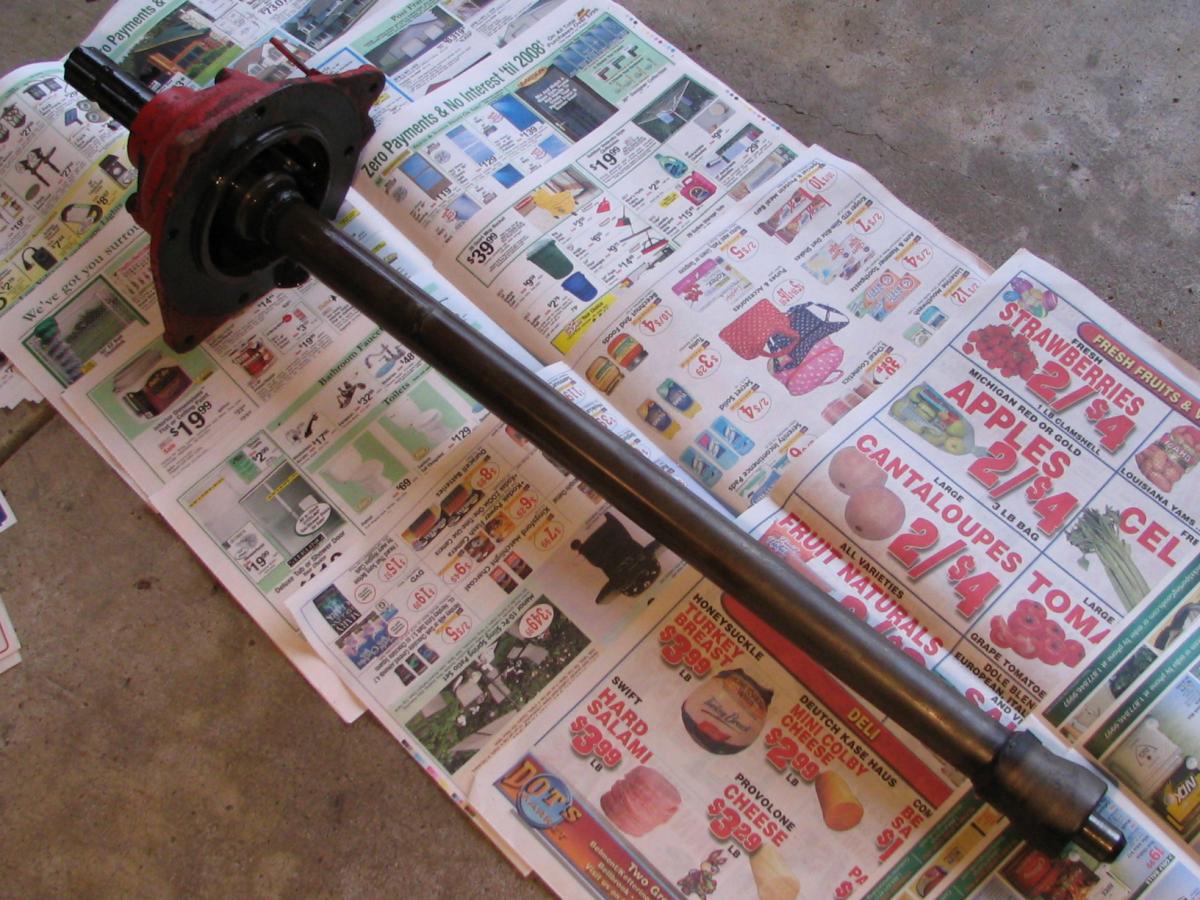
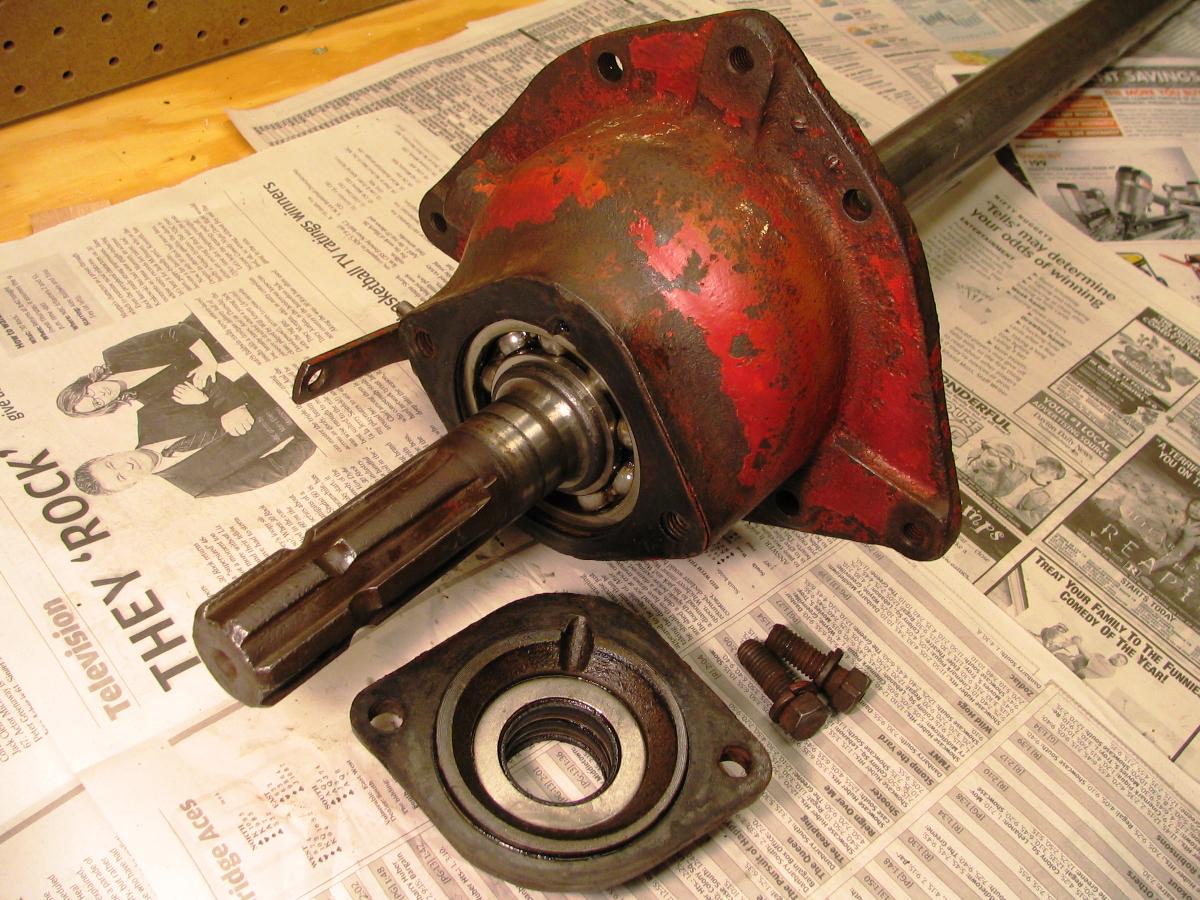
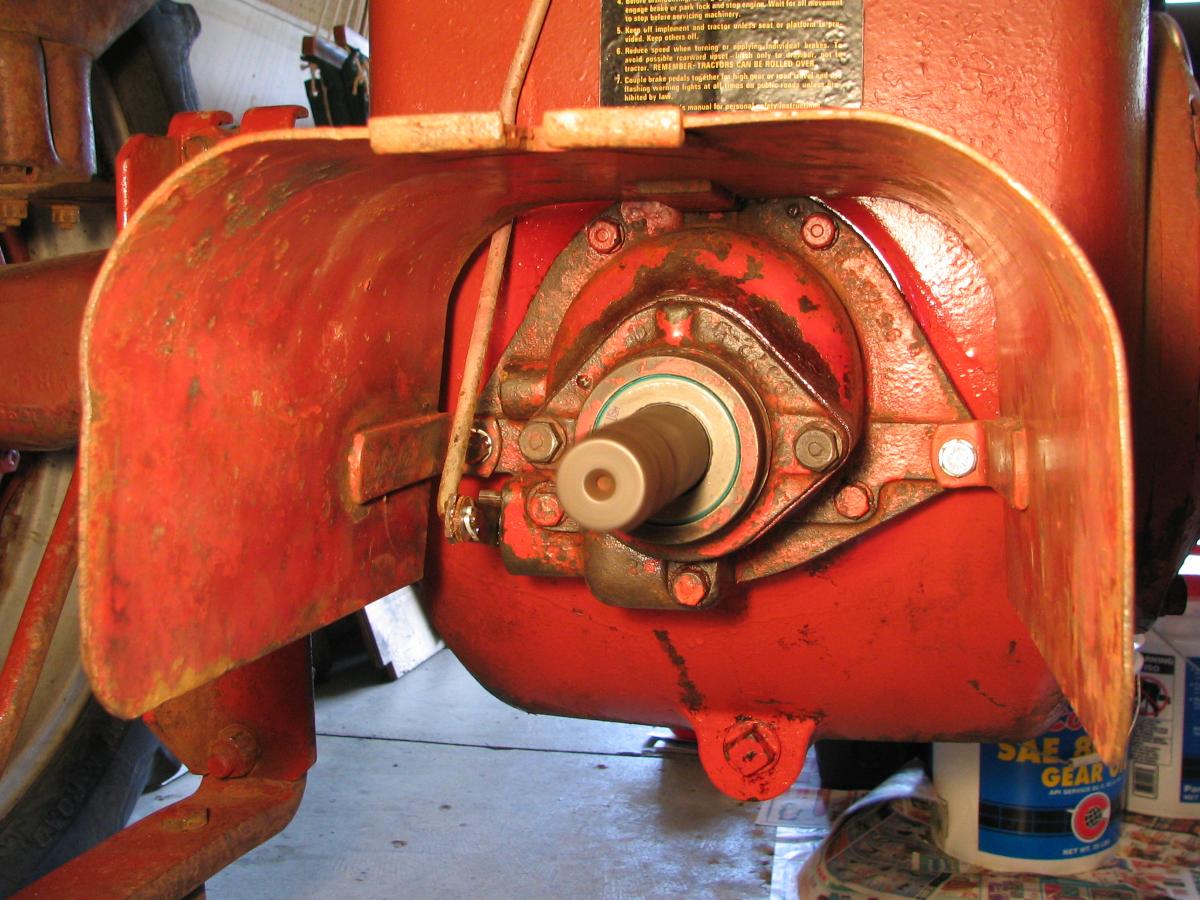
The
end of the PTO shaft on the replacement assembly is in pretty good
condition and the bearing looks fine. I had the local Case/IH
dealer replace the oil seals
on general principle... the original PTO had leaked a little bit of oil
there, which turns into a big mess surprisingly quickly. I
don't
know if this one would have leaked or not, but replacing the seals and
gasket while I had it out of the tractor seemed like pretty
easy insurance. |
|
Meanwhile, I wanted to see if I could get the
shifter linkage out of the original assembly, to at
least look at the parts which were worn out and to see
what might still be worthwhile to take to a swapmeet.
There's only one bolt that needs to be removed in order
to get the shifter parts out of there, but removing that
bolt took some trial and error--it's a bit too long to
come out without bumping into the underside of the cam
on the shifter arm, and the collar on the sliding PTO
tube is in the way. I eventually got it out by randomly
wiggling and pulling and shaking. (Getting it back
together later tested my patience and vocabularly, but I
felt like the king of the world when it finally dropped
back into place).
With the
linkage parts out where I could see them, there was very
little visible wear. The shifter arm is fastened to
the
shifter lever shaft by the above-mentioned bolt. The bolt
itself
wasn't worn out of shape, and the hole in the shaft through
which
the bolt passes wasn't distorted into an oval. It
all fit
together fairly snugly with only a little bit of slop
(the
five degrees or so of wiggle that I'd noticed earlier), and given the
size of the bolt and the diameter of the hole it didn't seem as if
anything could
have
been much different when it was new. So I checked
the
shifter lever on the other PTO assembly, and sure enough it
has four degrees of free play. So why didn't the
original one work?
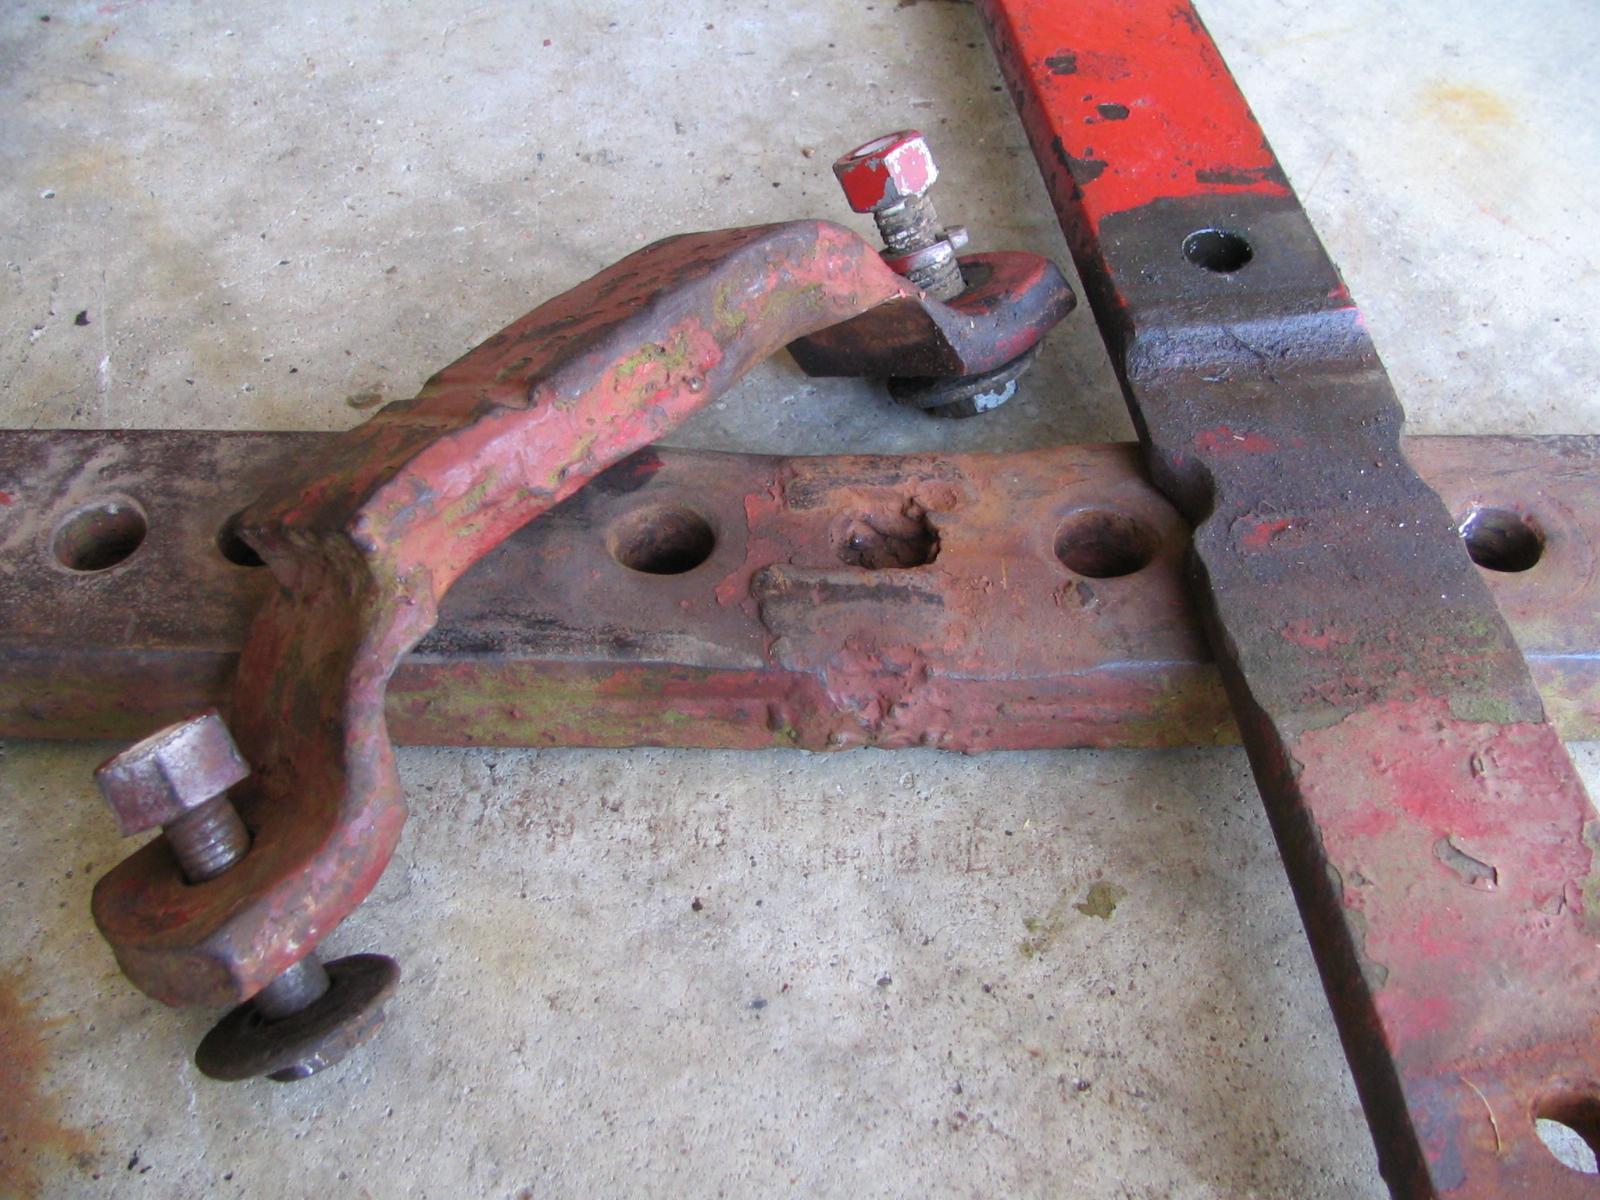
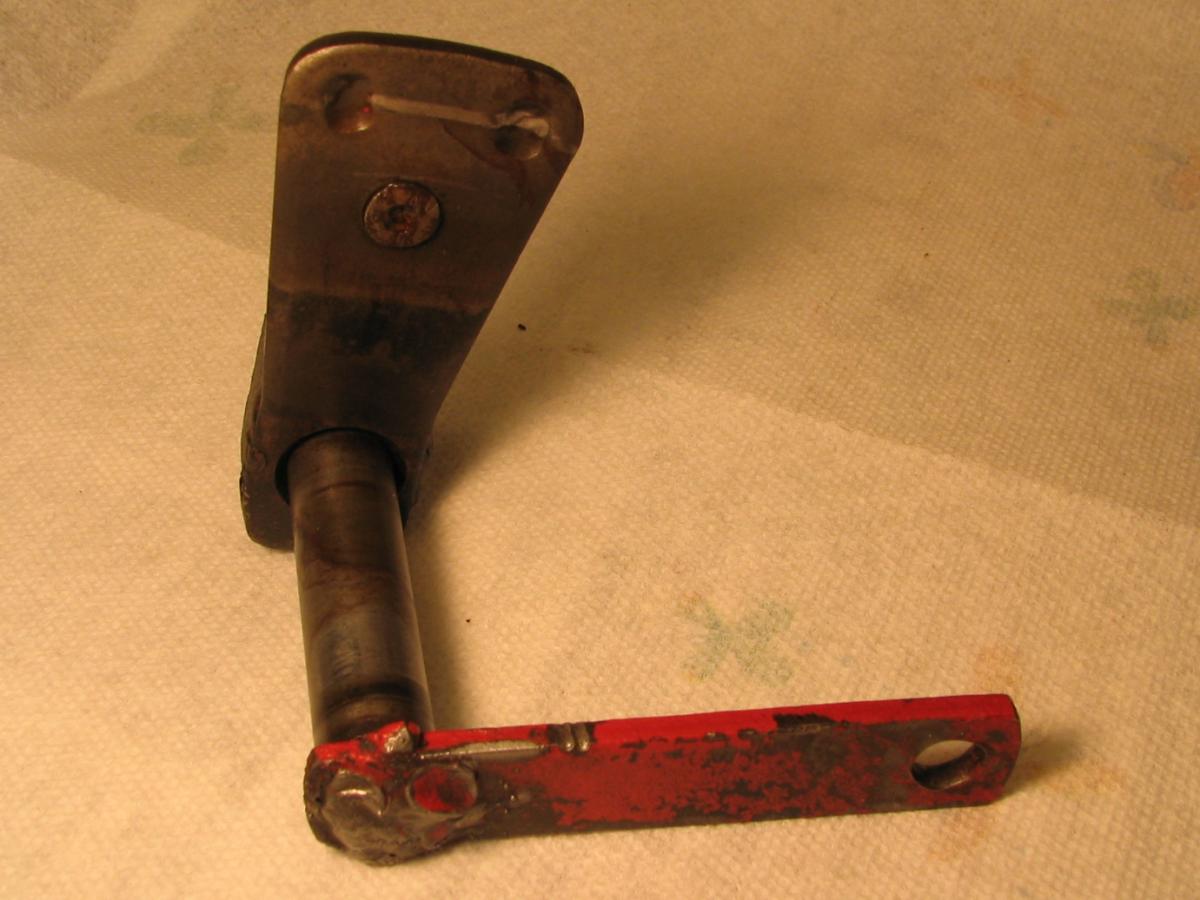
After
scratching my head for a while, I finally noticed the obvious
problem: The shifter lever had been broken and re-welded to
the
shaft at some point, but at the wrong angle. In the picture
on
the right, above, you can see the weld and the angle at which the
shifter arm is leaning to the right. With the shifter lever
horizontal, that arm ought to be vertical. Since the arm is
leaning back, it can't come far enough forward to mesh the sliding PTO
tube with the transmission countershaft before the shifter lever hits
the stop. |
 |
 |
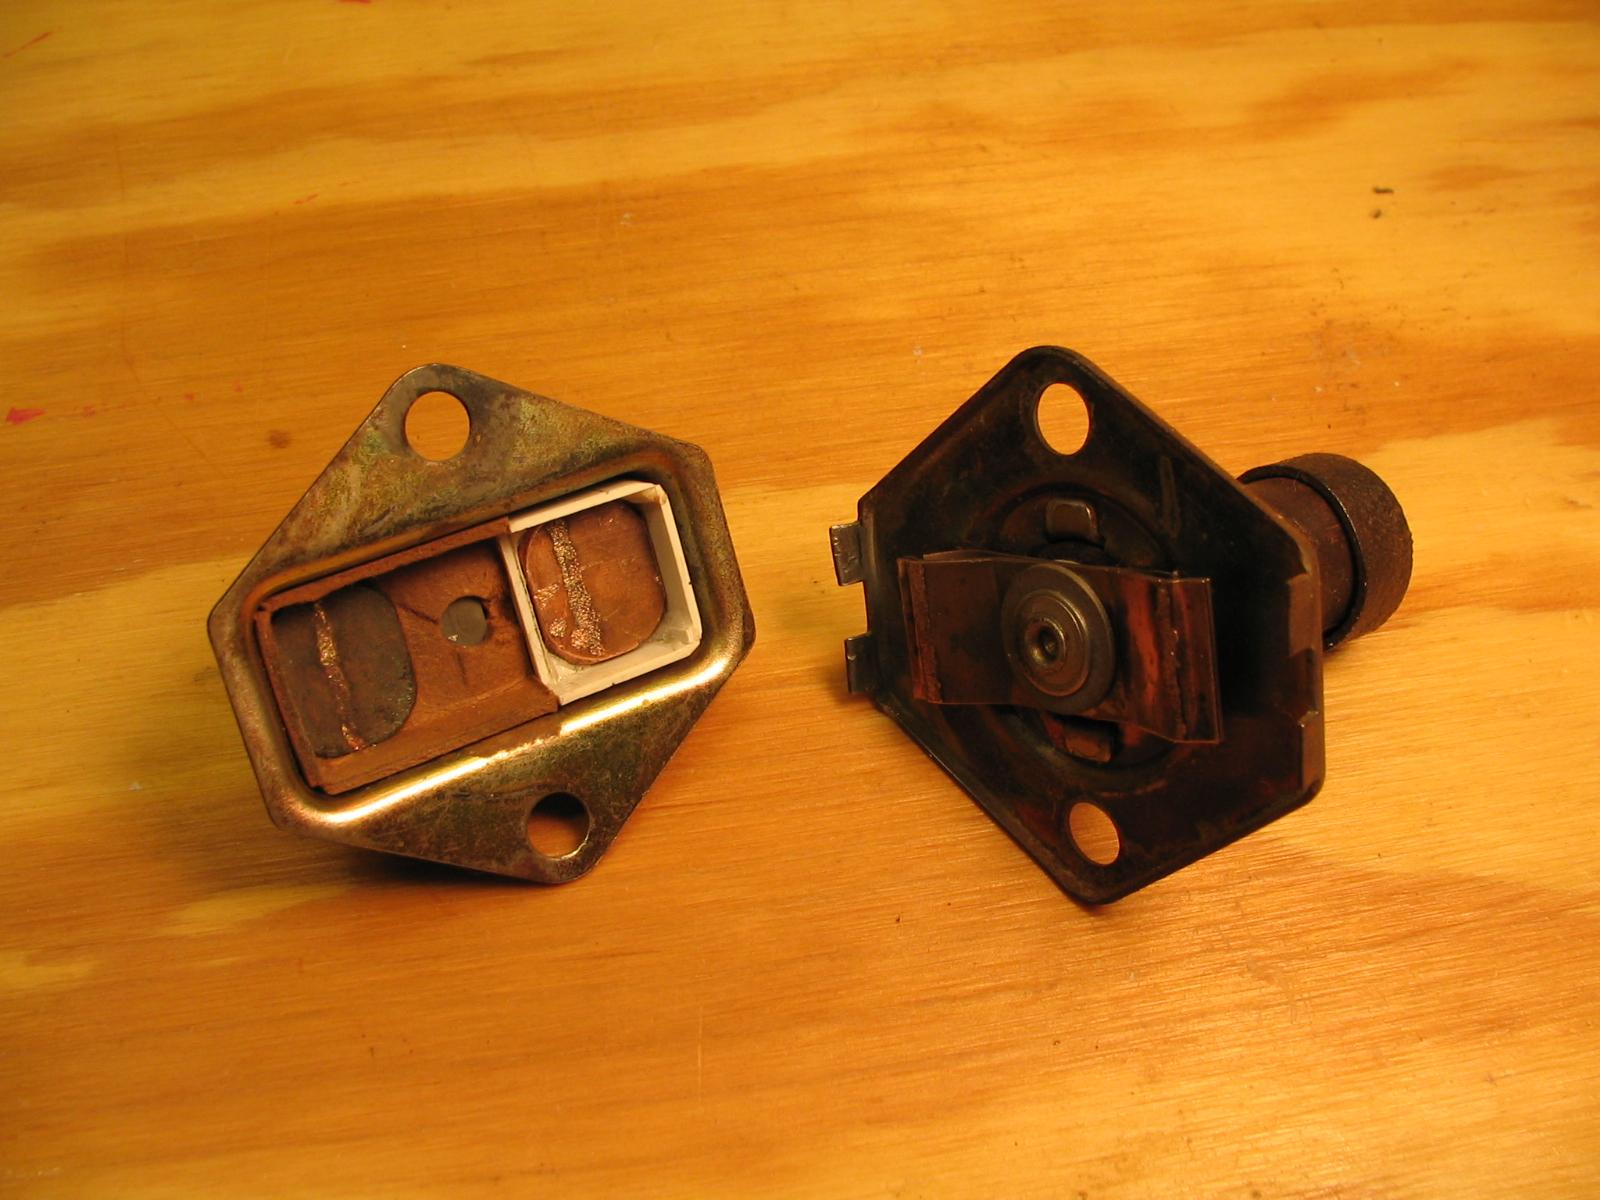
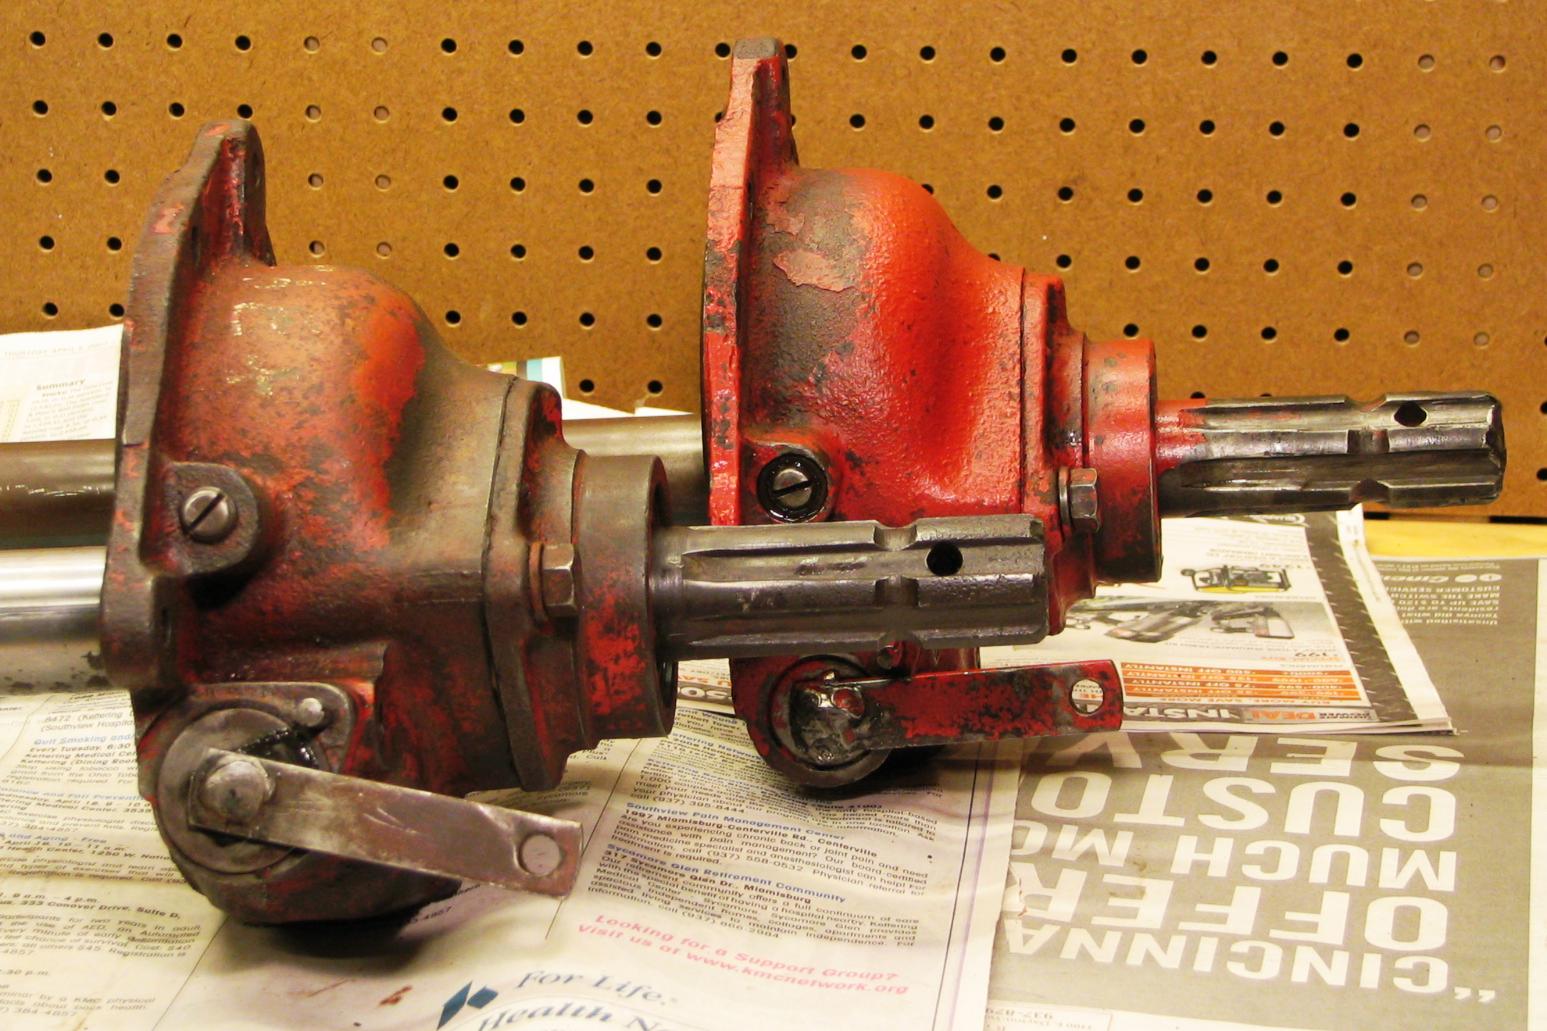
This
picture of the replacement PTO assembly in front
of the
original one shows the problem. Both are in the "disengaged"
position, with the shifter levers down as far as they will go.
The lever in front can rotate almost 30 degrees
counter-clockwise before it hits the stop, but the one in back is
already halfway "up" so it only has half that range of motion left.
I
put the replacement PTO on my tractor, but still need to figure out
what to do with the old one. Cutting a little notch in
the shifter lever, so it can rotate farther before it hits the stop,
seems like it'd work but it'd be kind of a hack job. Better
to
really fix the angle at which the lever is welded to the shaft, but
that's beyond my skill and equipment. Might put a tag on it
explaining what's wrong and bring it to the
swapmeet at
Portland... |
|
|
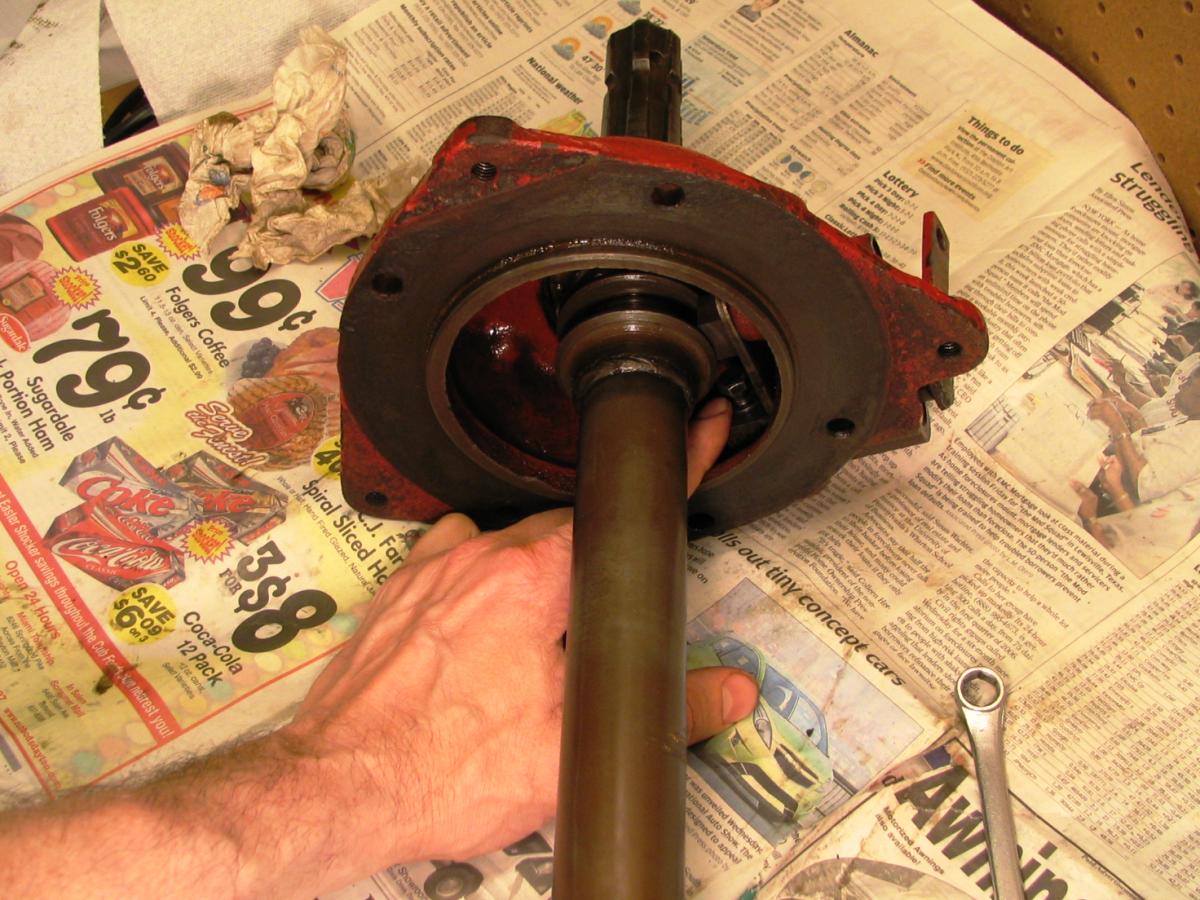
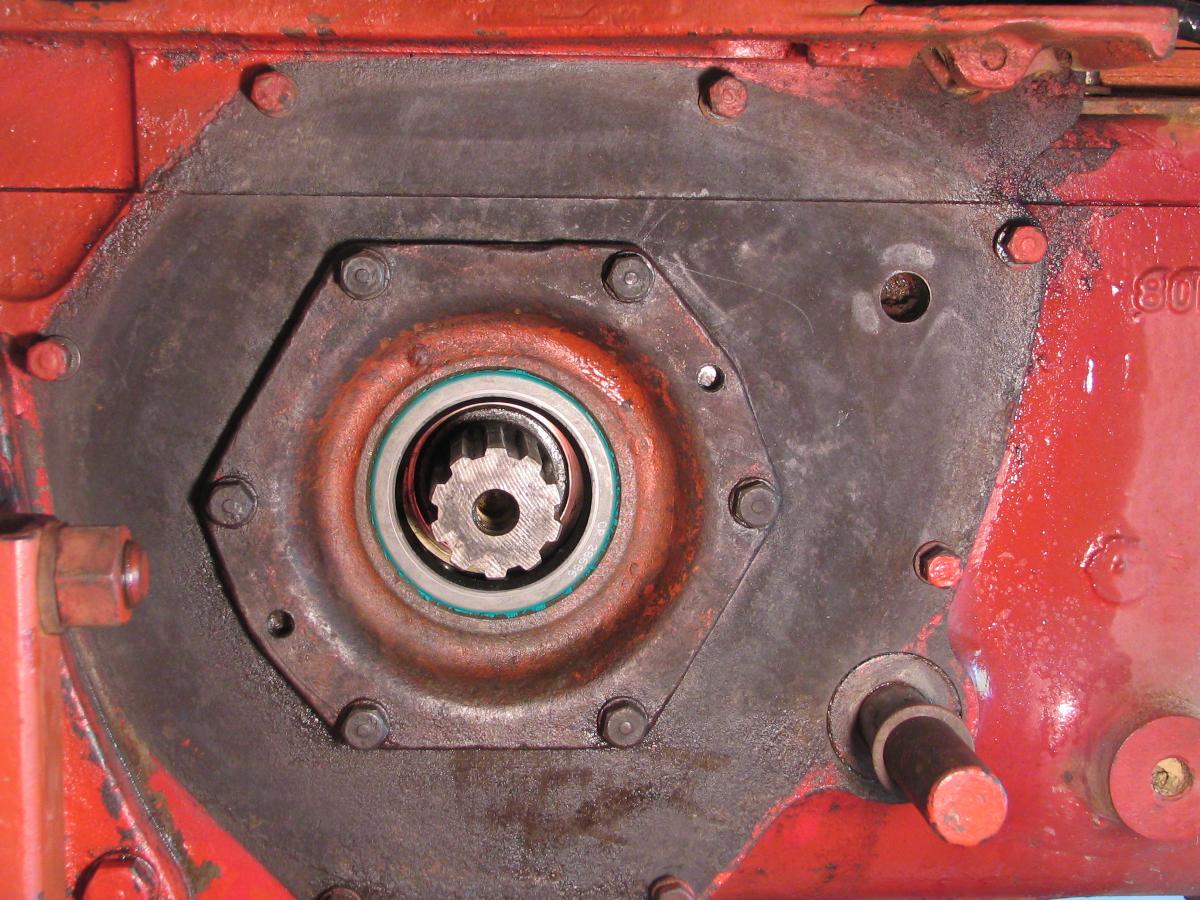
I used an old putty
knife to slowly scrape the old gasket off the
mounting flange on the rear of the transmission case, then sprayed on
some gasket sealant. The inside face of the PTO housing got
some
also, and both sides of the new gasket, then it was time to
put it
all back together. That PTO assembly feels pretty heavy when
95%
of the shaft is wobbling around inside the tractor and all you have to
hold onto is the housing and outside end of the shaft, but it's great
when it fits into place. With everything reassembled and the
transmission case refilled with oil, I gave the PTO a test run in the
garage and it all looks good. I'll watch to see if it leaks
over
time, but for now I think this job is finished. |
|
|
| |
|
|
| |
|
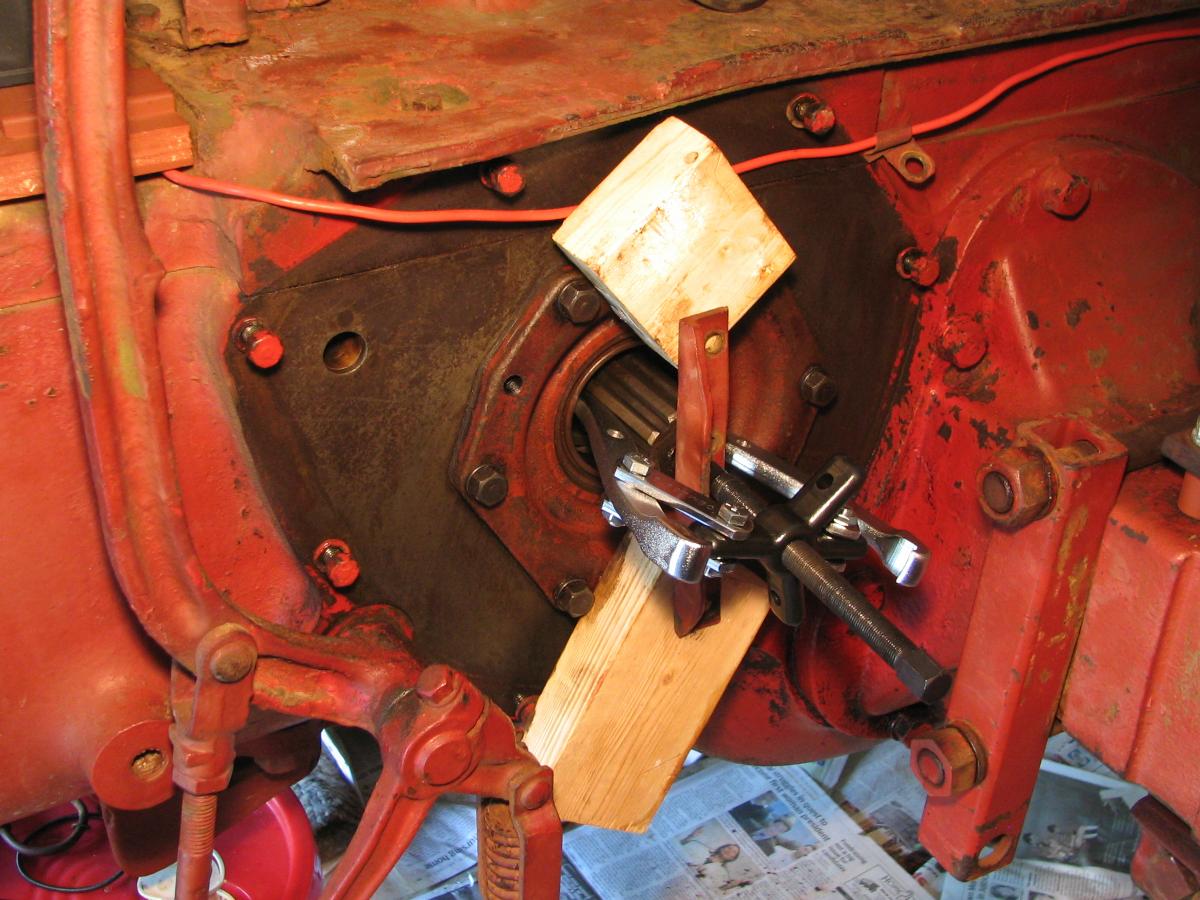
Next
job after getting the PTO back together was to clean the brakes up,
both of which were pretty gunked up with oil which had leaked past the
seals. Getting them apart was straightforward
except
for actually removing the old oil seals--I had to buy a gear puller
(which seemed like a good tool to have anyway). I used some
wood
blocks and a piece of old angle iron for the puller to push against,
since it didn't seem right to let it push hard against the brake shaft
itself. And hard is the right word--the puller bent the heck
out
of that piece of angle iron, but eventually the seals came out.
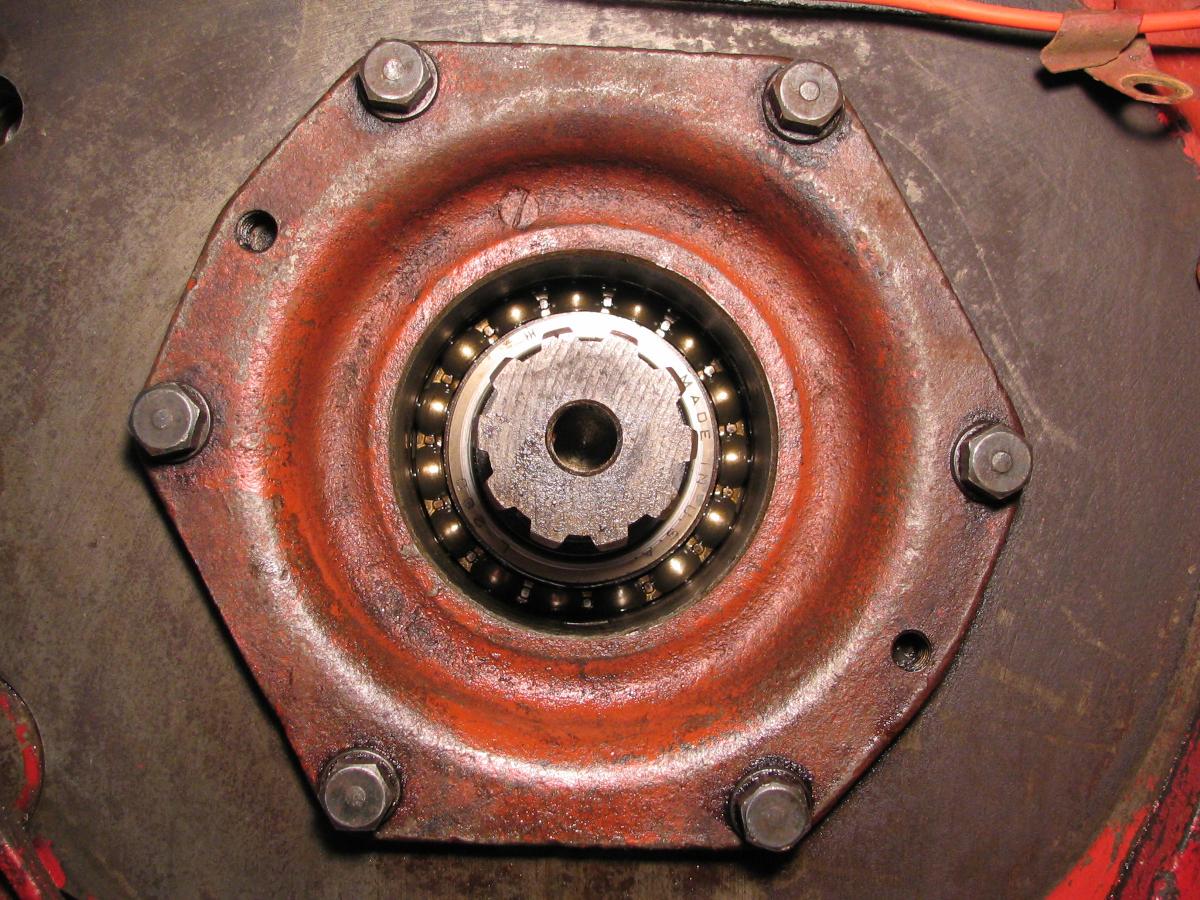
I bought new seals
from Case/IH ($17.70 each, plus
$2.50 for the little cork washers that go behind the big
bolt that
holds the brake drum onto the shaft), and carefully tapped them in
place with a hammer and block of wood. I cleaned everything
else
up using rags and a little gasoline, and a propane torch to boil some
remaining gunk out of the brake bands. Put it all back
together,
adjusted the brake linkages the way the operator's manual said to, and
they work a lot better now than before. Plus there are two
fewer
sources of oil drips on my garage floor. |
|
|
| |
|
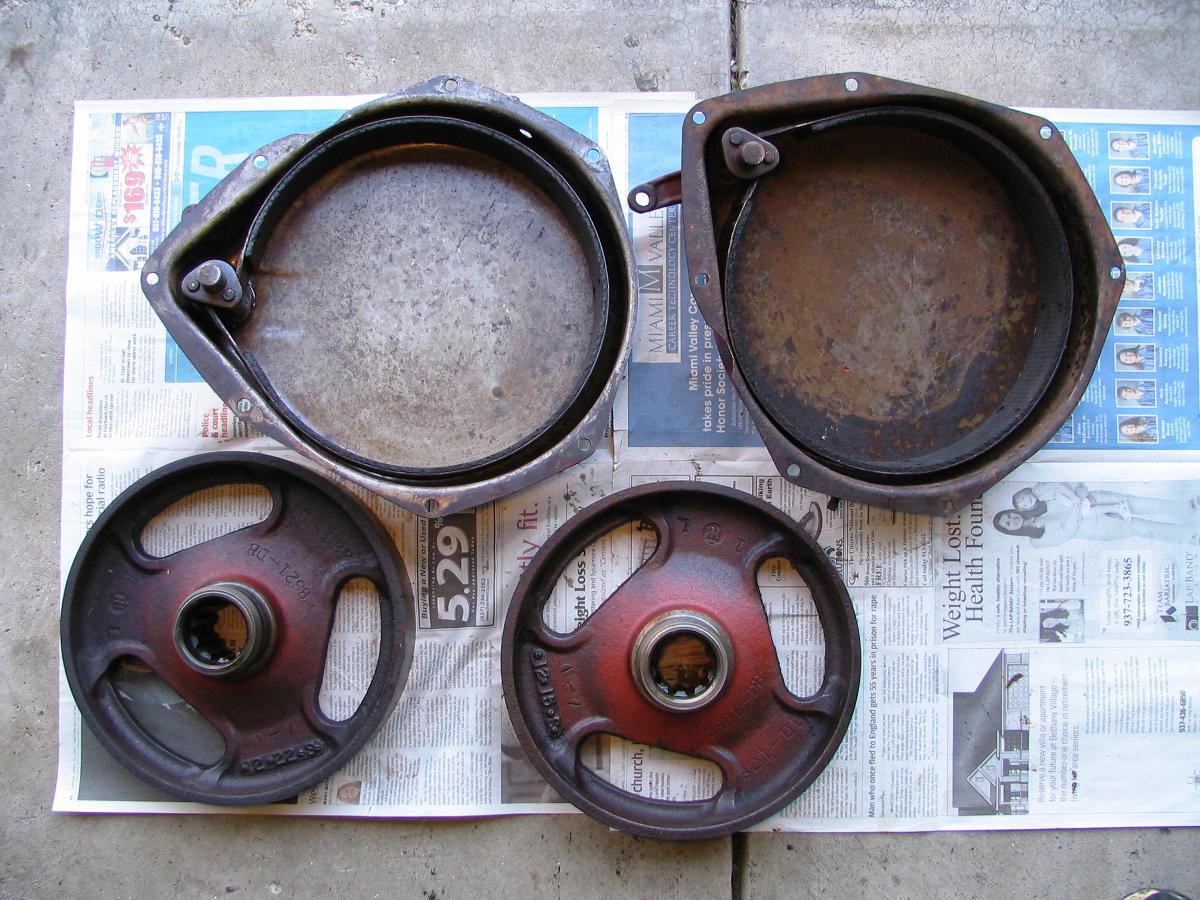
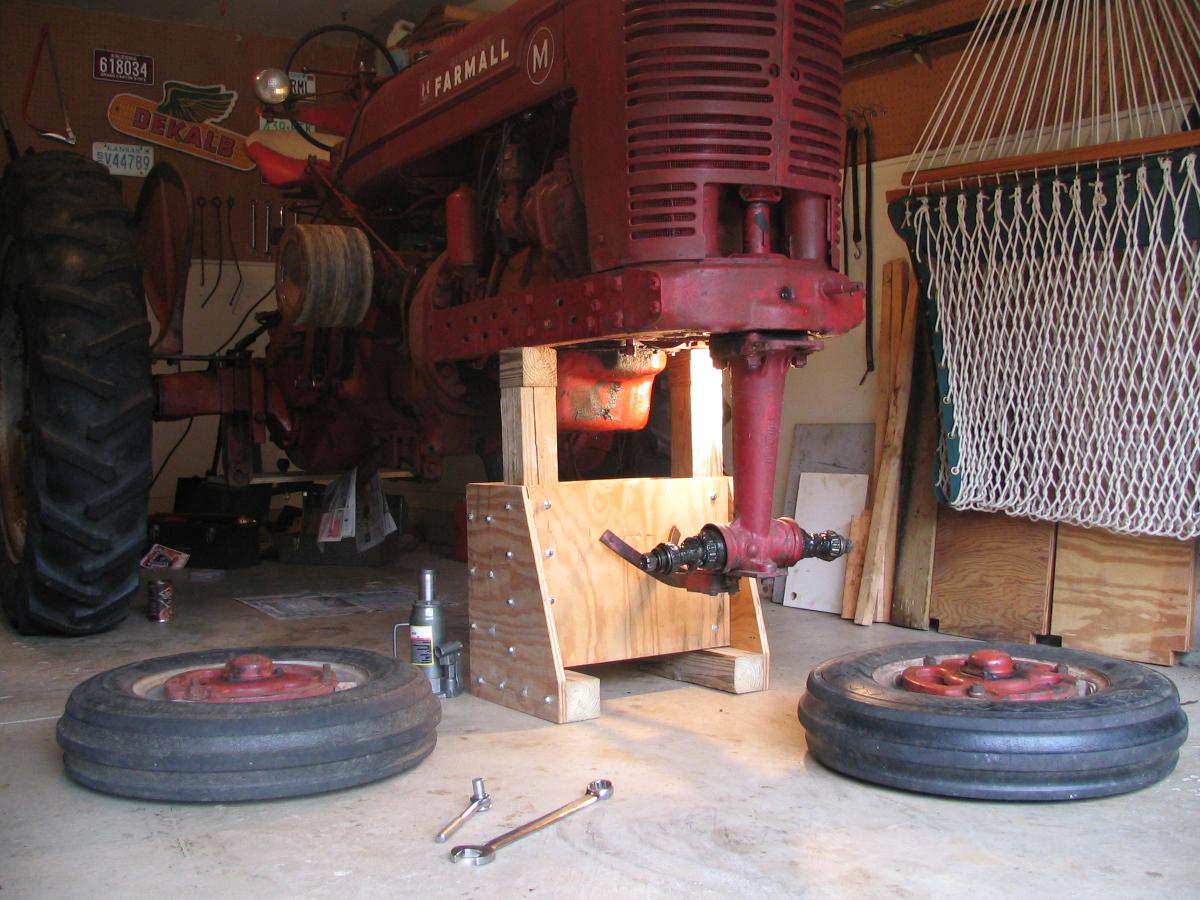
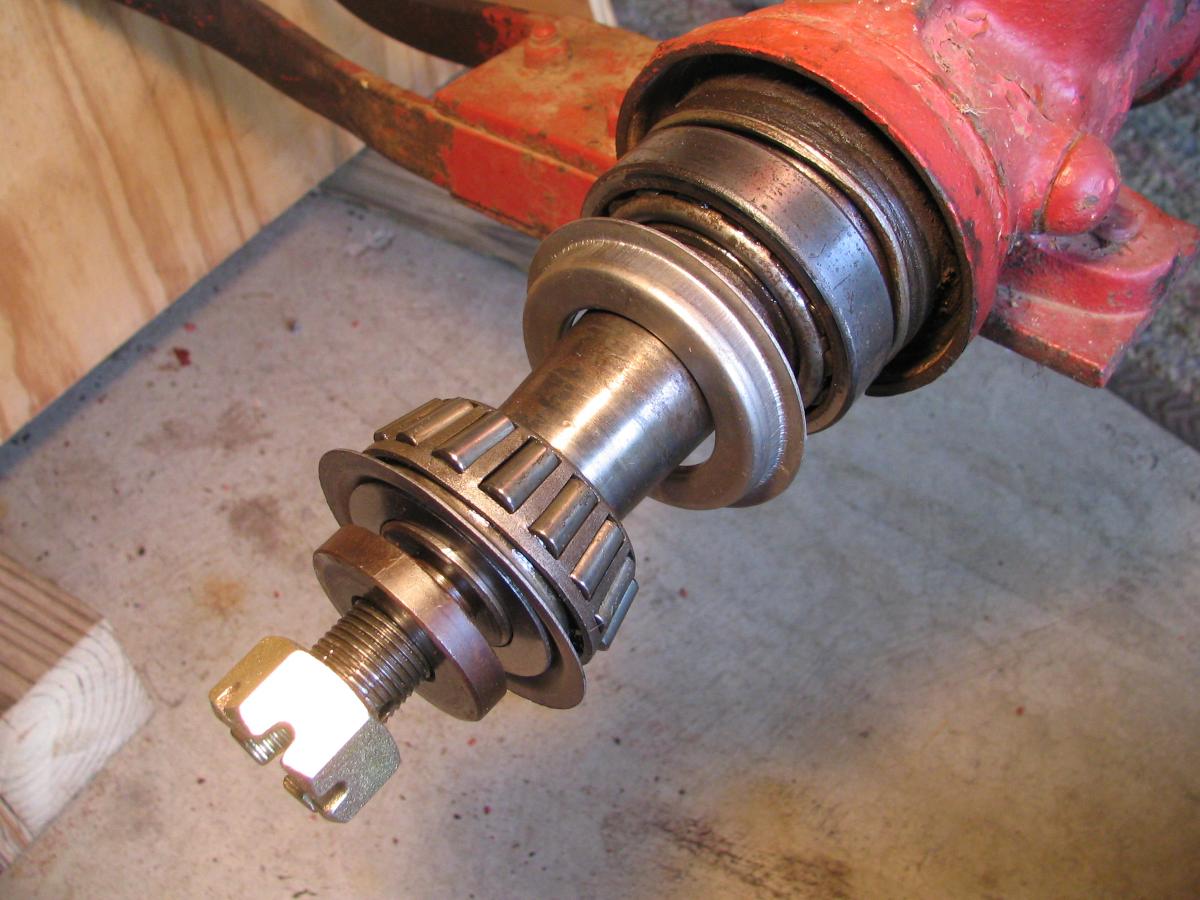
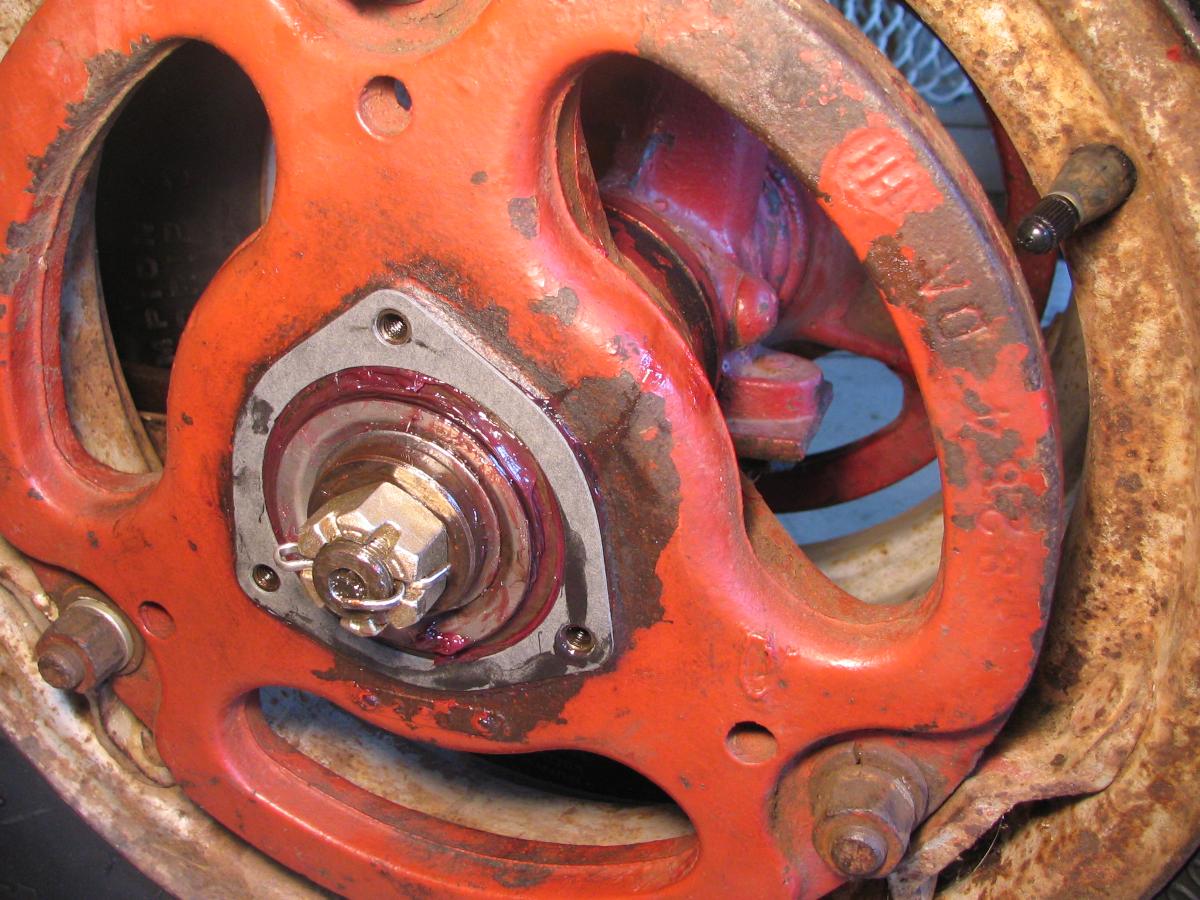
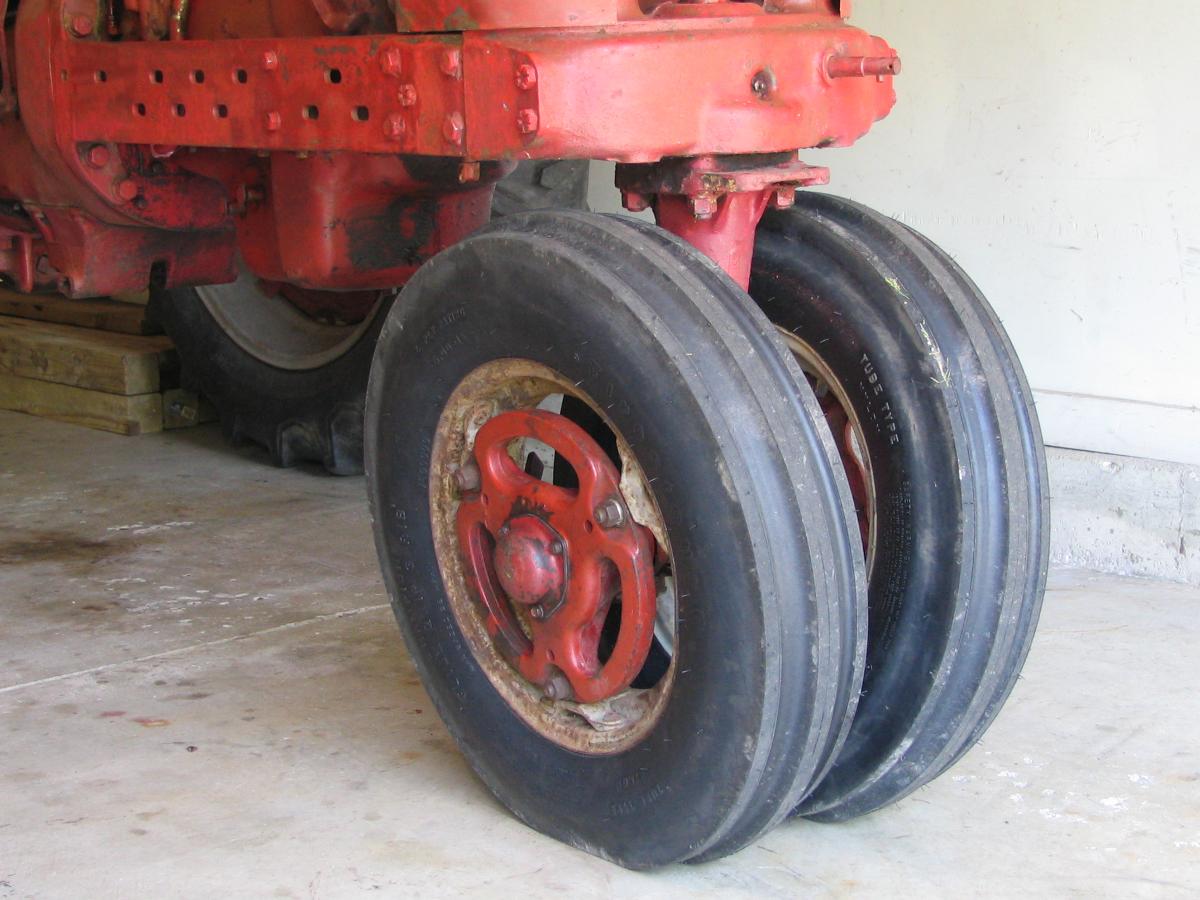
Repacking grease
in the front wheel bearings turned into a big job, like they all seem
to do. First task was to build a
stand for the front end, and
fortunately I had some salvaged 4x4s and plywood on hand.
Once I
had the wheels apart and the axles cleaned up so I could compare them
to the parts book, I realized that neither wheel had the grease
retaining seals that
are supposed to go up next to the bearings. And the castle
nut on the
right side had the threads all worn down somehow so it wouldn't tighten
up
(beats me how the threads on the inside of a nut get worn down).
But those things are all still available from the CaseIH
parts counter, so after another $46 I was ready to go. |
|
|
| |
|
|
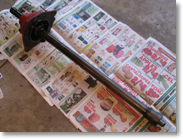
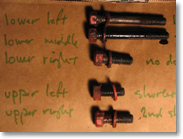
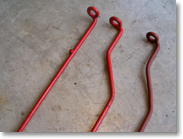
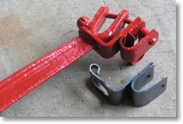
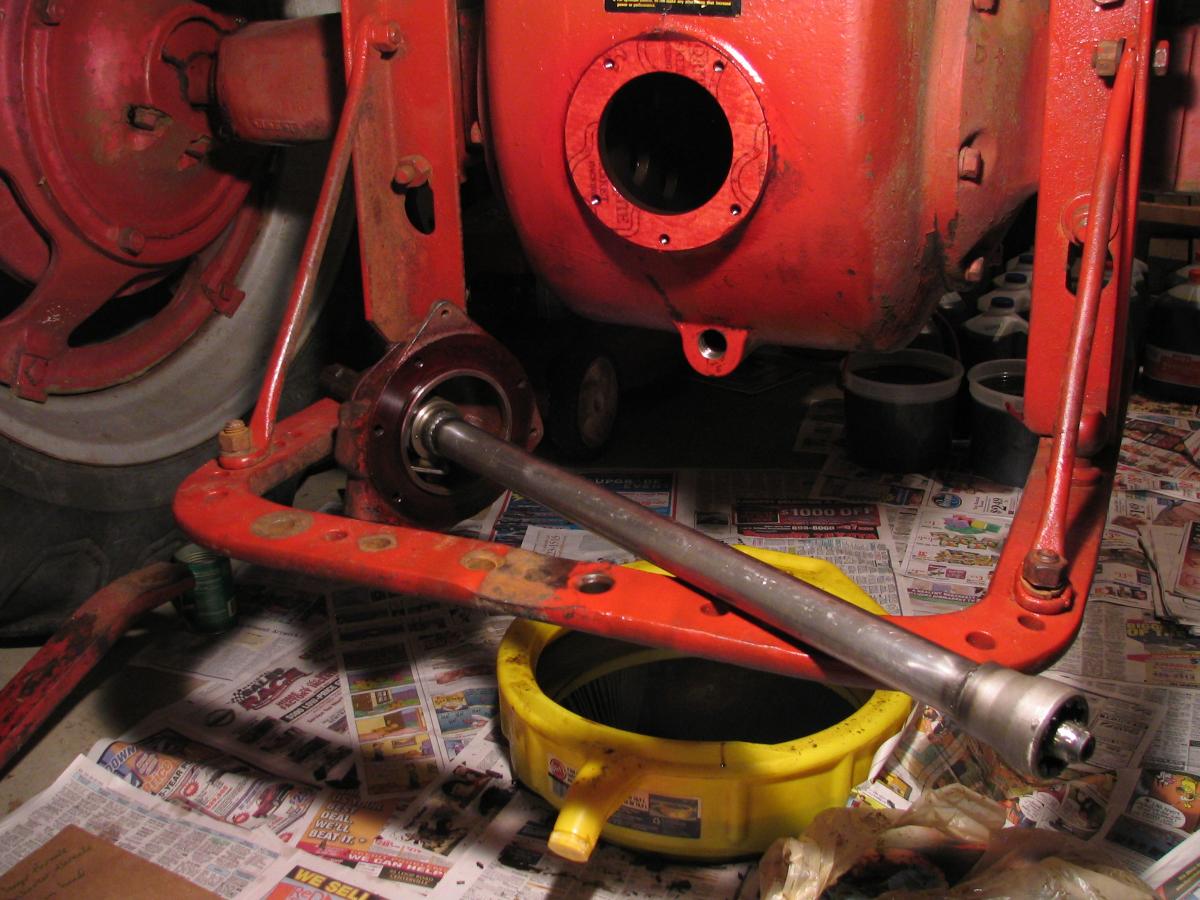
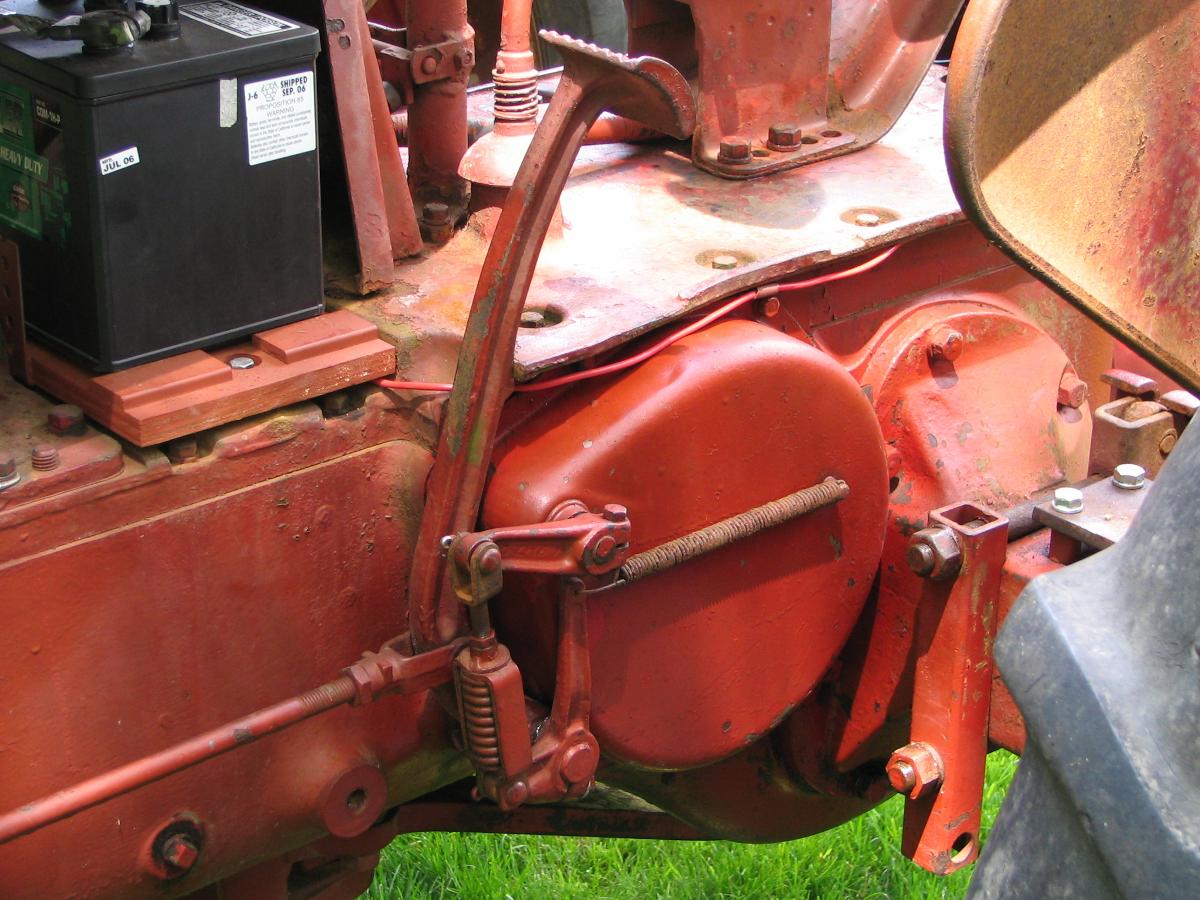
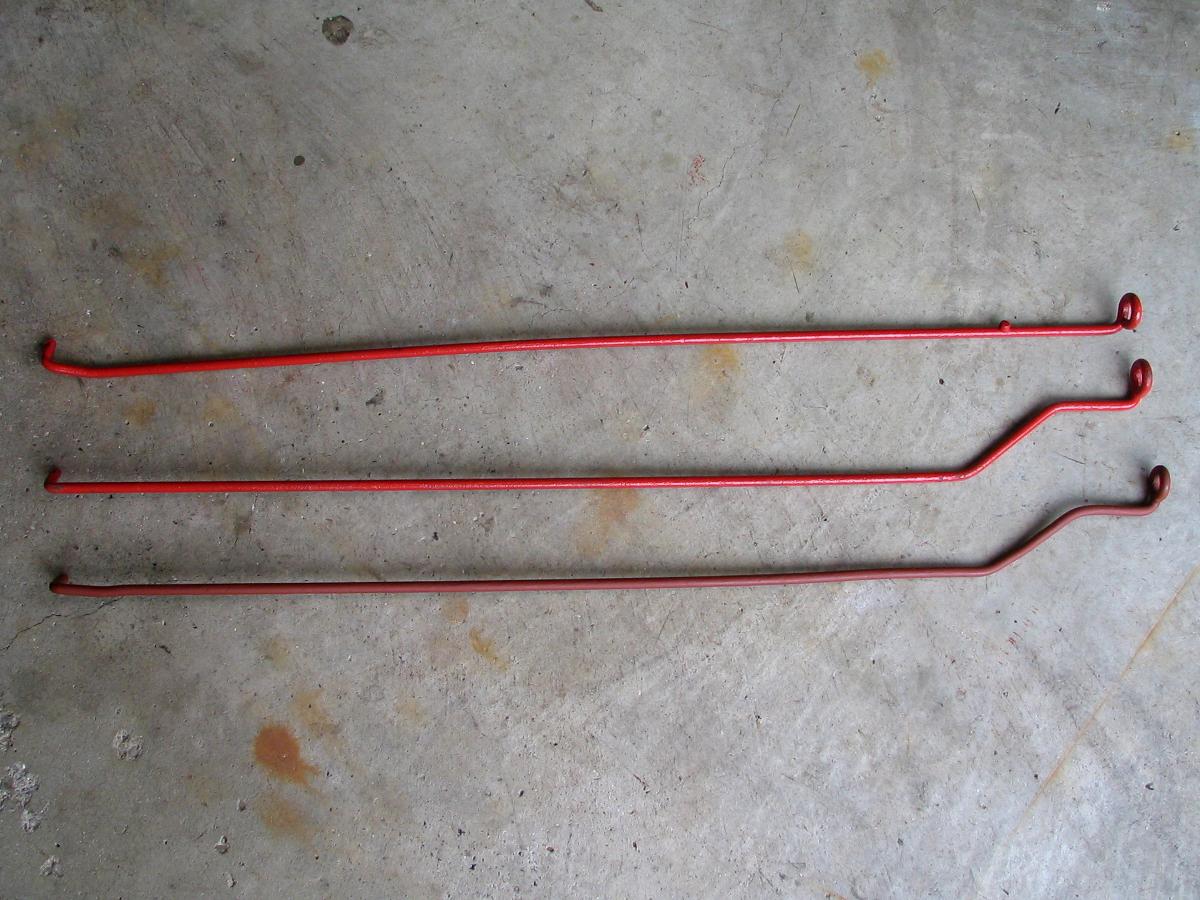
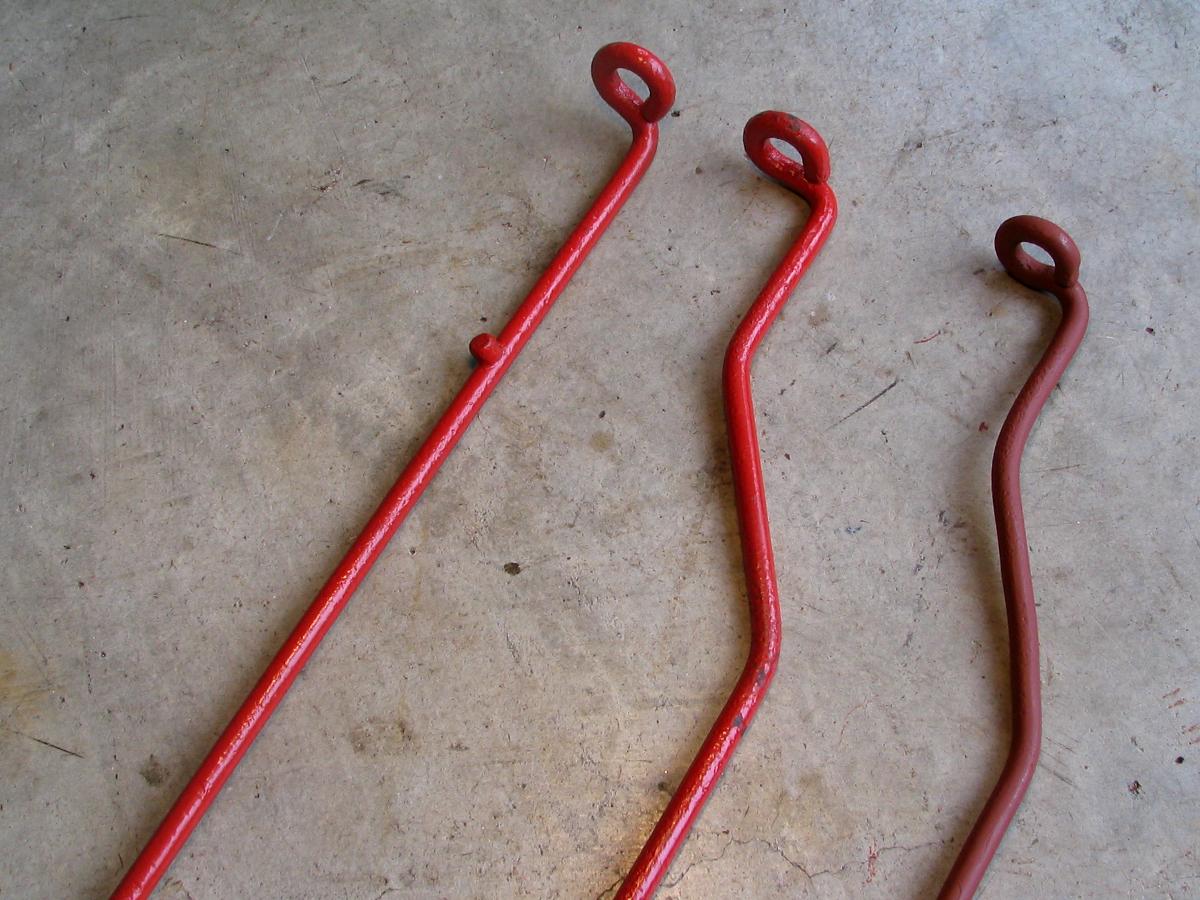
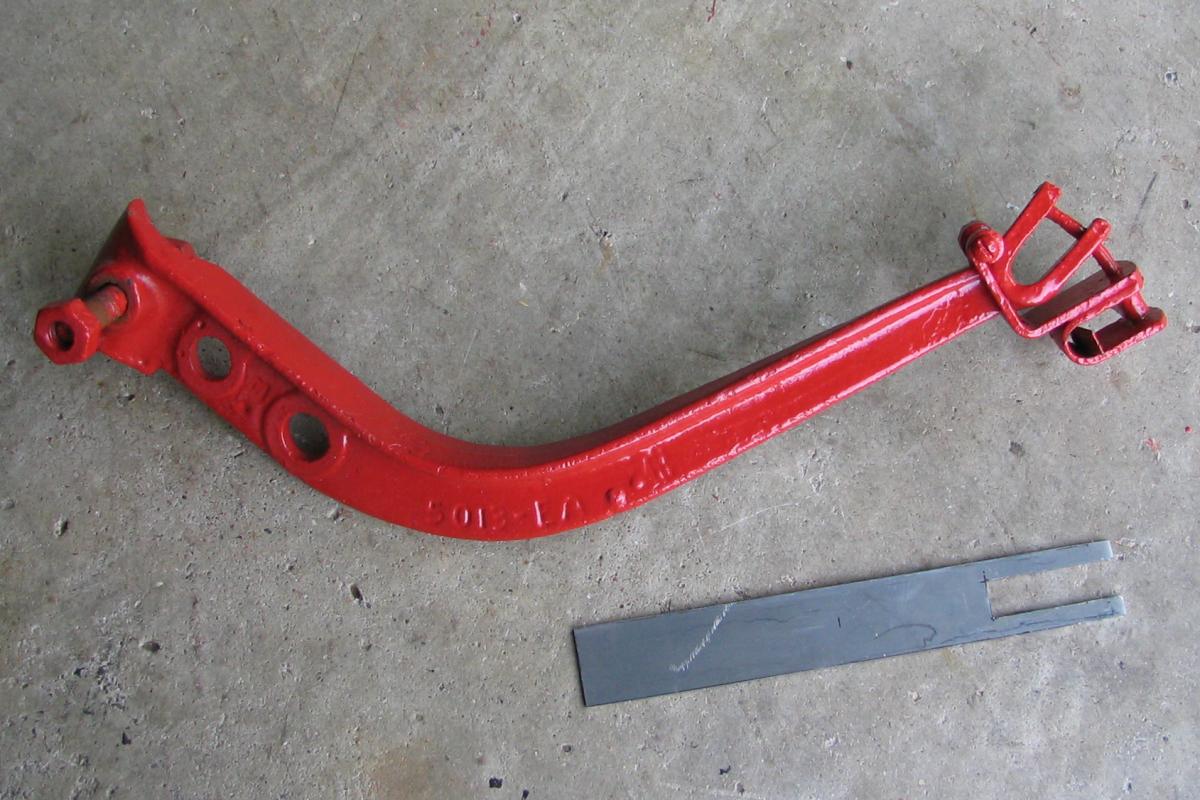
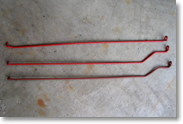 I
bought this shiny red pair of hydraulic control rods because
I needed the one with the bends in it, which controls the
valve for the remote cylinder. The straight one controls
the Lift-All pump, but I already had one of those on the
tractor and a second one that I'd bought sight unseen
because I mistakenly thought it was the other type. I
didn't want yet another straight rod, but the bent ones are
hard to come by. I
bought this shiny red pair of hydraulic control rods because
I needed the one with the bends in it, which controls the
valve for the remote cylinder. The straight one controls
the Lift-All pump, but I already had one of those on the
tractor and a second one that I'd bought sight unseen
because I mistakenly thought it was the other type. I
didn't want yet another straight rod, but the bent ones are
hard to come by.
When I had them side by side, I could see that the rods
themselves were the same length. Since I had a spare
straight rod, I cut off the little stop peg and bent the rod
to match the other one. It's not 100% identical to the
genuine rod, but it's mighty close--that's it in the
pictures, after I painted it with primer. It was fun making
what I thought was a useless extra rod into the part I
needed, and afterwards I re-sold those shiny red ones. |
 |
|
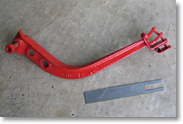
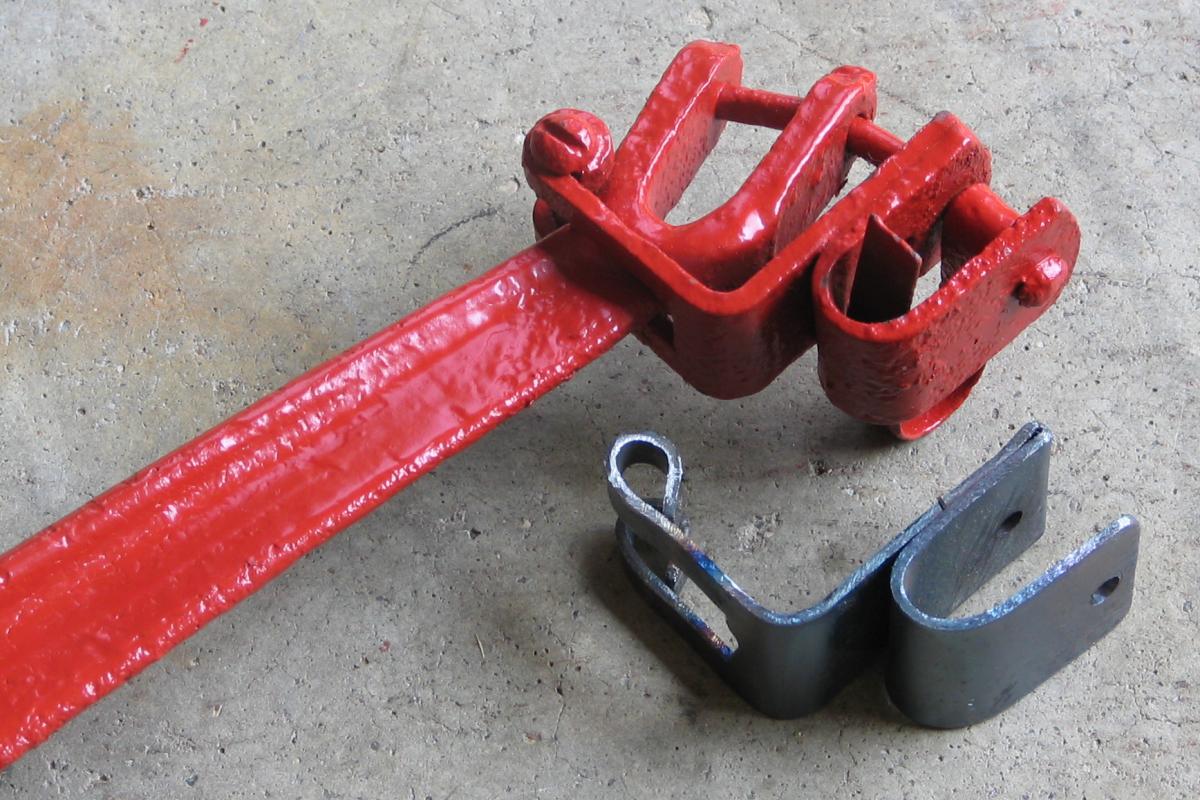
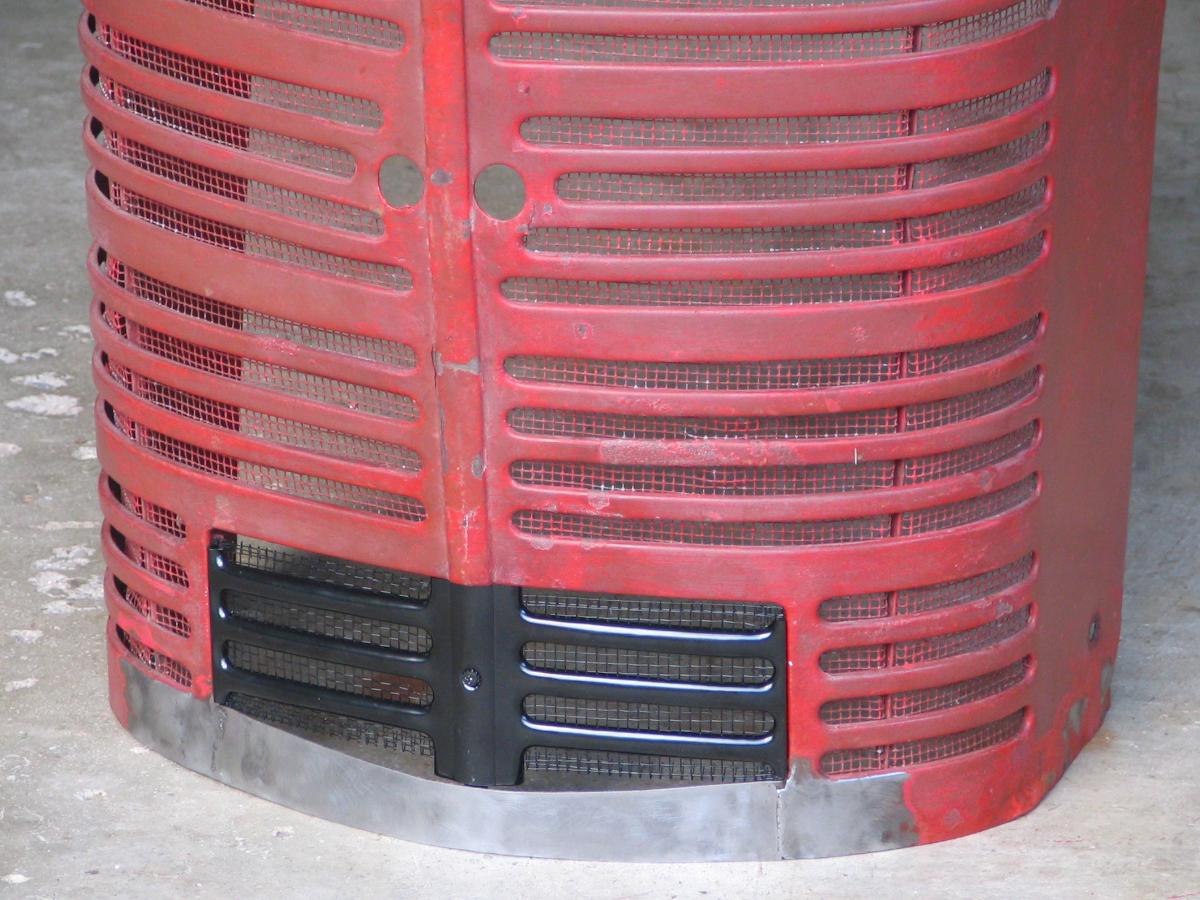
Same deal with the support bracket for the remote valve rod.
I bought this arm to get the extra little bracket that
clamps onto the end, but once I looked at it I figured I
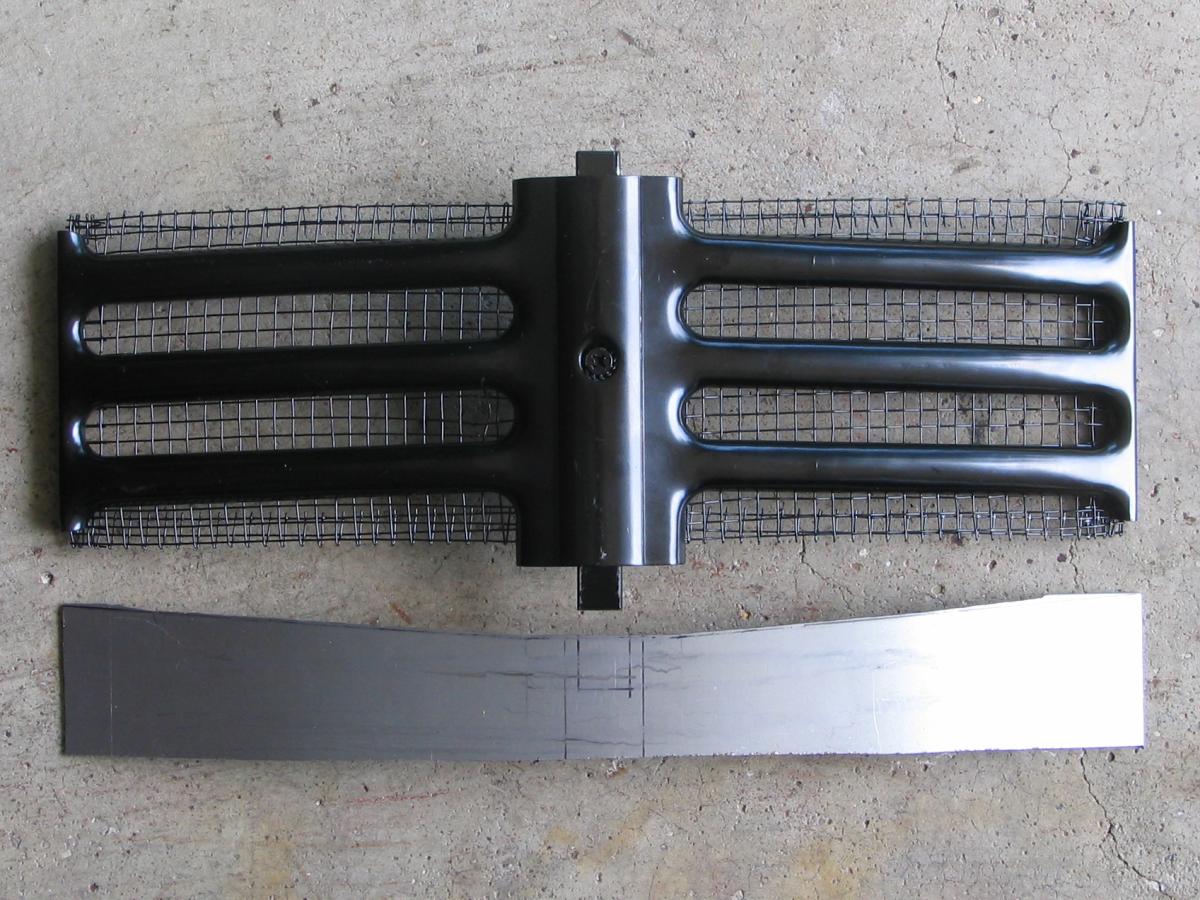
could make one to do the job well enough. I had some sheet
metal left over from working on the grille (below) and cut
it and bent it to be a reasonable approximation of the
original, put it on my tractor, then sold the other arm and
bracket. Didn't quite get all my money back, but it was
pretty close. |
 |
 |
|
| |
 |
 |
 |
 |
 |
| |
August
2006 |
June 2007 |
October
2007 |
November
2008 |
January 2009 |
|
|
| |
|
 |
 |
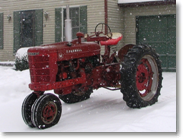
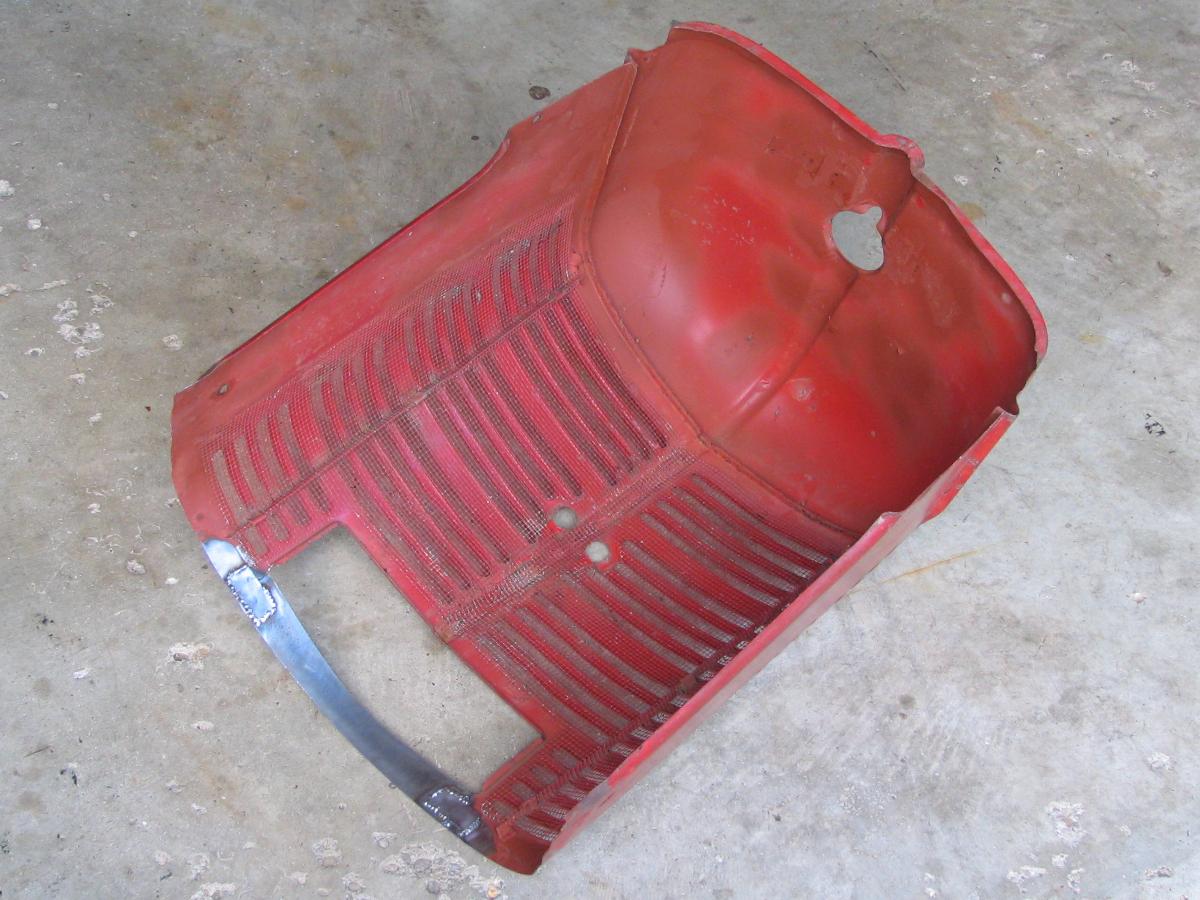
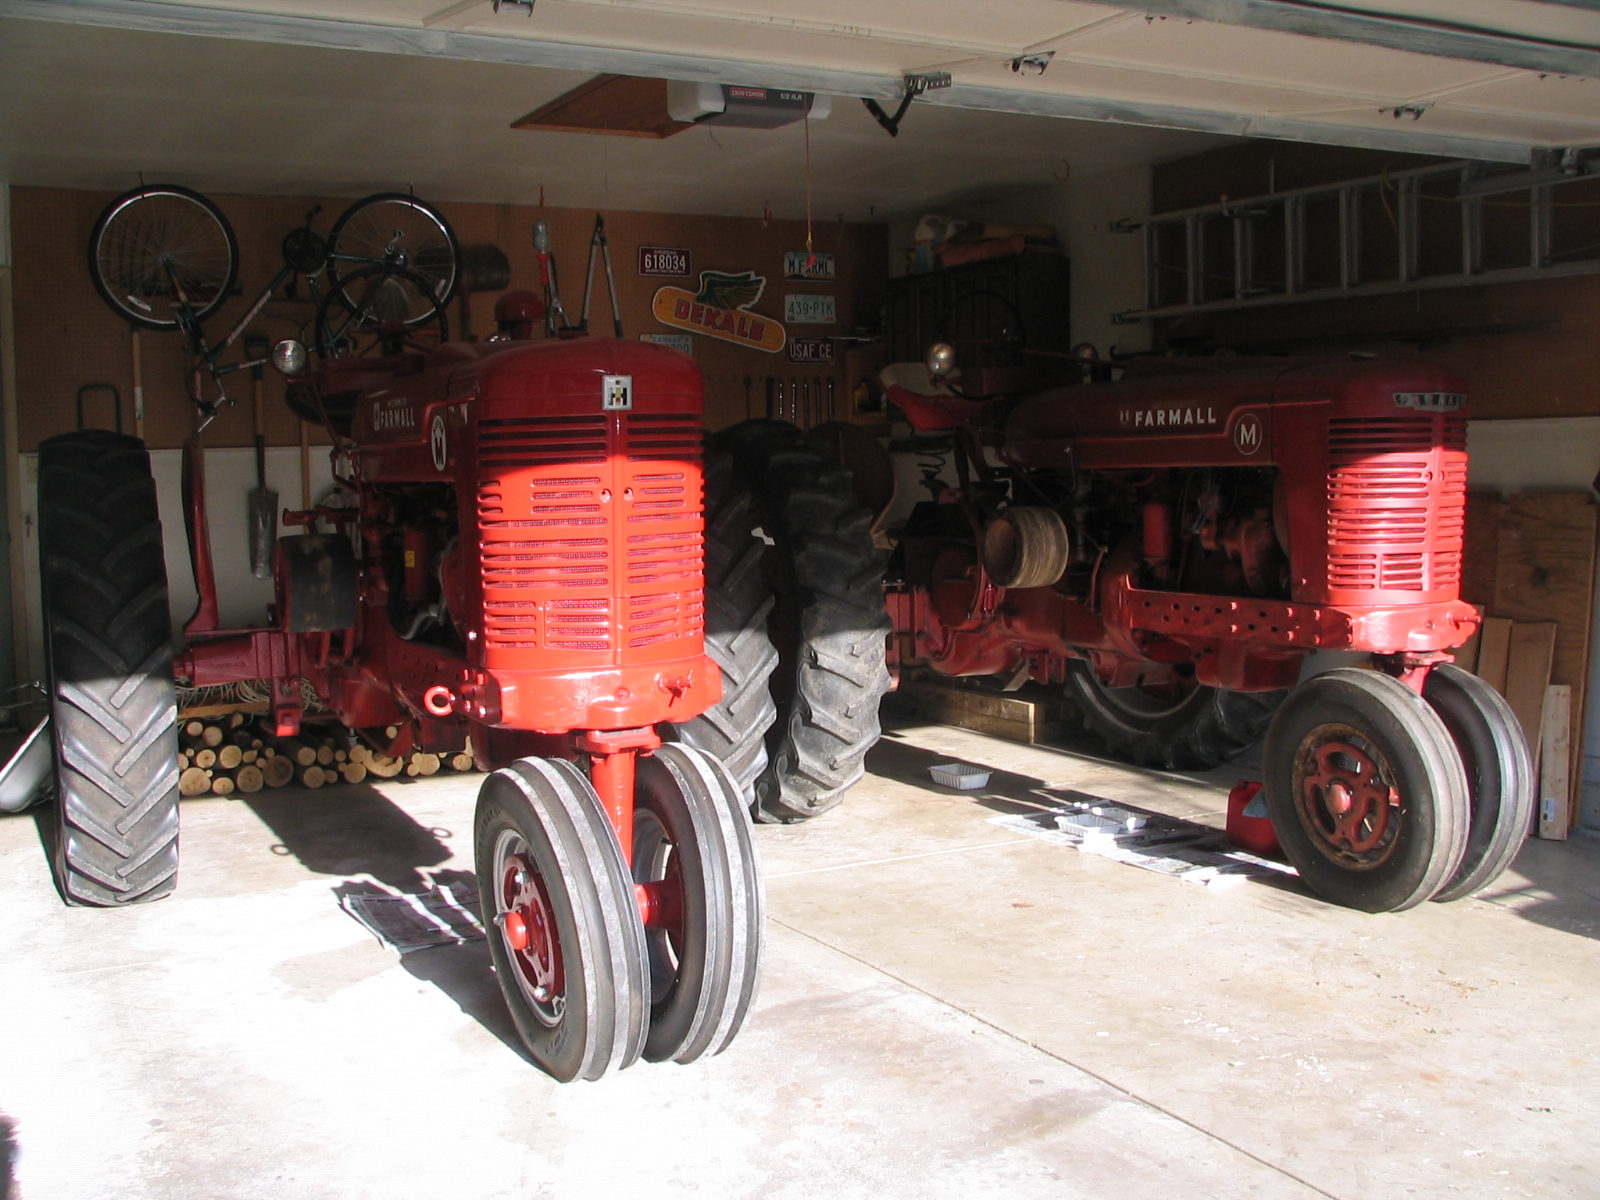
I
hadn't intended to ever sell the M, but one day I
noticed a photo ad for another tractor... a late 1953
Super M, very much like
the one I'd
owned a dozen years ago only even nicer, and as soon
as I saw the ad I knew I was done for. Just like
that one I'd had before, this new Super M has the
transitional grille, sort of halfway between the regular
M/Super M grille and the Super MTA grille. Those
grilles apparently only showed up on the very late
production Super Ms, as tooling was gearing up for the
Super MTAs. I've often wished I'd hung onto that
other Super M and had never seen another just like it in
the dozen years since I let it go... so when this one
came along I didn't lose any sleep over buying it.
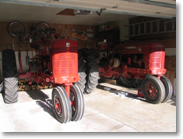
For a brief and enjoyable period of time I had two
tractors here in the suburbs, but I reluctantly sold the
M to make room in the garage and my checkbook for the
new Super M. Now this one, I
definitely plan to hang onto for the long haul. |
|
|
|


